
Welcome to our comprehensive guide on how to create a timeline using PowerPoint. Timelines are powerful visual tools that help convey information in a chronological and organized manner.
They are appealing because people find them easier to understand than complex text. Take advantage of this! Show them complex processes as a series of simpler steps on a timeline, using images and PowerPoint. Make the complex simple! This is exactly what your audience wants.
In this guide, we will walk you through the step-by-step process of creating a timeline in PowerPoint, from preparing the data to customizing the design. Get ready to captivate your audience with an engaging and informative timeline presentation!
Table of Contents
- FAQs about Using a Timeline in Presentation
- Prepare the Data to Create a Timeline in Powerpoint
- Select a Timeline Layout for your PowerPoint Slide
- Let’s Move on to Building a Timeline
- Conclusion
FAQs about Using a Timeline in Presentation
What is a Timeline?
A timeline is a way of visually representing events or tasks that occur in chronological order. It is often used to organize and visualize information that includes dates, time intervals, markers, or images.
Why Use a Timeline in a Presentation?
Timeline is a versatile presentation tool that helps the audience better understand the chronology and importance of events. It can serve as a visual aid for highlighting events both in the past, such as a company’s history, and in the future, such as stages of a prospective project.
What are the Best Timelines to Use in a Presentation Slide?
There are several types of timeline layouts – horizontal or vertical – that can be used in a presentation slide. The choice depends on the theme and objectives of the specific slide. Gantt chart is also a timeline that is used to display the duration of project stages. Any of them can be the best. Most likely, you will be able to choose the best layout for the slide after structuring the information for it and determining the number of milestones.
What Do I Need to Know to Create a Timeline Using Powerpoint?
To create a timeline in Powerpoint, you will need to know how to create shapes, insert images, and use colors to display data. While Powerpoint provides a set of functions for creating timelines, knowing the basic principles of design and composition will help make your timeline more readable and understandable. Additionally, it is useful to know how to evenly arrange timeline elements on the slide. To do this, you will need skills in aligning horizontally and vertically, resizing, and positioning elements using Powerpoint.
How to Start Creating a Timeline?
Start by structuring the information based on which you will create the timeline.
- Understand the Purpose of Your Timeline
To create an effective timeline in PowerPoint, it’s important to first understand the purpose behind it. Consider why you need a timeline and what information you want to convey to your audience. Are you showcasing a project’s milestones, historical events, or a chronological sequence? Clearly defining the purpose will guide you in structuring and designing your timeline effectively. - Determine the Timeline’s Start and End Points
Identify the specific start and end points of your timeline. This could be a range of dates, a series of events, or any other relevant time frame. Knowing the start and end points will help you establish the timeline’s length and scale. It’s crucial to accurately represent the time span to provide a clear visual representation for your audience. - Choose a Suitable Horizontal Timeline Layout
PowerPoint offers various built-in timeline templates and layouts to choose from. Select a timeline layout that aligns with your content and complements the overall design of your presentation. Consider factors such as the number of events, space availability, and the level of detail you wish to include. Experiment with different layouts to find the one that best fits your needs. - Remove everything unnecessary
Shorten the descriptions to the necessary minimum. The words you leave on the slide should imprint in the minds and memories of your audience! All other words you will say yourself. - Find or create graphic images that will accompany your presentation.
Now that all the introductory words have been said, let’s start to create a timeline using Powerpoint.
Prepare the Data to Create a Timeline in Powerpoint
Firstly, since we have determined that a timeline is a chronological sequence of events, the milestones on your slide should contain brief textual information about these events:
- a title or event name,
- a timestamp or time of occurrence,
- and perhaps a brief description of the event. If a description is needed, it should contain only a few of the most important words. All other words should be spoken by the presenter, that is, you.
In addition to textual information, you will need images or icons for your milestones to make them clear and memorable. If you don’t already have these, you can find them on PoweredTemplate, Microsoft Store, or Pixabay.
Secondly, you need to determine the number of events that will make up your timeline. The best way to do this is to make a list of them.
In one of our previous posts, we wrote about How to Create a Comprehensive Project Plan. We will take a list of stages from it, which make up the creation of a project plan. It will serve as the basis for creating a timeline using Powerpoint tools. So, here is a table view of a list of six headings, arbitrary dates, and a brief description of the milestones:
| Title | Date | Description |
|---|---|---|
| Outline the Business Case | February 6 | Why the project is needed |
| Meet with Key Stakeholders | February 7 | Discuss the project’s goals |
| Define Project Scope | February 8 | Describe the work |
| Assemble a Project Team | February 9 | Find skilled professionals |
| Determine a Project Budget | February 10 | Be sure to include the costs |
| Set Project Goals & Objectives | February 13 | Ensure that the goals are clear |
These are your data. Let’s open Powerpoint and place them on a slide.
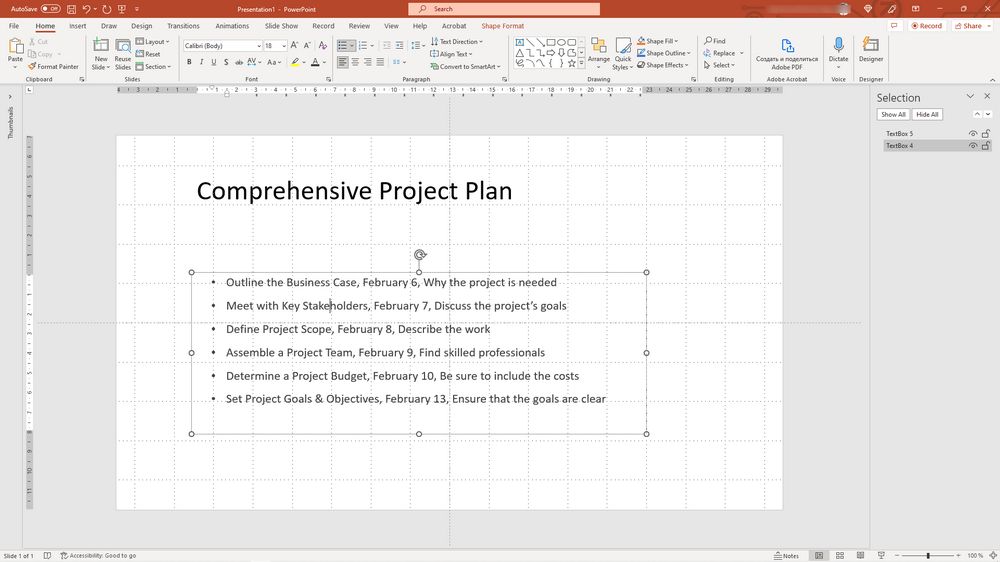
Most likely, this is not what you were expecting to see. This happened because we haven’t selected a layout for your slide yet.
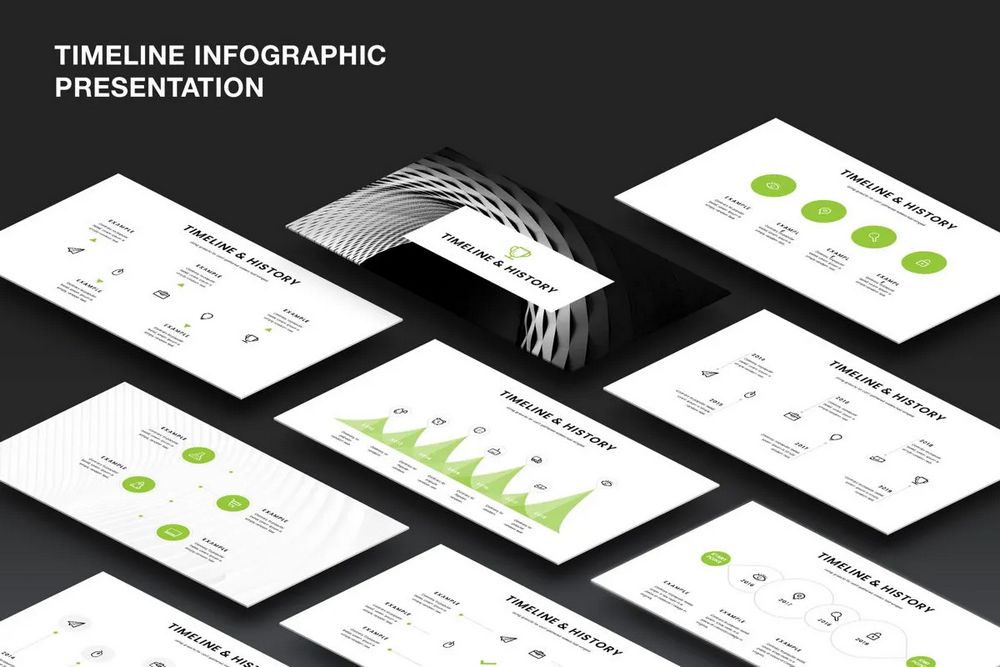
In the PoweredTemplate Library, you’ll Find Dozens of the Best Eye-catching
Powerpoint or Google Slides Timeline Slides
-
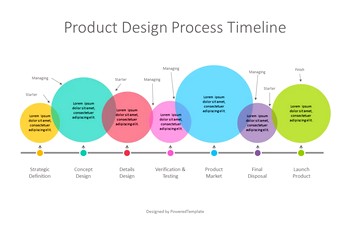 Product Design Process Timeline is a free presentation infographic template with a horizontal timeline example with 7 milestones
 -
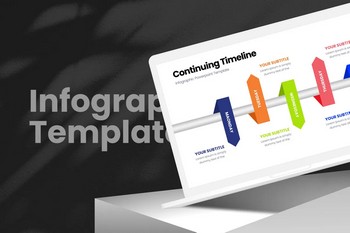 Continuing Timeline – Infographic Presentation Template is an asset to help you make the business illustration in the media presentation easier.
 -
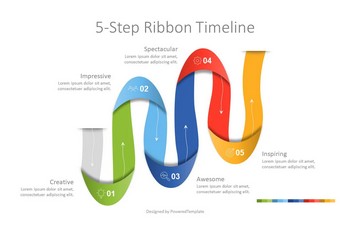 5-Step Zigzag Ribbon Timeline is an illustrative infographics with wriggling colored ribbon which creates 5 stages, parts, phases, steps, stages, options, or milestones of a process or timeline.
You’ll save hours of development time with easy-to-configure features and enjoy the benefits of unlimited downloads with your unlimited subscription.
Select a Timeline Layout for your PowerPoint Slide
When it comes to creating timelines in PowerPoint, you have the opportunity to unleash your creativity and choose from different design options. In this section, we’ll explore the characteristics and applications of three timeline design layouts: horizontal, vertical, and free-flowing.
- Horizontal Timeline Design.
The horizontal timeline design offers a straightforward and intuitive representation of events or milestones. It presents information along a horizontal axis, allowing the audience to follow the progression from left to right. This layout is ideal for illustrating a sequence of events in chronological order. Whether you’re showcasing historical timelines, project timelines, or the evolution of a concept, the horizontal design provides a clear and organized visual representation.
- Vertical Timeline Design.
If you prefer a design that emphasizes a vertical progression, the vertical timeline layout is a great choice. With this design, events or milestones are presented from top to bottom. This vertical arrangement is particularly effective when you want to highlight a hierarchical structure or show the growth and development of a project or idea over time. The vertical timeline design enables a clear representation of the timeline’s structure and allows the audience to easily grasp the passage of time.
- Free Flowing Timeline Design.
For those looking to add a touch of creativity and flexibility to their timelines, the free-flowing timeline design is an exciting option. This design breaks away from the linear constraints of horizontal and vertical layouts and allows for a more dynamic and visually captivating representation. You can arrange events or milestones in any direction, connect them with shapes and connectors, and create a visually engaging narrative. The free-flowing design is perfect for showcasing interconnected events, multiple storylines, or highlighting relationships between different elements.
When deciding on a timeline design, consider the nature of your content, the story you want to tell, and the overall visual impact you wish to achieve. Each design offers its own strengths and applications, so choose the one that best aligns with your presentation objectives.
When working with a screen that has a 16:9 aspect ratio,
- horizontal timelines with 6-8 events can fit perfectly within the available space.
But this layout provides limited space for accompanying text.
In a horizontal timeline, the text can be positioned either above or below the timeline axis. - vertical timelines with 3-4 events are well-suited and can be placed perfectly within the available space. The vertical orientation allows for a clear and concise representation of the timeline’s events, and the space to the right of the axis provides an excellent opportunity to include additional details and information.
- the free-flowing layout offers a visually engaging effect by snaking around the page, making it an excellent choice for timelines with a high number of events. This layout allows for the inclusion of more events compared to a horizontal layout, providing a comprehensive overview of the timeline’s progression. However, it’s important to note that executing a free-flowing layout can be more challenging compared to other timeline layouts.
Now that we have explored the characteristics of horizontal, vertical, and free-flowing timeline designs, let’s move on to the next section. There, using a horizontal layout, we will depict the timeline we started talking about above.
Let’s Move on to Building a Timeline
There are two ways to create a timeline using PowerPoint: the easy way and the slightly more complex way. The first, which is simpler, involves using the standard PowerPoint SmartArt. But since we’re not looking for easy standard solutions, let’s go with the second method. We will create the timeline ourselves from scratch.
So, we will draw a horizontal timeline. Let’s start with an axis that will show the direction of time:
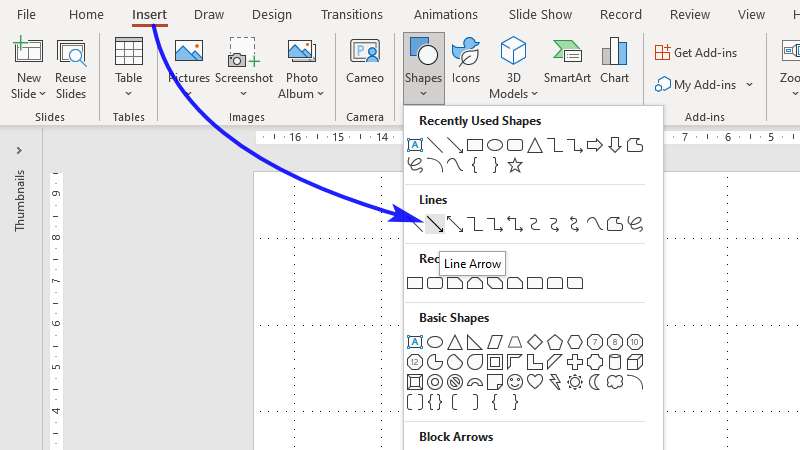
- In the Insert tab, navigate to Shapes, then insert a new Line Arrow.
- Hold Shift to lock the line horizontally and drag your arrow across the slide from right to left.
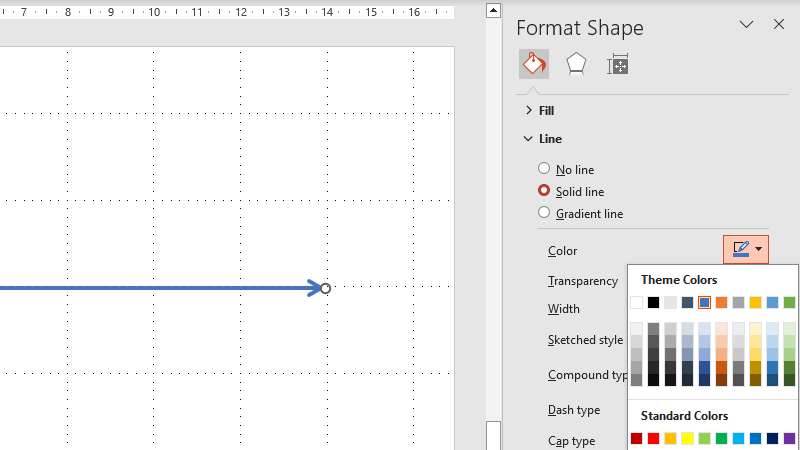
- Go to the Format Shape window (Right Click > Format Shape) and customize the arrow: change the color, line weight, or whatever you want.
Now is the time to start adding events. We have prepared the data in advance and now we need a calculator and a little patience to evenly place events on the timeline.
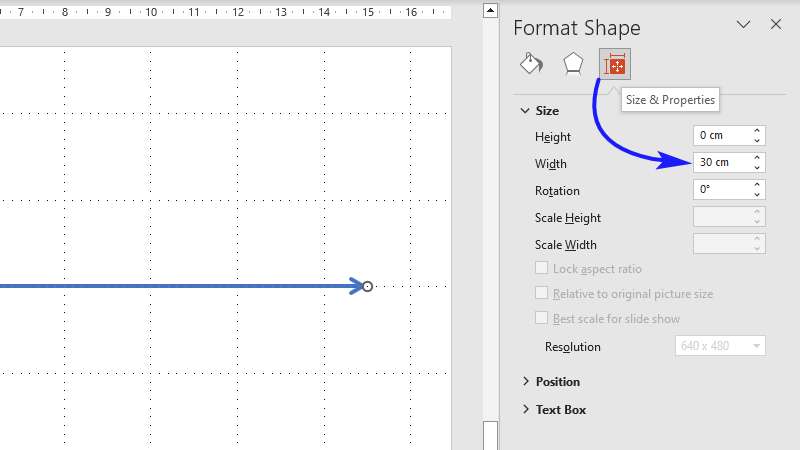
First, measure the timeline. Select a row and click the Format Shape tab. The Size&Properties section will list the width – our line is 30 cm wide. This means that each event can take up 5 cm in the timeline, along with a small gap to the right.
Launch the PowerPoint software on your computer and create a new presentation or open an existing one. Then click on the “New Slide” button in the PowerPoint toolbar to add a new slide to your presentation.
Now we can choose the shape of milestones and place them on the timeline. Let’s go with a rectangle, although it’s no better than any other shape. Then, go back to the “Format Shape” tab again to input the width of the rectangle, let it be 4.5 cm. The remaining 0.5 cm will serve as the gap between neighboring rectangles.
To continue follow the next steps:
- Drag this shape over your slide so the left edge butts up against the start of your timeline
- Copy & Paste the rectangle so you have a total of six.
- Place one of these so the right edge butts up against the end of the timeline.
- Select all six and click Align Objects Middle, then Distribute Horizontally.
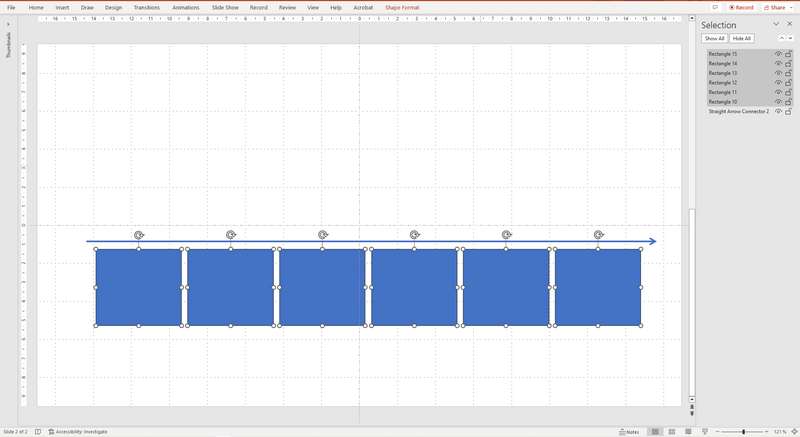
All 6 event containers should now be perfectly aligned and distributed on your slide.
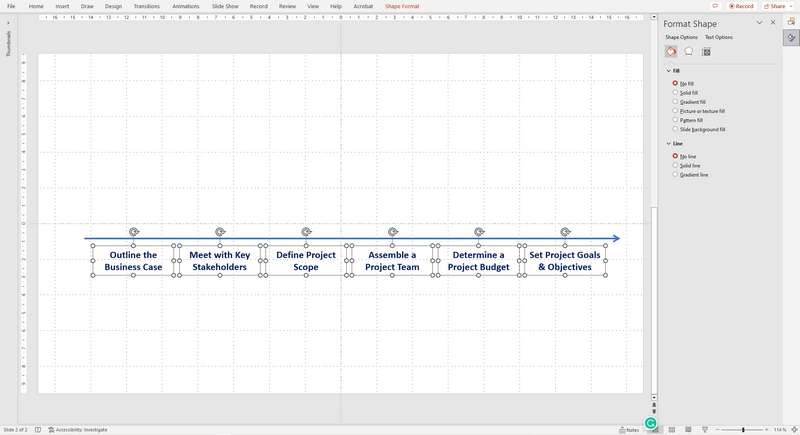
Type the titles you prepared into each box, then change the shape fill to No Fill in the Format Shape tab. In the Size & Properties section, you can also tick Resize Shape to Fit Text, trimming down the boxes to size.
Next, select all your boxes, hold Ctrl+Shift, and drag them vertically down to duplicate all 6. Repeat this, but now drag the boxes vertically up. Write descriptions of your milestones in the lower ones, and place time markers in the upper ones. Don’t forget to reduce the font size a bit so the titles pop. As a result, you should get something like this.

Good plan, but something is missing, right? Plan events don’t look tied to the timeline, that’s the point! Let’s fix this and add some visual anchors to the timeline to make the slide look more attractive. Six small circles will be just right – one circle per timeline event!
- Insert a new Circle (Insert > Shapes > Circle) and drag to resize (holding Shift while dragging to draw a perfectly round circle).
- Select the circle, and holding Ctrl, drag the shape anywhere on the slide to make a six duplicate.
- Repeat until you have one circle per timeline event.
- Align one circle on the timeline above your first event and another at the end one.
- Select all of the circles and use the Distribute Horizontally tool, followed by Align Objects Middle.
- Go back into the Format Shape tab.
- Match the Fill Colour to the slide background and add an outline that matches the timeline to look the anchors and the timeline seamless.

Well, there you go, that’s much better!
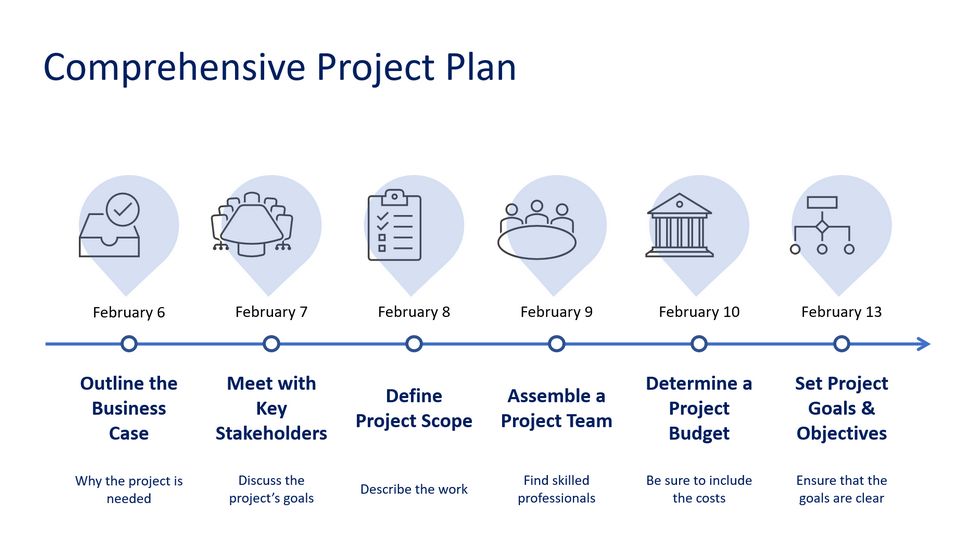
Next is really simple! We just repeated the sequence we discussed here twice: insert shape, align horizontally, and center. First, we did it with the teardrop shape, and then with the icons. As a result, we got this:
Conclusion
In conclusion, creating a timeline using PowerPoint can be a powerful way to visually represent chronological information and engage your audience. By following the steps outlined in this guide, you can effectively build a timeline that showcases events, milestones, or historical sequences in a clear and organized manner.
Remember, PowerPoint offers a range of tools and features to help you create visually captivating timelines. Experiment with different layouts, colors, fonts, and shapes to achieve the desired effect to suit your presentation needs and audience preferences.
So go ahead, start to create your timeline using PowerPoint, and unlock the potential to captivate and inform your audience with a visually stunning and engaging presentation.