

In PowerPoint, image placeholders are useful tools for adding and arranging images within your slides. While PowerPoint provides ready-made image placeholders, you can also create custom image placeholders using PowerPoint’s built-in features. This allows you to design unique layouts and enhance the visual impact of your presentations. This guide will walk you through the process of creating a custom image placeholder in PowerPoint.
PowerPoint, among its other merits, is great because it takes care of all the monotonous work of formatting multiple slides in your presentation. It comes with a built-in Master Slide and a set of Slide Layouts. You can modify any layout from this set if desired. Your creative work remains, and one of its elements is giving the custom image placeholder the shape you want. The thing is, by default, they all have a rectangular shape. Change that, and the images on your slides will acquire a unique style!
There are two ways to create a custom image placeholder using PowerPoint, but regardless of which one you choose, you will need to start with the PowerPoint Slide Master to add a layout slide.
Table of Contents
- How to Add a Layout Slide in PowerPoint
- How to Add an Image Placeholder in PowerPoint
- How to Combine the Properties of a Custom Shape and an Image Placeholder?
- How to Create an Custom Image Placeholder Using PowerPoint Ready-made Shapes
- Conclusion
How to Add a Layout Slide in PowerPoint
Layout slides, unlike the Slide Master, allow you to customize the design and layout of a slide based on the type of information and content you will be presenting. We have discussed this before, but we didn’t touch upon image placeholders at that time. Well, let’s do it now, shall we?
So, following our instructions, you have entered the Slide Master, and now on your screen, you see layout slides on the left side. These are smaller-sized slides located beneath the Slide Master. Each layout slide has its own design and purpose, such as displaying a title or a large image. Any changes made to a layout slide will not affect other slides.
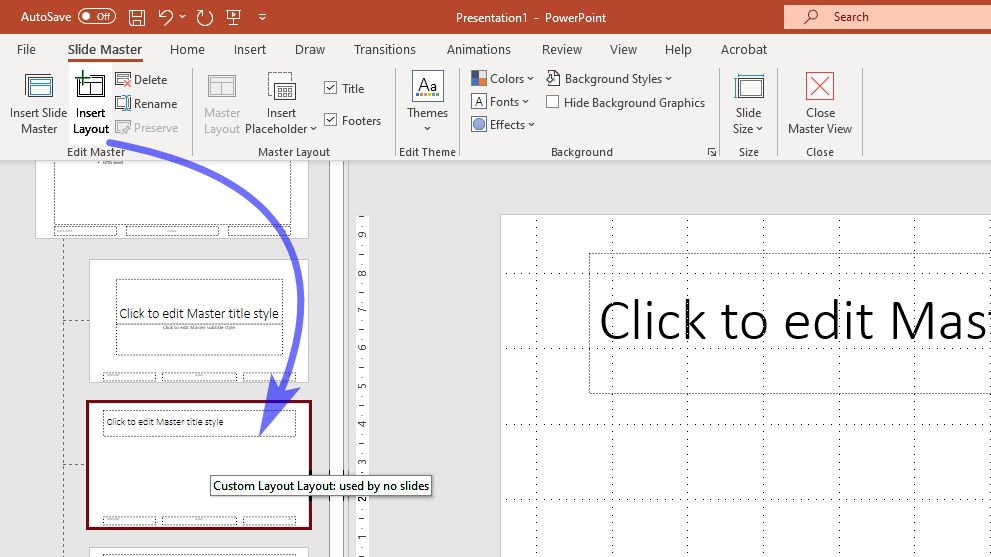
Click “Insert Layout” in the “Edit Master” group to insert a layout slide after the current one. Remove the Master title style placeholder if it’s obstructing your view. We are using this layout to demonstrate how to add an image placeholder in PowerPoint.
How to Add an Image Placeholder in PowerPoint
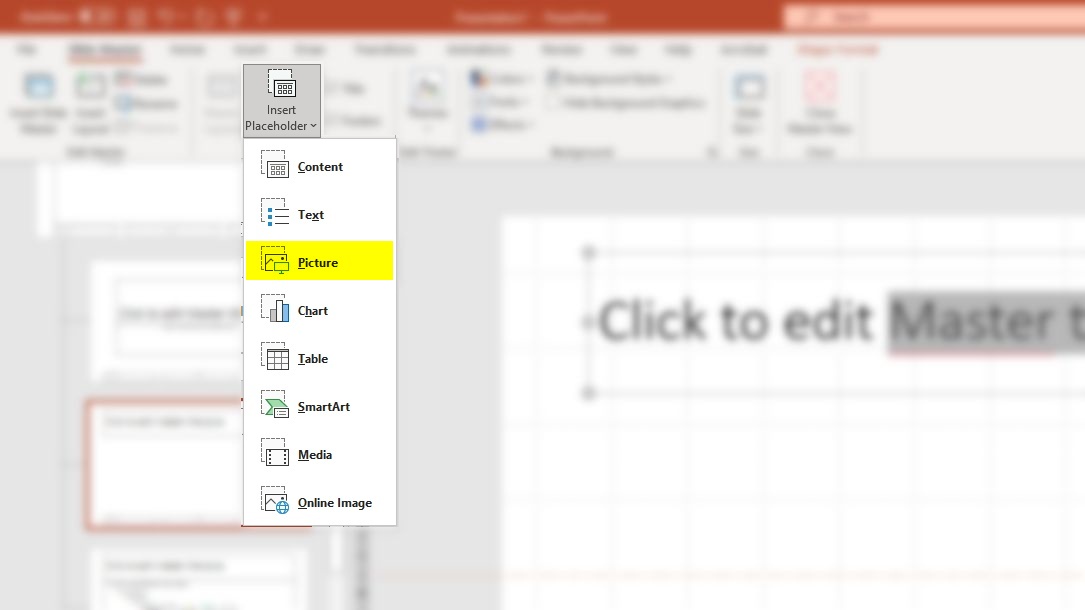
Now locate the Master Layout group and choose Insert Placeholder. The drop-down menu with the list of their available types will appear. Click Picture to insert the image placeholder.
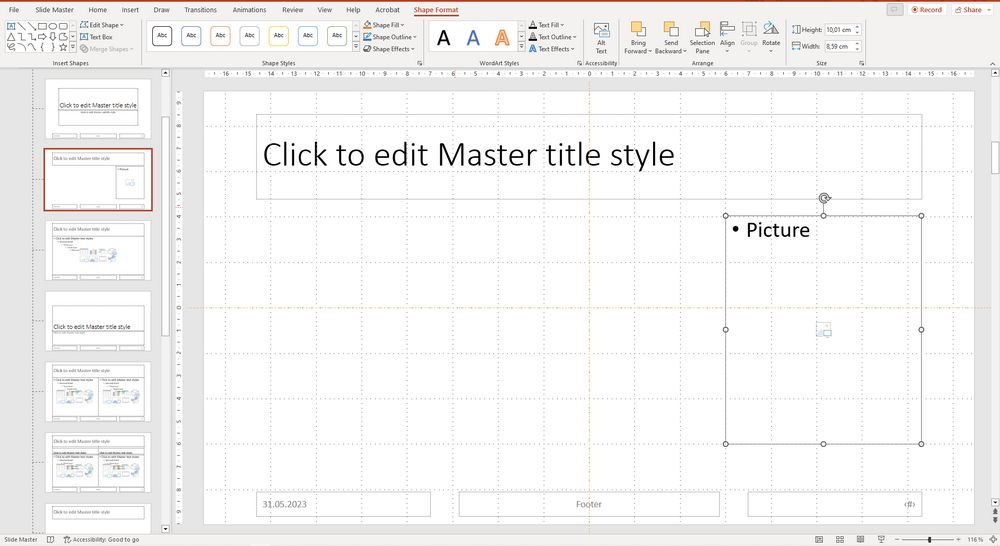
Now click the left mouse button and draw a rectangular shape where you planned to place the images. Done!
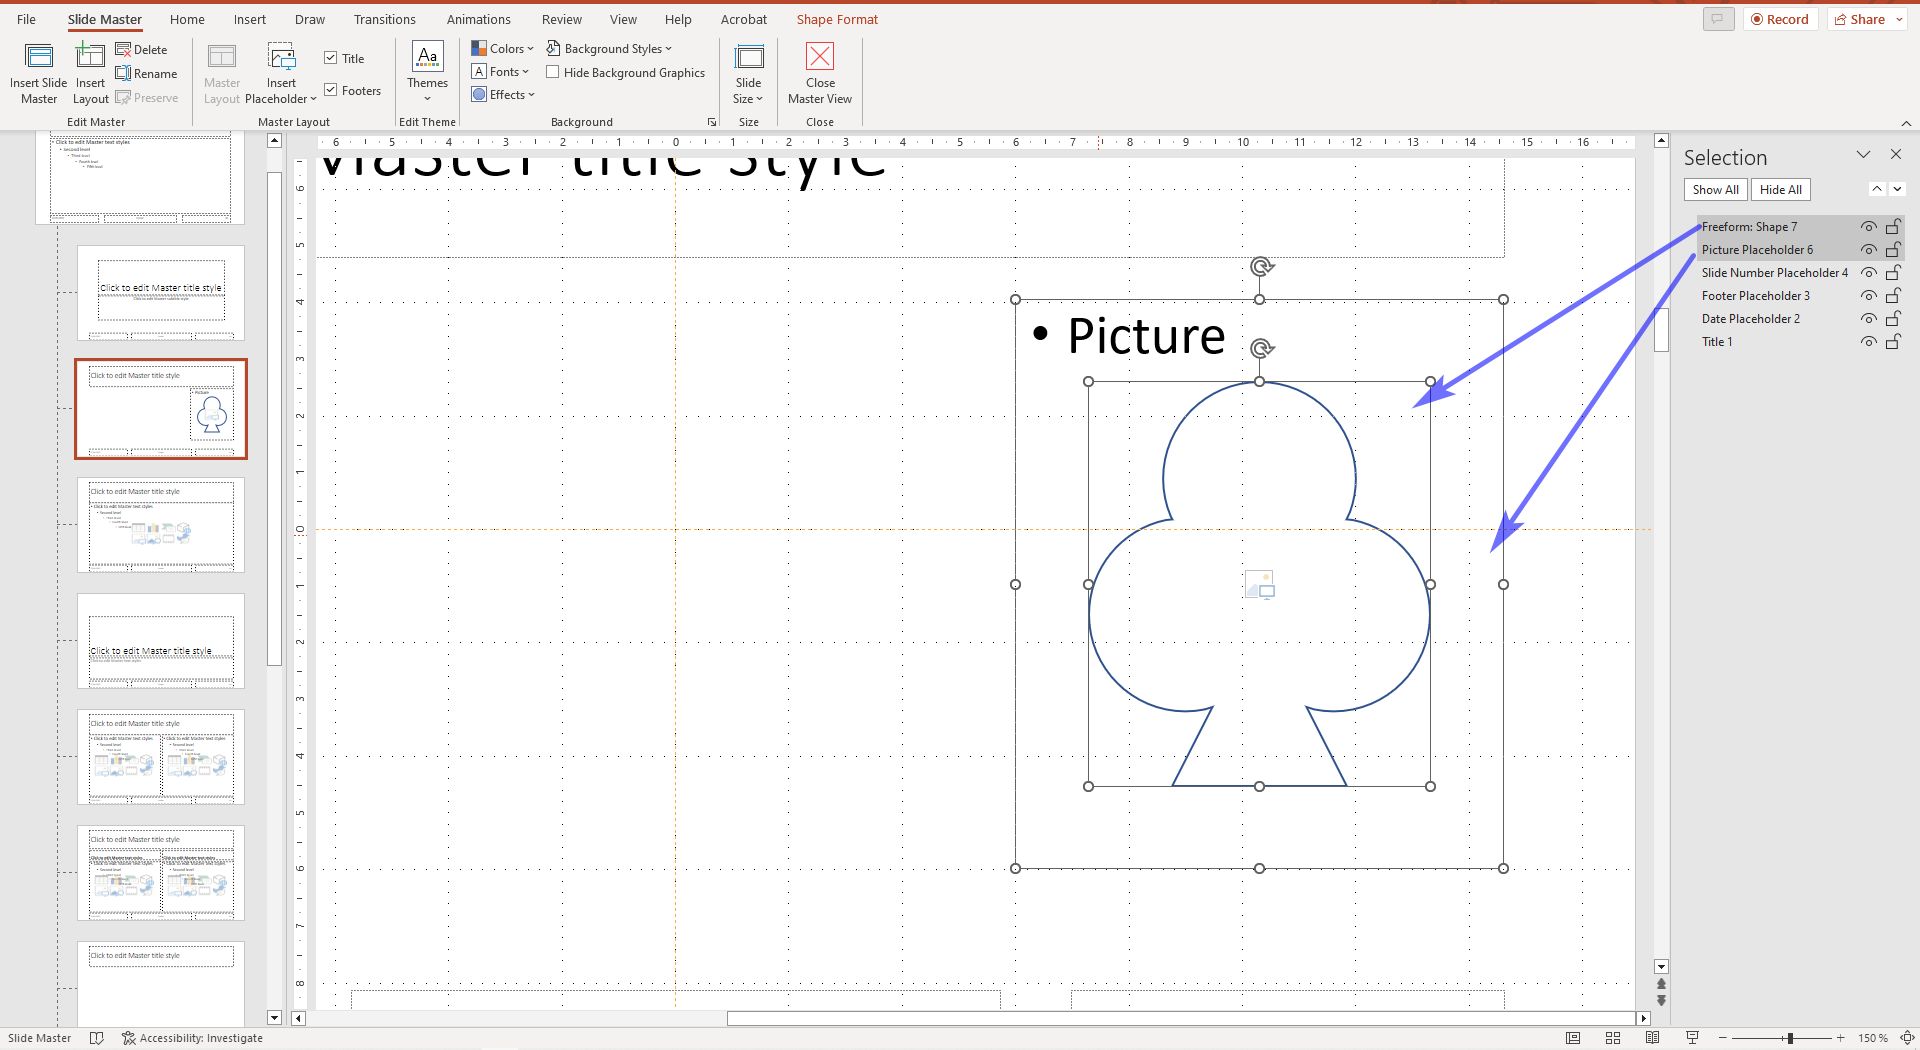
At this point in our narrative, the most interesting moment arrives! Have you ever asked yourself the question, “What is an image placeholder?” To find the answer, locate the Selection Pane button in the Arrange group and click it to open the Selection Pane panel.
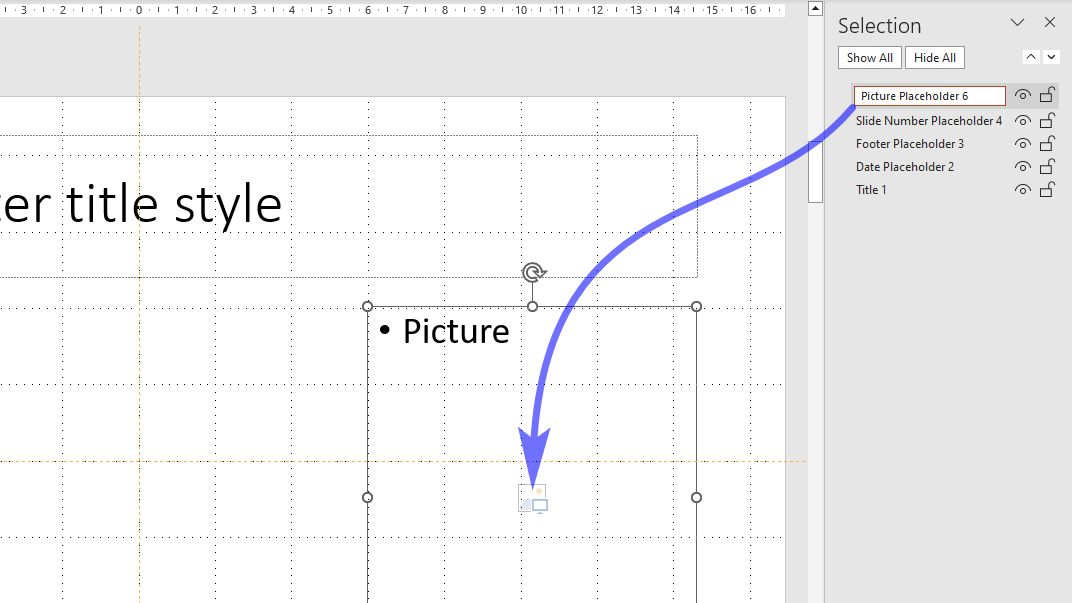
Wow! It turns out an Image placeholder is a shape! It’s almost the same as any other shape created in PowerPoint! The only difference is that small icon in its center. It indicates that this shape is an Image placeholder! This is fantastic! It’s exactly what we need to create a custom image placeholder using PowerPoint. Now, the only question remains: how do we do it?
Here we are at the crossroads of the yellow brick road! Remember, at the beginning of the article, we mentioned that you can create a custom image placeholder using PowerPoint in two ways? So, here they are:
- The first way is that you will have to manually create a shape that you will then use as a custom image placeholder.
- The second way is easier. Instead of creating your own shape, you will select a ready-made one that PowerPoint offers you.
Since we don’t know which method you prefer more, we will take you both ways.
How to Combine the Properties of a Custom Shape and an Image Placeholder?
By combining the properties of a custom shape and an image placeholder, you can create a unique and customized placeholder that suits your specific needs in PowerPoint.
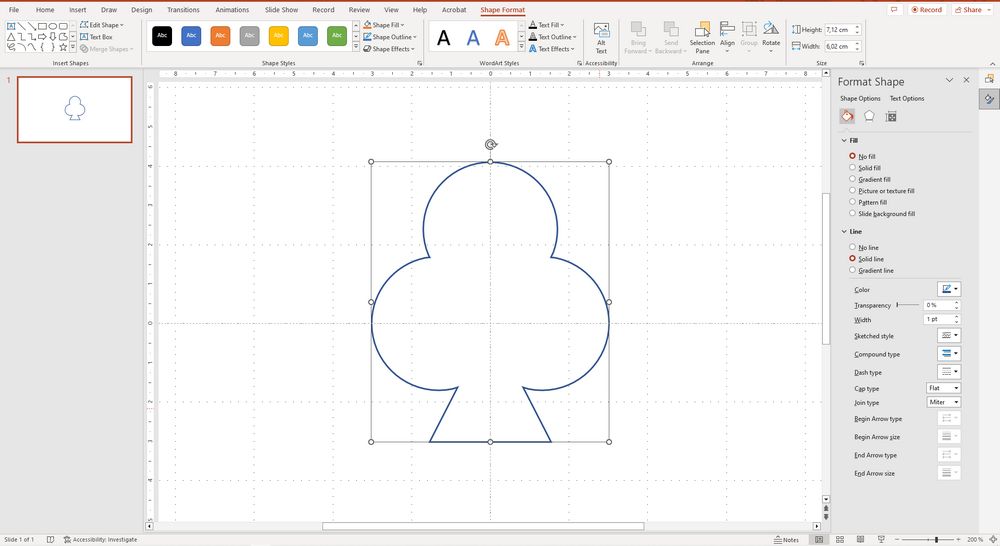
To confirm this statement, we created a simple custom shape that consists of three identical circles and one triangle. It resembles a tree. Or maybe an ice cream cone. Then we copied it to the clipboard.
Now let’s get back to the image placeholder and the Selection Pane.
Press Ctrl-V to paste the “ice cream cone” and then drag it onto the image placeholder, aligning and resizing it as desired. Are you ready?
Now, on the Selection Pane, click on the placeholder, then while holding Ctrl, click on the “ice cream cone”. Be careful with the order, as it is important. Next, find and click on the Shape Format tab, then go to Merge Shapes -> Intersect.
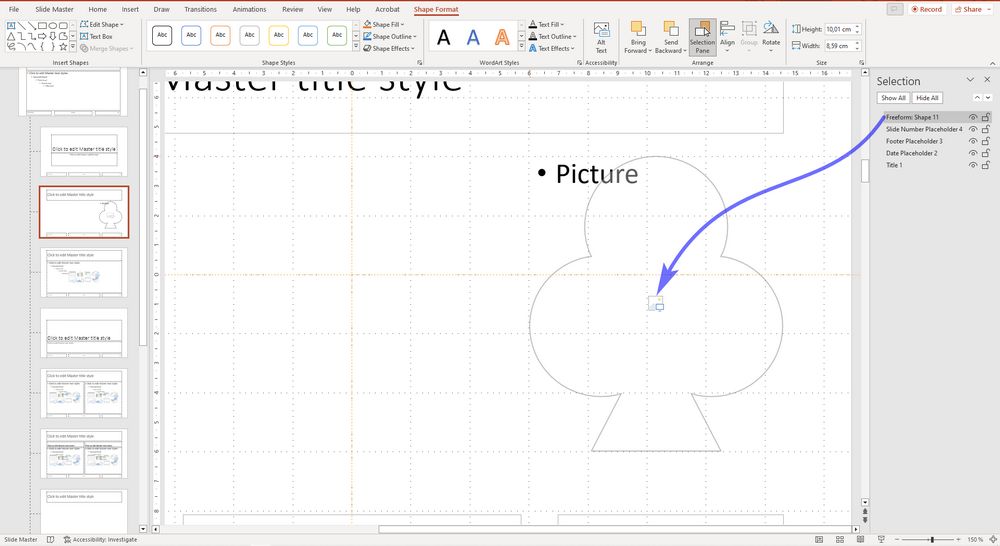
And now, take a look at the result: the slide layout now features the shape of an “ice cream cone” that has taken on the properties of an image placeholder!
Your custom image placeholder is ready to use! To confirm this, try the following: switch back to Normal View, open a new slide, select Custom Layout, and then click placeholder icon… Well, you know what to do next, right?
How to Create an Custom Image Placeholder Using PowerPoint Ready-made Shapes
The second method is much simpler than the first one, as it involves using ready-made PowerPoint shapes instead of creating new ones. Just a reminder, you have just created an image placeholder in the Layout Slide.
Now, to create a custom image placeholder using the second method, follow these steps:
- Click to select the picture placeholder that you created.
- Locate and click the Shape Format tab.
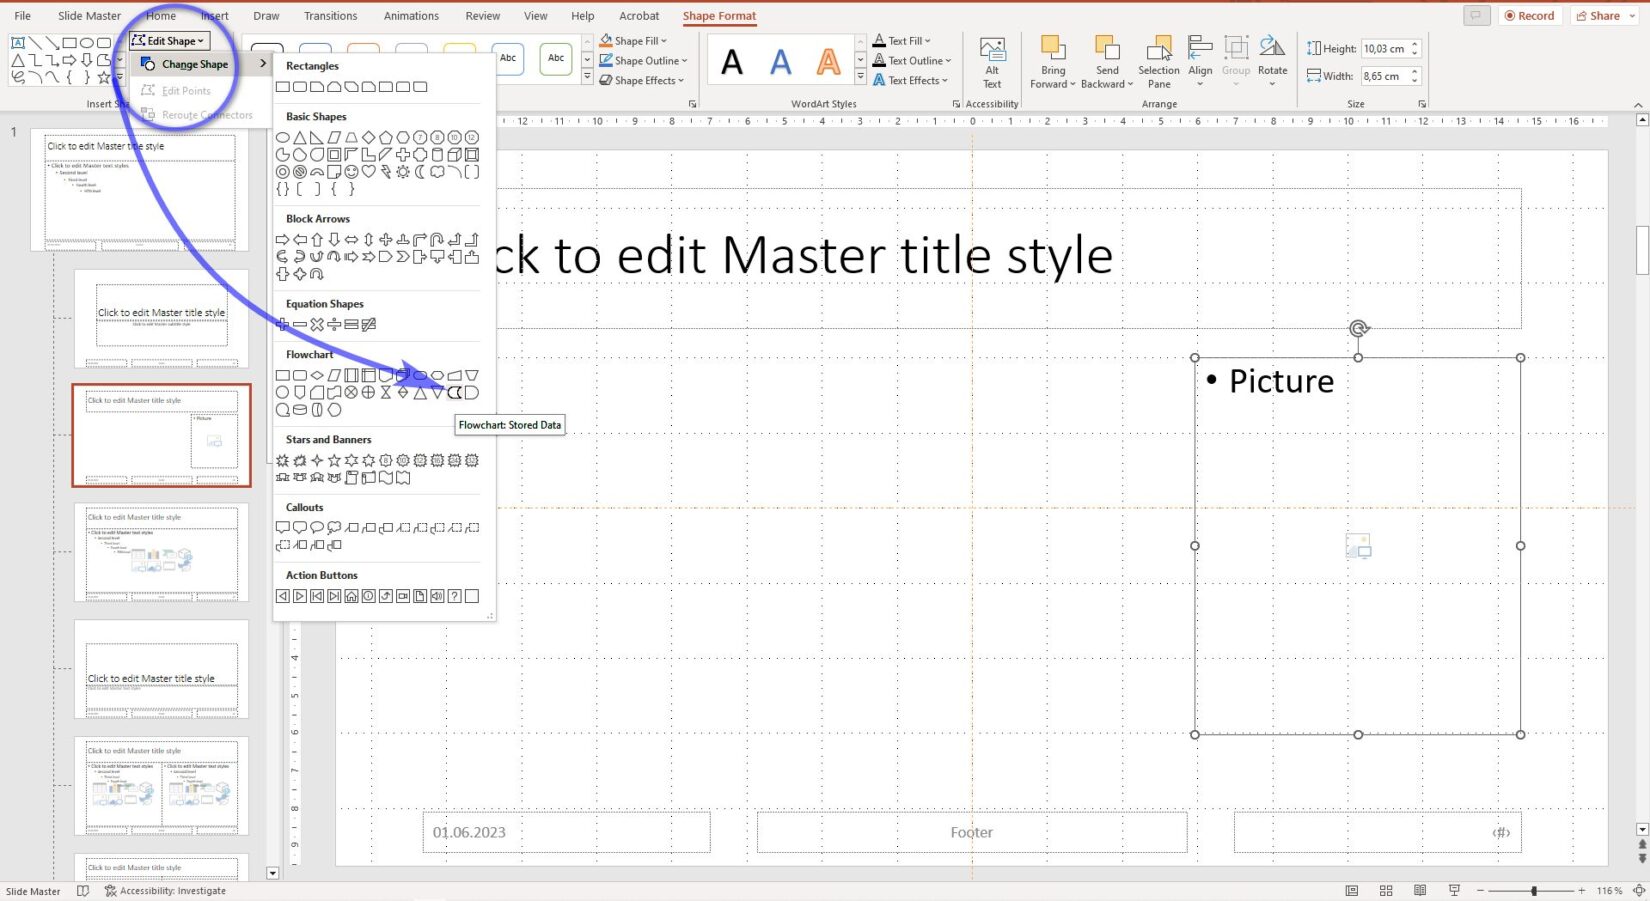
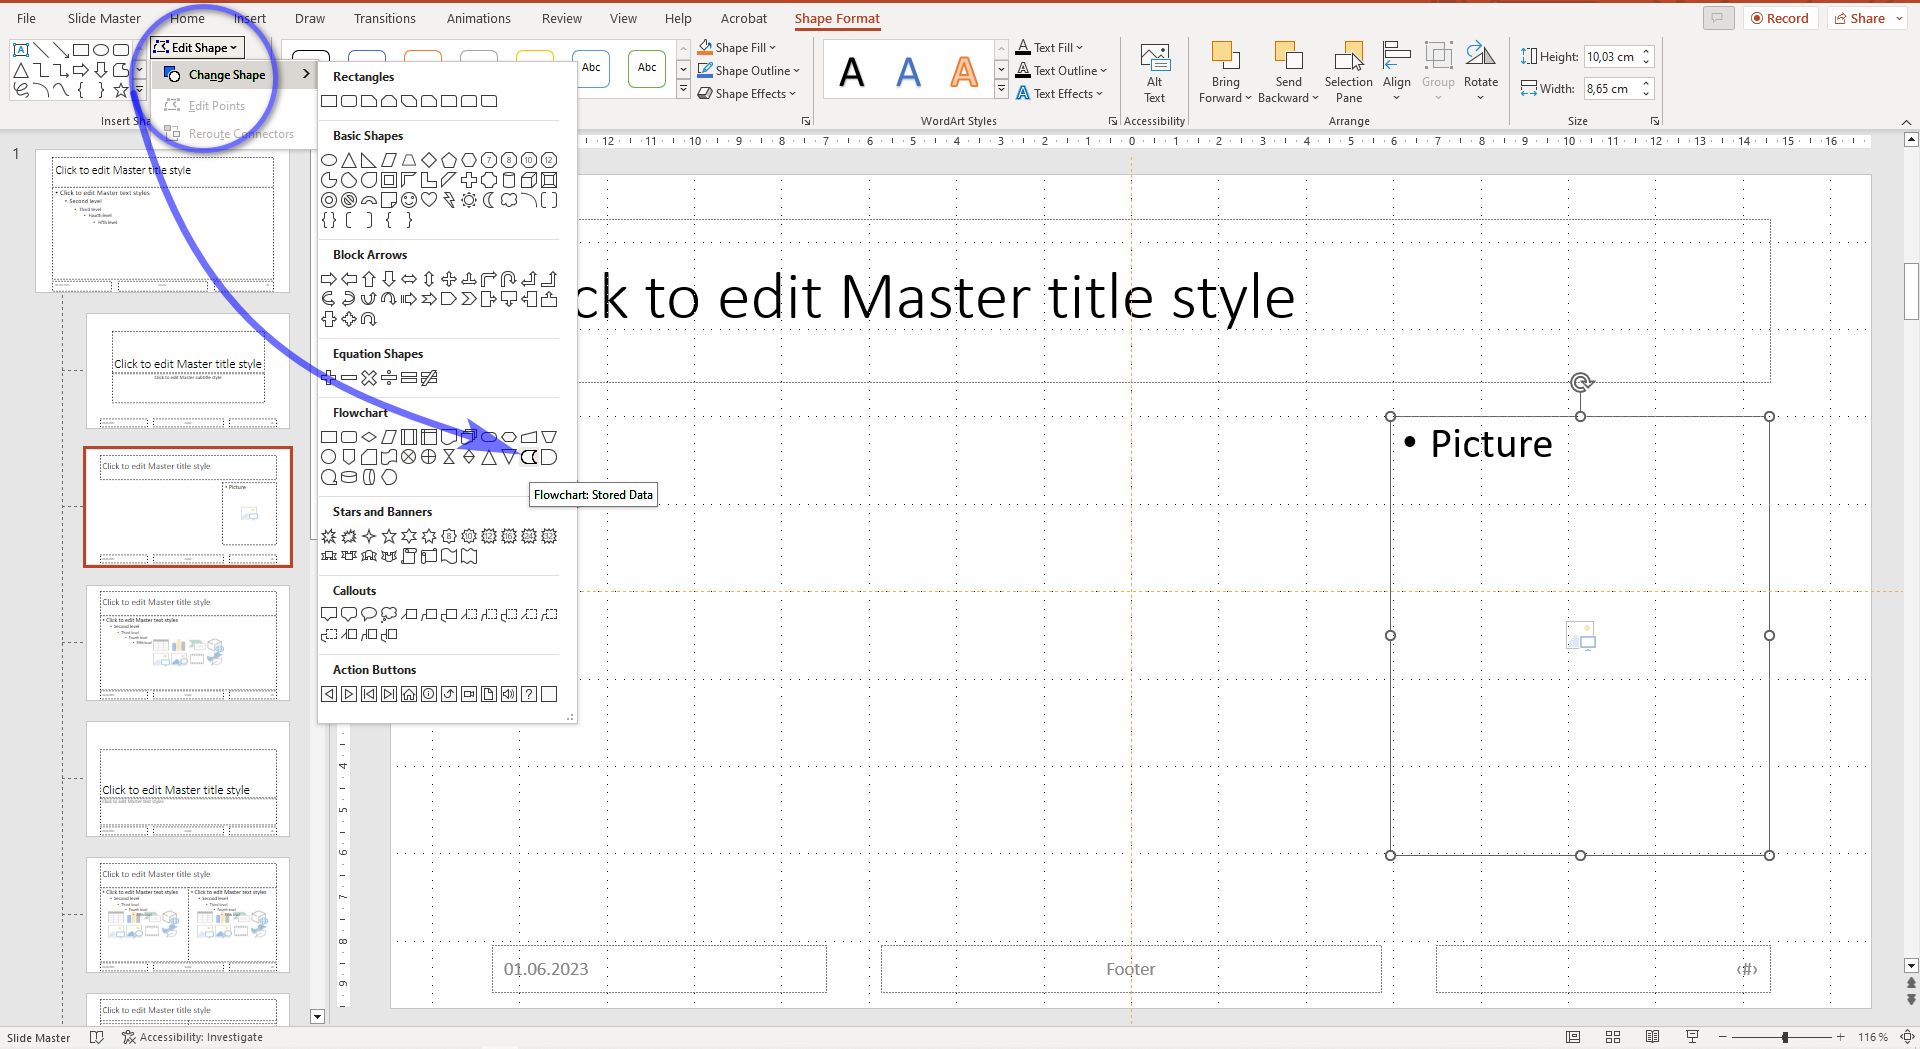
- Locate the Insert Shapes group, click the Edit Shape button, and then Change Shape.
- From the shapes gallery appear, choose a shape you like.
From the shapes gallery appear, choose a shape you like - Locate and click the Close Slide Master button to return to Normal View.
- In Normal View, click New Slide in the Slides group to create a new slide.
- Click the right mouse button over the new slide thumbnail and select the custom layout slide that you created before.
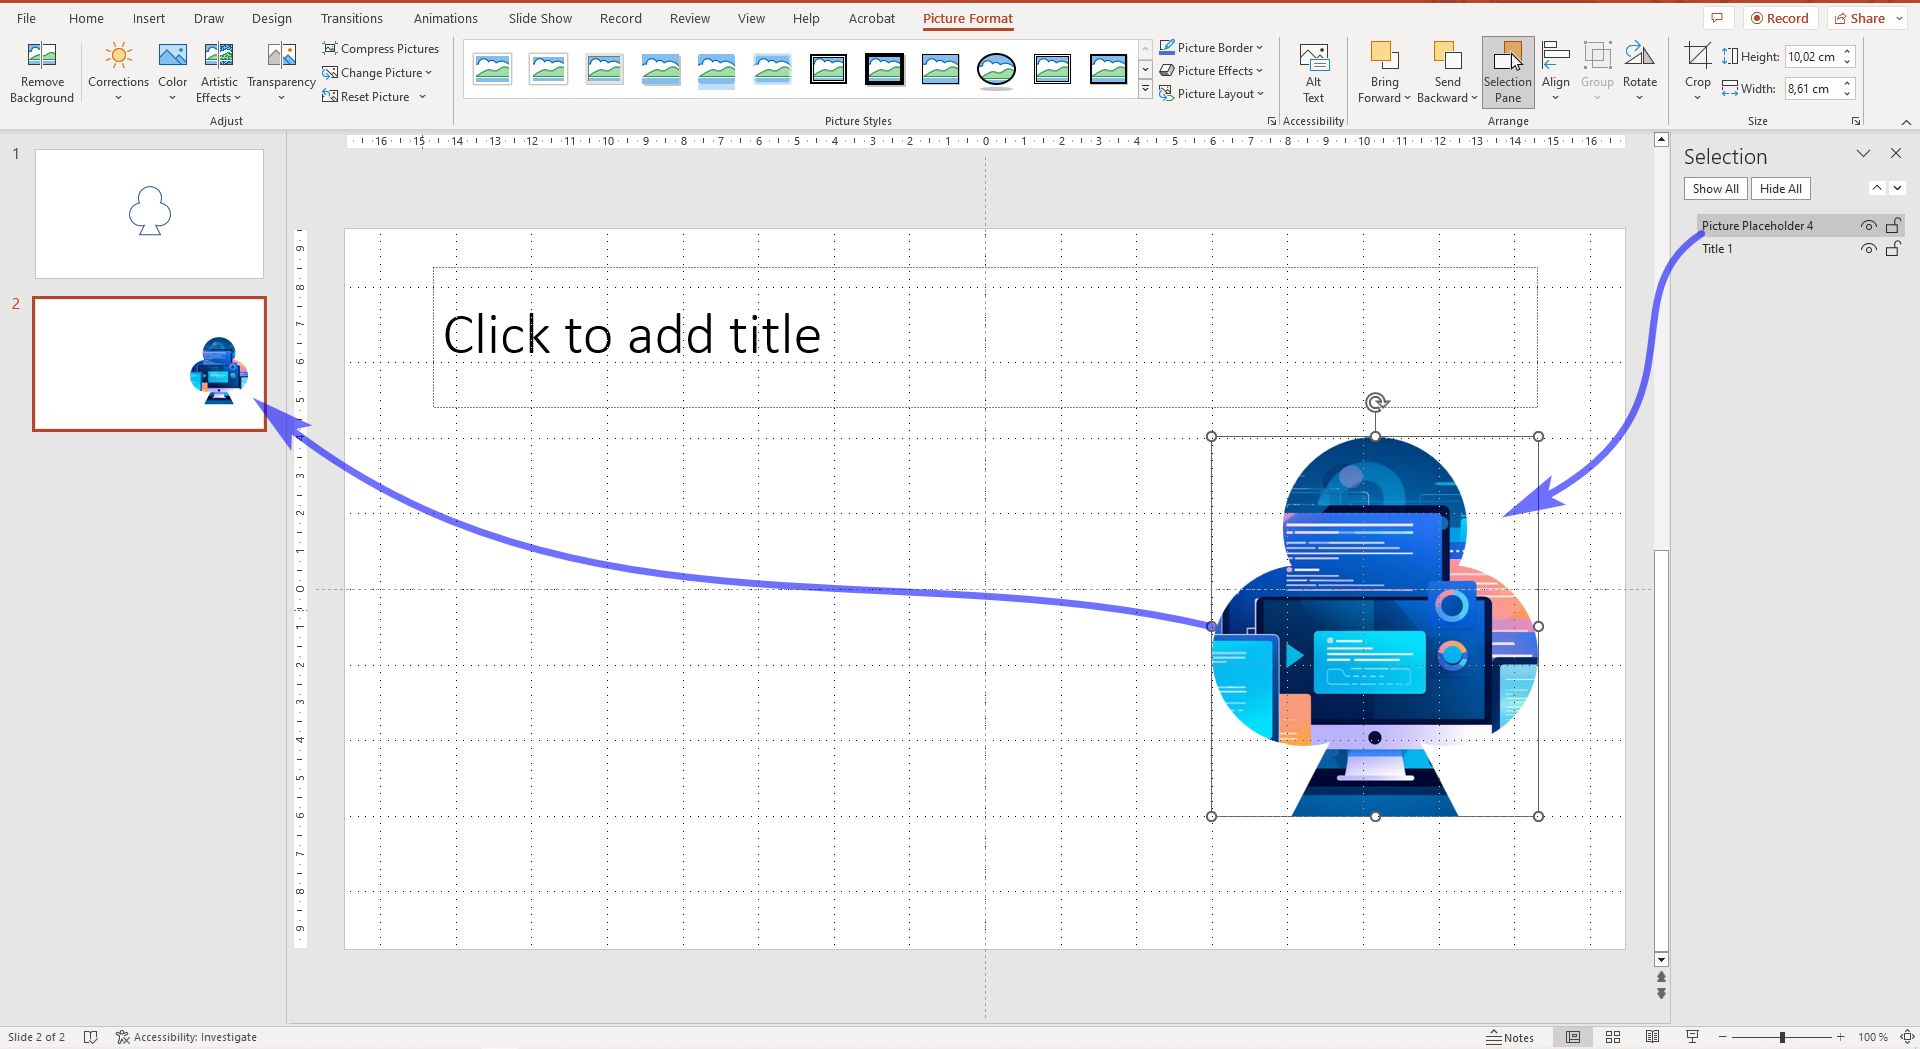
Now your Powerpoint with the custom image placeholder should look like this:
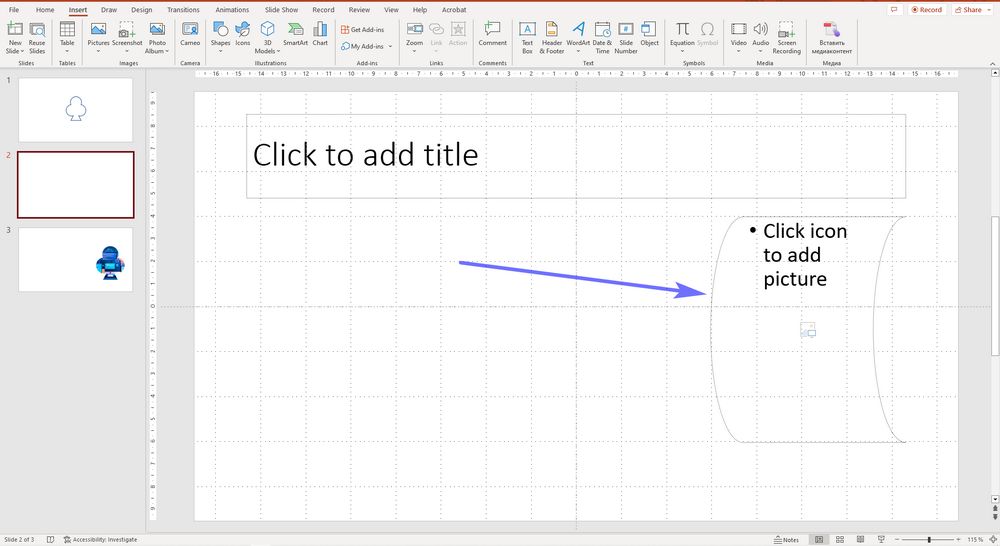
Click the icon in the middle of your customer placeholder to insert an image!
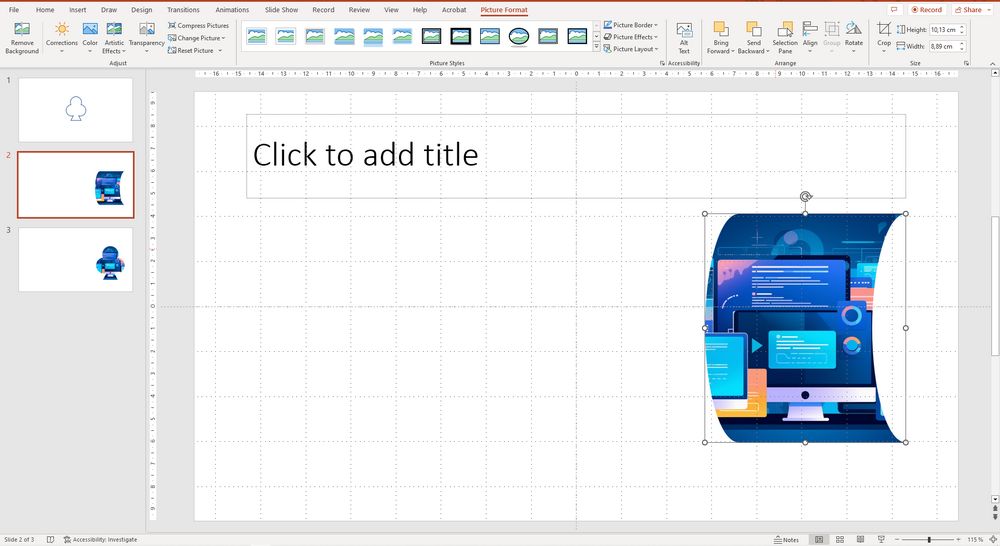
Voilà!
Conclusion
By following the steps outlined in this guide, you can easily create custom image placeholders in PowerPoint. Whether by combining the properties of a custom shape and an image placeholder or utilizing PowerPoint’s ready-made shapes, you have the flexibility to design unique layouts and enhance the visual appeal of your presentations. Experiment with different shapes, sizes, and images to create captivating custom image placeholders that align with your presentation’s objectives.