

The combination of masking techniques with animation in PowerPoint slides will grab and hold the attention of the audience longer.
You are an experienced presenter. You know how easy it is to lose the audience’s attention if you force it to stare at a slide filled with obscure information. Therefore, you fill it up gradually, and listeners absorbedly follow the pace of your narrative.
If the above is about you, then combining masking techniques and PowerPoint animation can be smart to present information in a way that supports the story you are telling.
Let’s see how to do this.
Masking technique and PowerPoint animation
To make it easy to learn this technique, we show the whole process below as a list of simple steps.
A graph and a mask first…
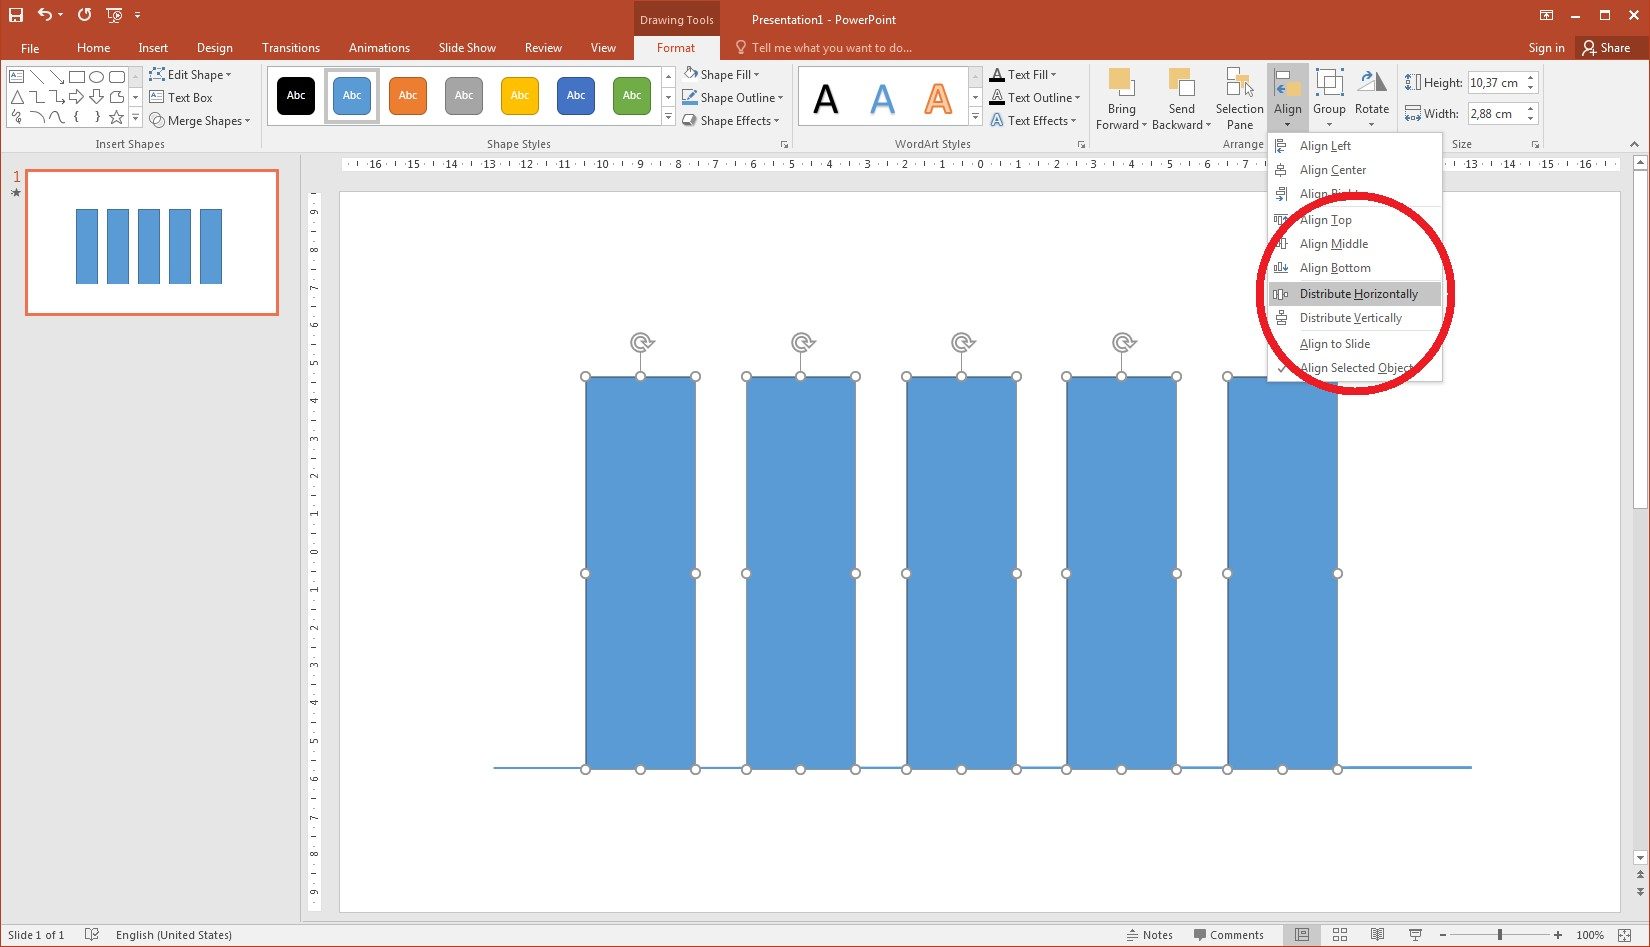
- Create your graph using lines and shapes in PowerPoint.
- We drew one rectangular shape and then copied it four times.
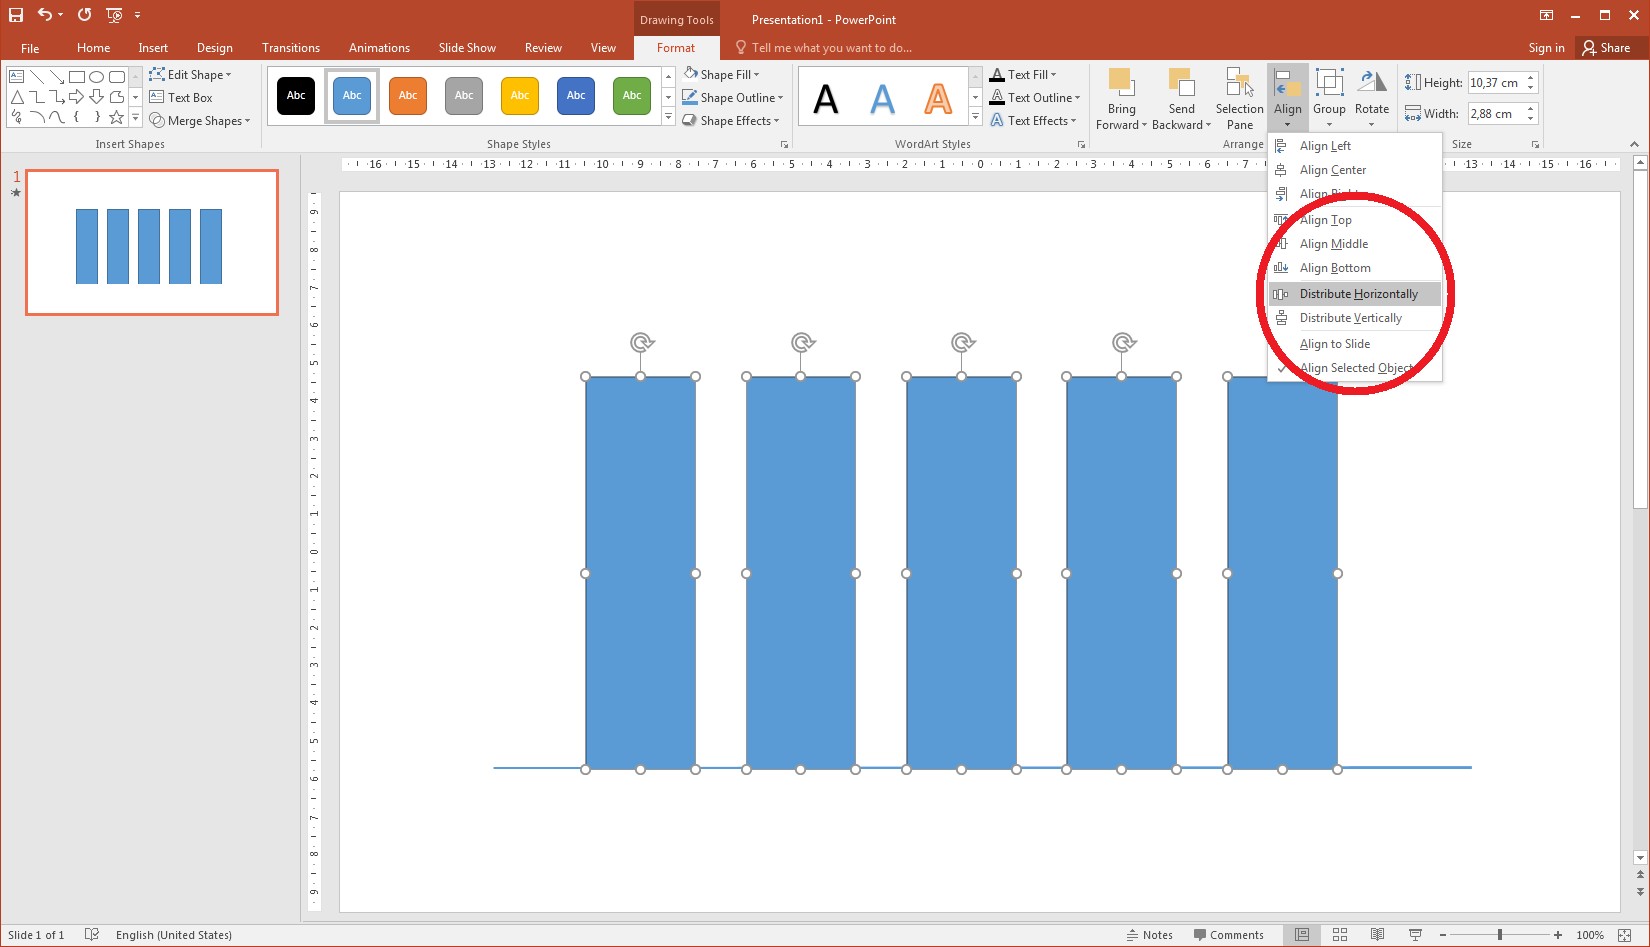
- Choose the Format tab, click the Align button, and use the alignment tools to ensure everything is nicely distributed and lined up.
…then use the alignment tools - Now, use a rectangular shape to draw a mask underneath your graph…

Use rectangular shape to draw a mask underneath your graph - …color it the same as your slide background so it’s invisible…
- …and finally, send the shape to the front.

Colour it the same as your slide background and send the shape to the front
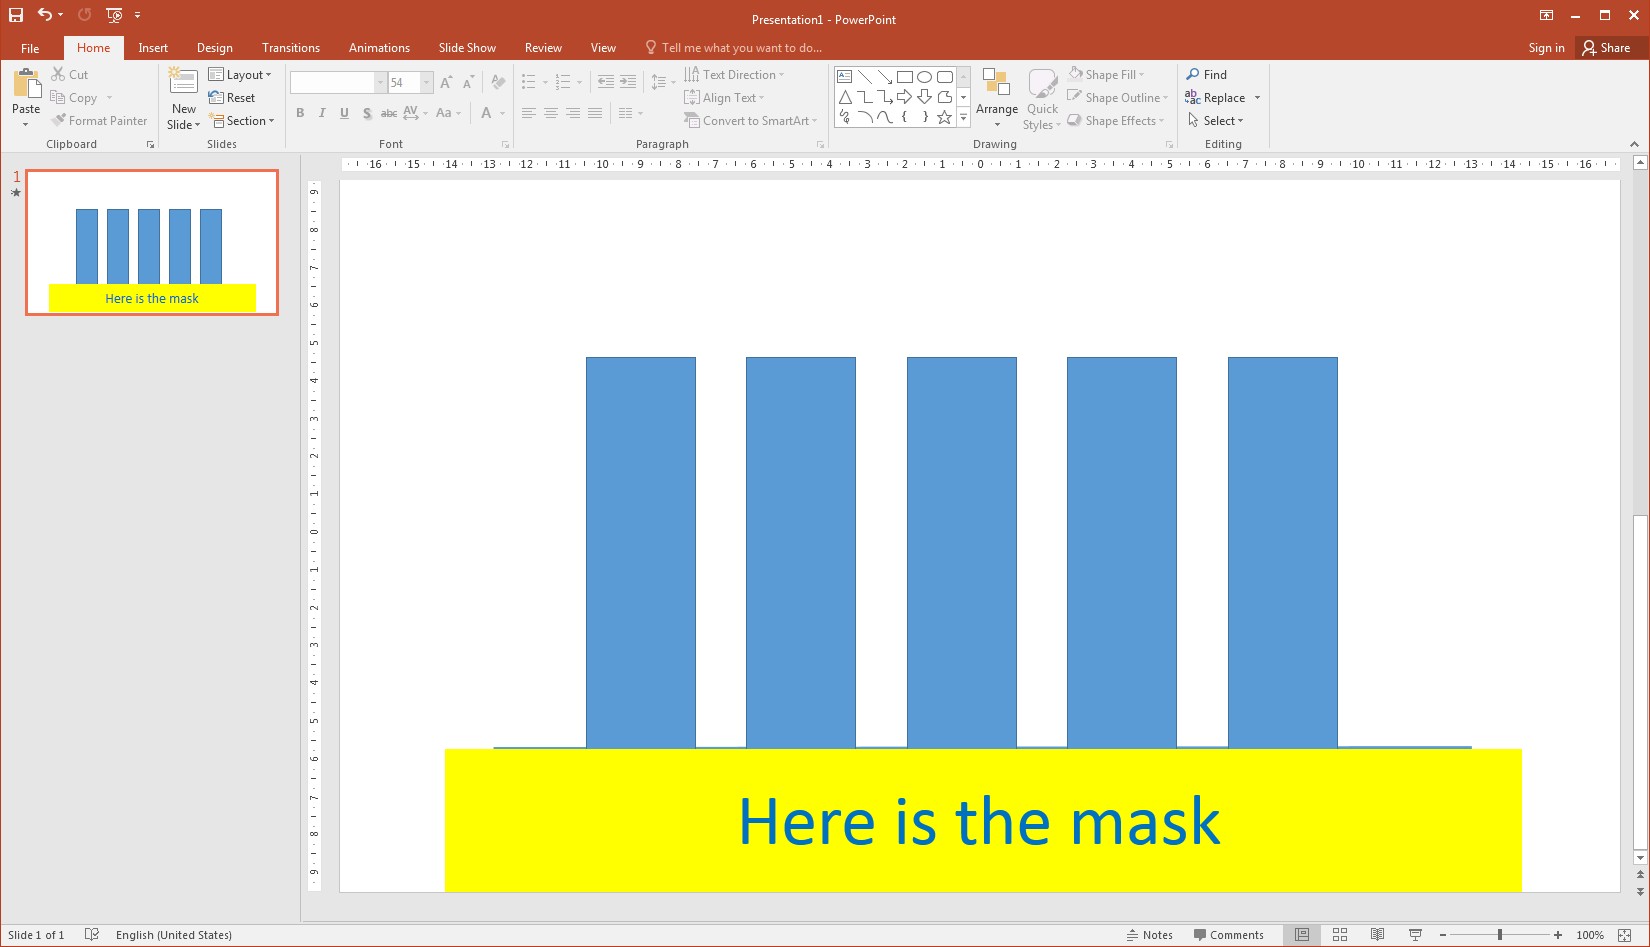
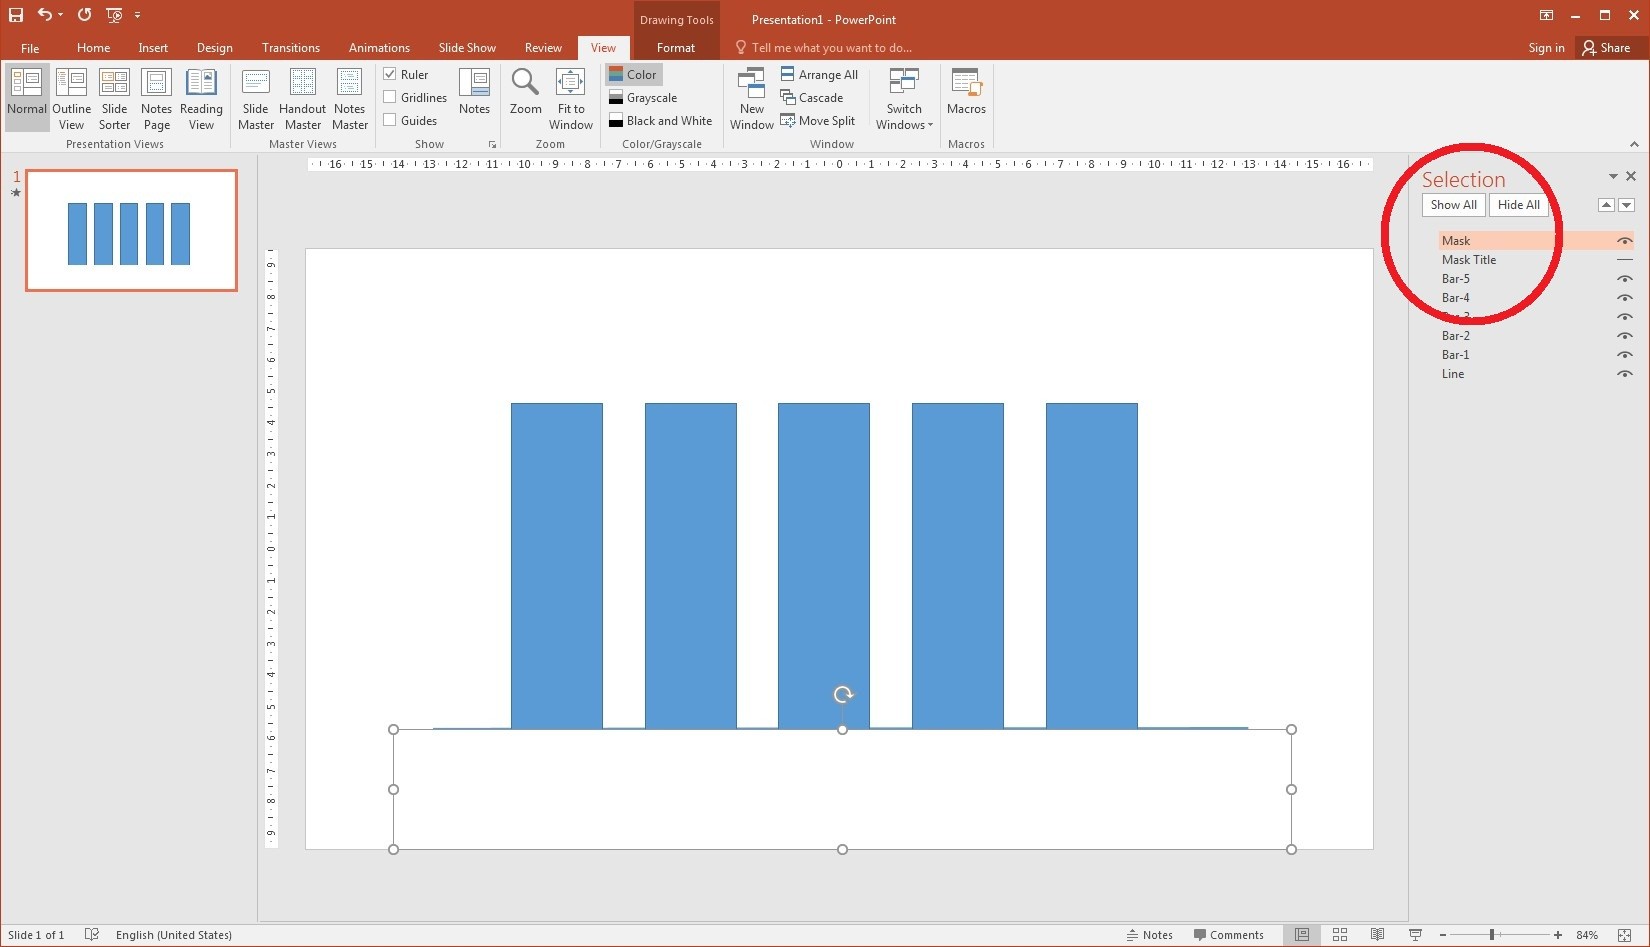
Your slide should look exactly like in step 2, but now you have a mask under the graph. With it, we get flawless animation!
… then add the animation
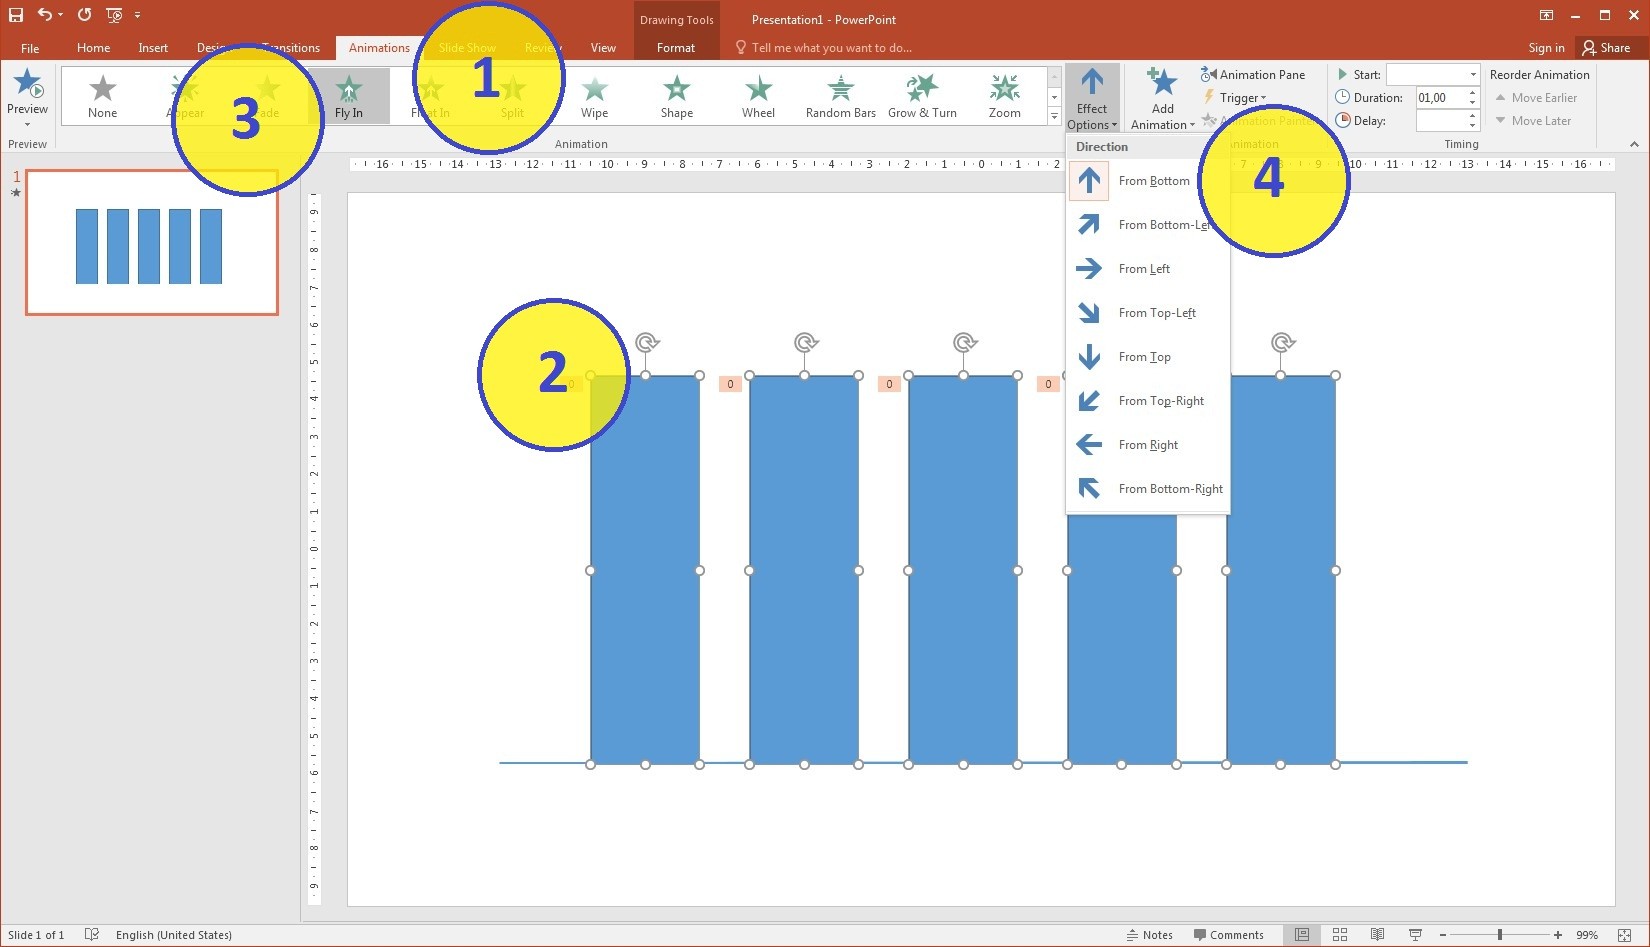
- Open up the Animations tab, …
- …then hold down the Ctrl key and select one by one the bars in your graph…
- … and choose “Fly in” animation.
- Make sure that in the “Effect Options” tab, you have selected “From bottom” (this should be the default).

- Open up the Animation Pane to control how the bars in the graph animate.
- Right-click the shapes to choose whether they come in on a click, or automatically.
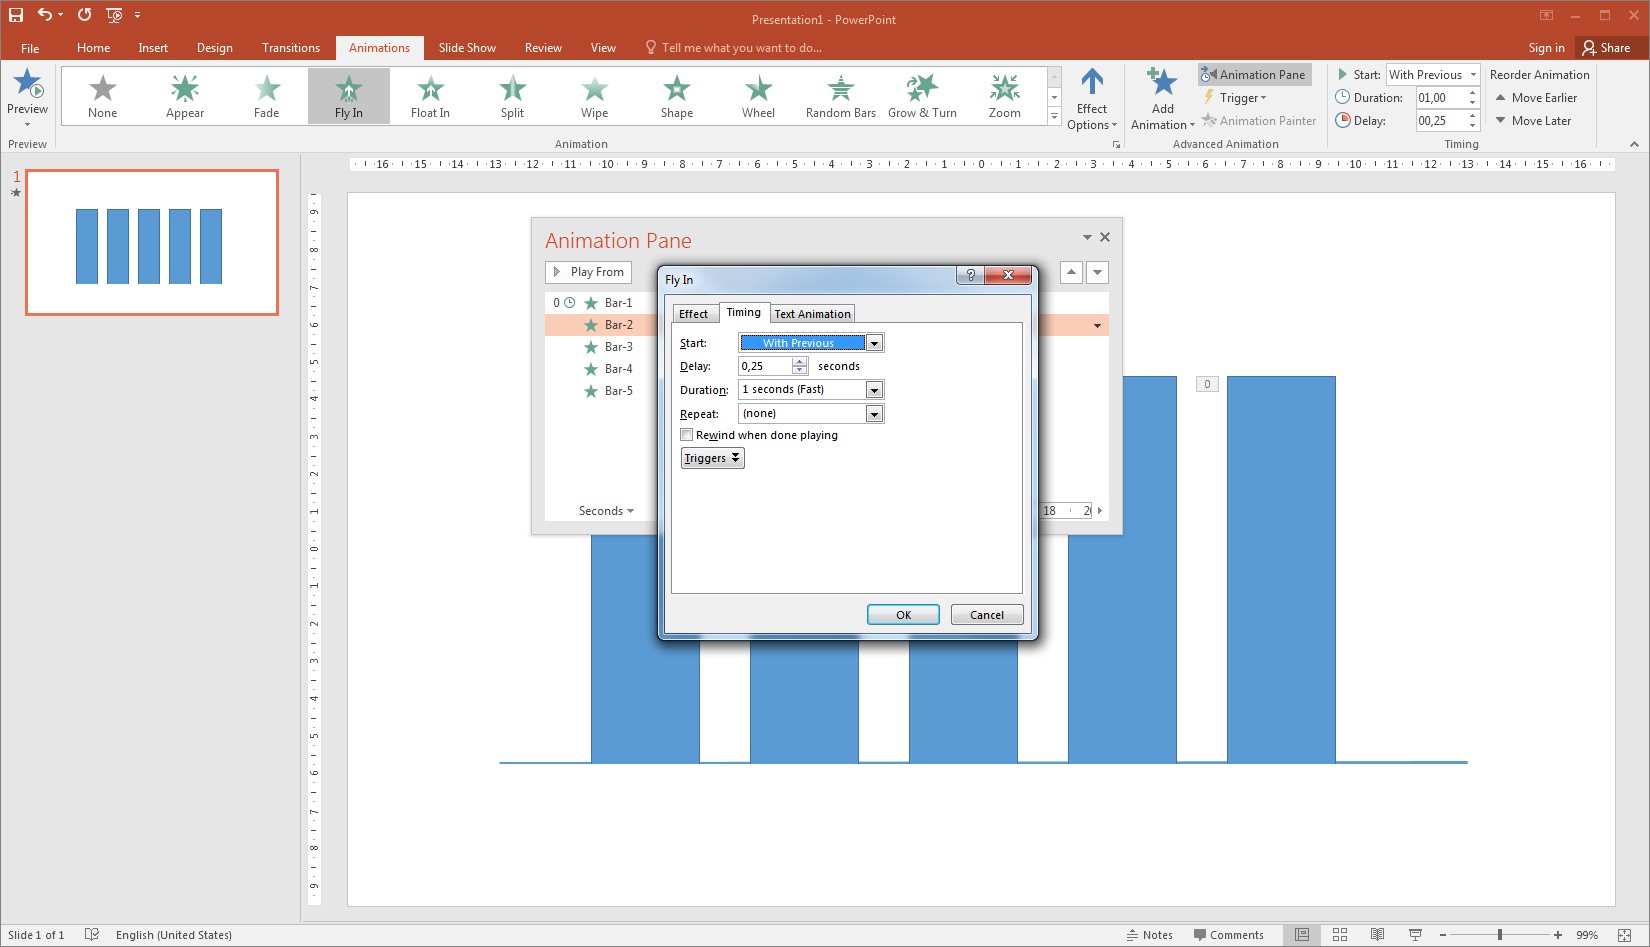
- We want all of our bars to come in as soon as the slide starts, and we want them to animate one after the other, so we’ve chosen “Start After Previous” for the first shape, then “Start With Previous” for the others.
- But you can do something else.
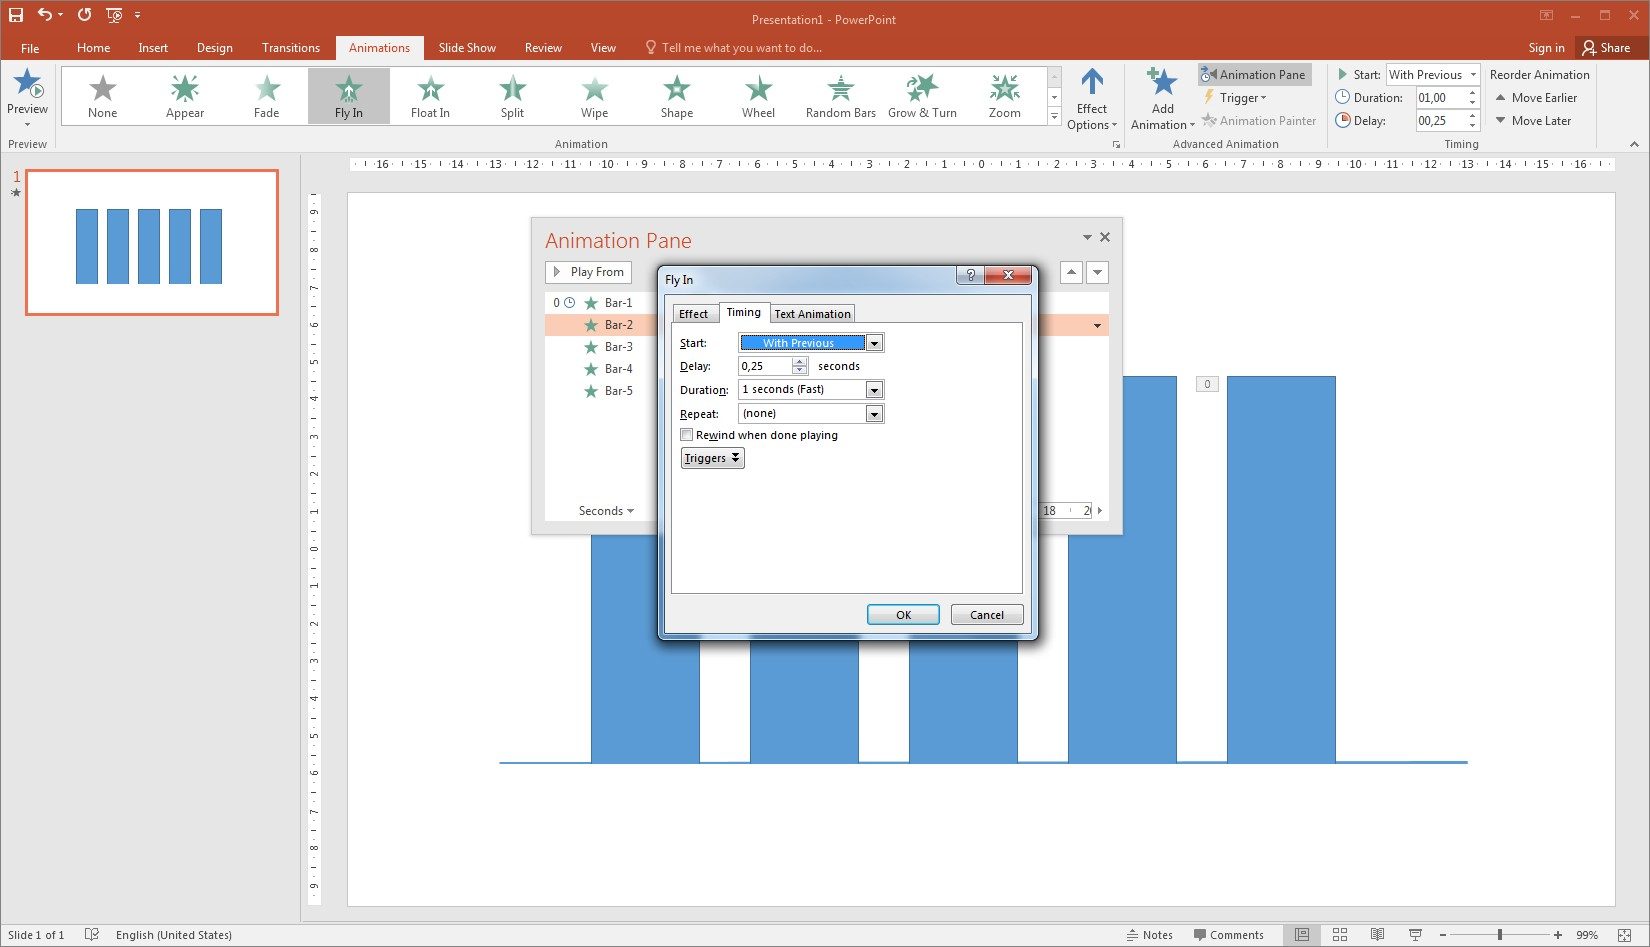
We’ve chosen “Start After Previous” for the first shape, then “Start With Previous” for the others
- You can then change the delay settings for each bar so that they come onto the slide in a sequence.
- We have a 0.25-second delay between each shape, so they fly from left to right, one after the other.
That’s all folks! Resize and color the bars as you need and see the result!