Using PowerPoint triggers allows you to create an interactive presentation with a personalized experience for your audience.
This article was updated in March 2025. Why? Because with the launch of AI Quiz Maker by PoweredTemplate, the topic of interactive presentations and quizzes has taken on a whole new life! So, I decided to refresh this material a little and give it a second wind.
Table of Contents
Introduction
How many times have you heard that the most important part of any presentation is the speaker, not the slides? Hard to argue with that when we’re talking about a traditional presentation, where slides simply illustrate the presenter’s speech, right?
But does that still hold true when we’re talking about an online quiz or test embedded in a presentation? Is it true when a student — or any other participant — is left on their own, clicking through questions and answers? And what happens if your quiz slide suddenly behaves in a way the student (or, heaven forbid, the teacher!) didn’t expect?
All of these provocative questions sound rhetorical because the answers are obvious: students need to feel confident they can answer the questions, and teachers need to be sure they can assess the results.
So, let’s walk through a simple example of how to create an online quiz — or an interactive presentation — using PowerPoint triggers, and how to make sure it runs as smoothly as possible.
How Your Interactive Presentation Should Respond to User Behavior
If you are developing an interactive presentation, then you need to decide how the presentation program will react if:
- The audience’s reaction is mouse clicks rather than applause or cues.
- The user wants to change the planned presentation sequence.
- A bored or tired viewer randomly clicks around on the slide just for fun.
No worries — we’ve got answers to all these questions!
Properly configured PowerPoint triggers and hyperlinks give your presentation the interactivity it needs.
We already have an article on our blog about using hyperlinks in PowerPoint presentations, so in this one, we’ll focus on how to create interactivity with PowerPoint triggers.
Interactive Presentation Slide Example with PowerPoint Triggers
We created a sample slide for an interactive presentation along with a short video to show you how it works. This is probably the easiest way to get started.
This slide is built using PowerPoint triggers and includes all the elements you need for a successful interactive presentation. Let’s take a closer look!
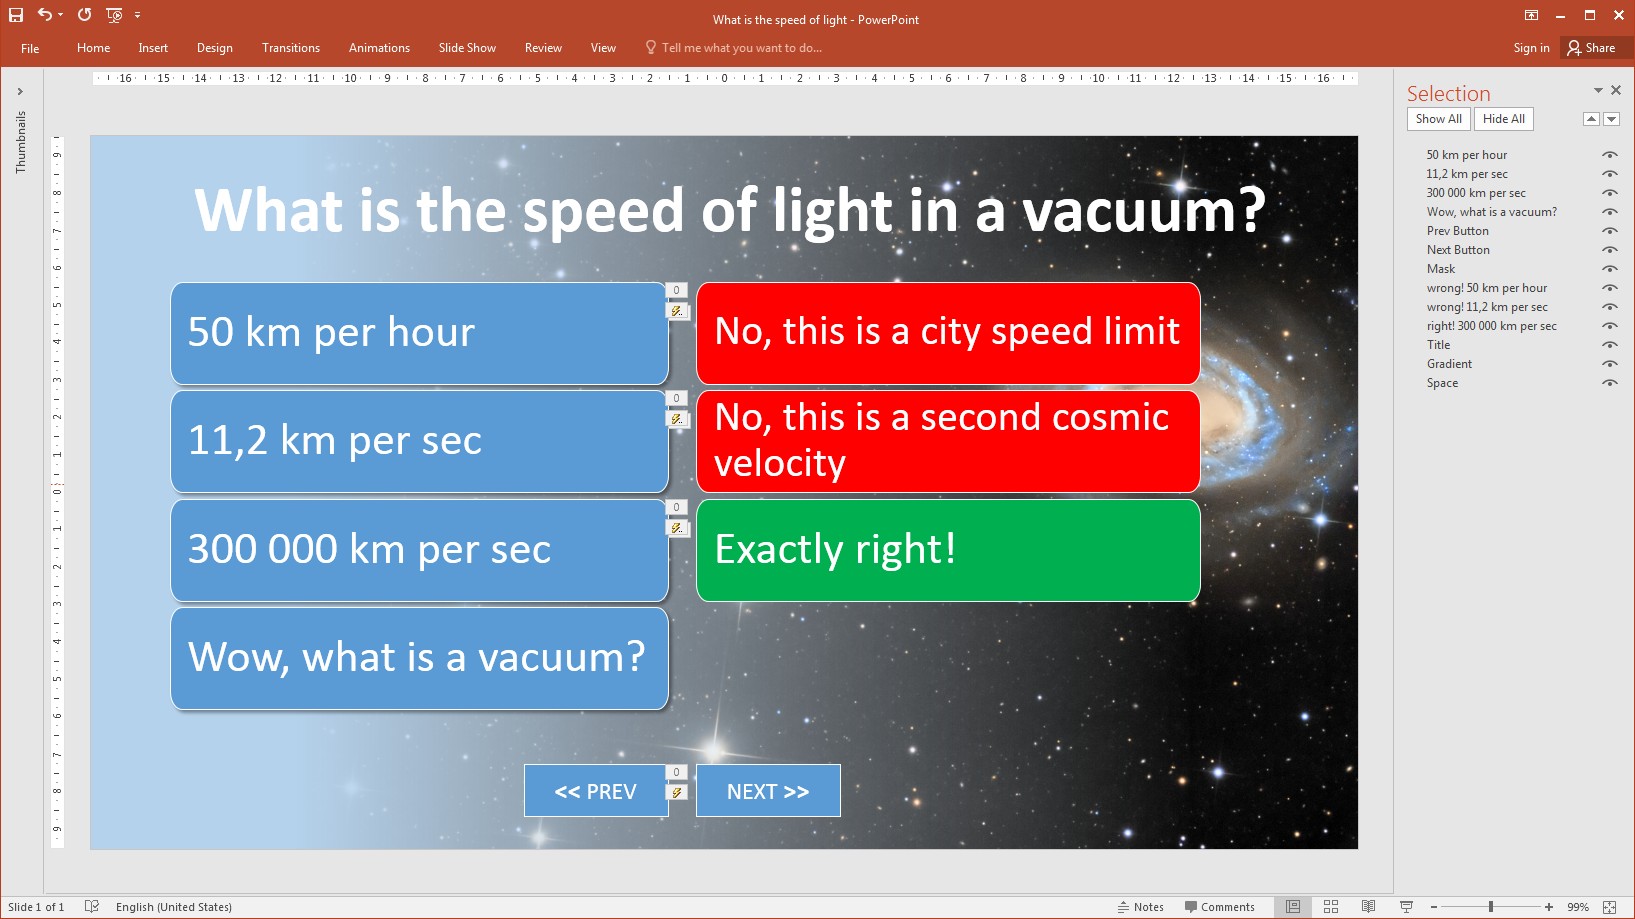
We used a photo from the Hubble Space Telescope website to create a mesmerizing space background. Simple, right?

Interactive Presentation: PowerPoint Triggers & Hyperlinks
We placed triggers and hyperlinks on this layer. The viewer sees them as regular buttons:
1) A click on the trigger launches the animation effect tied to it.
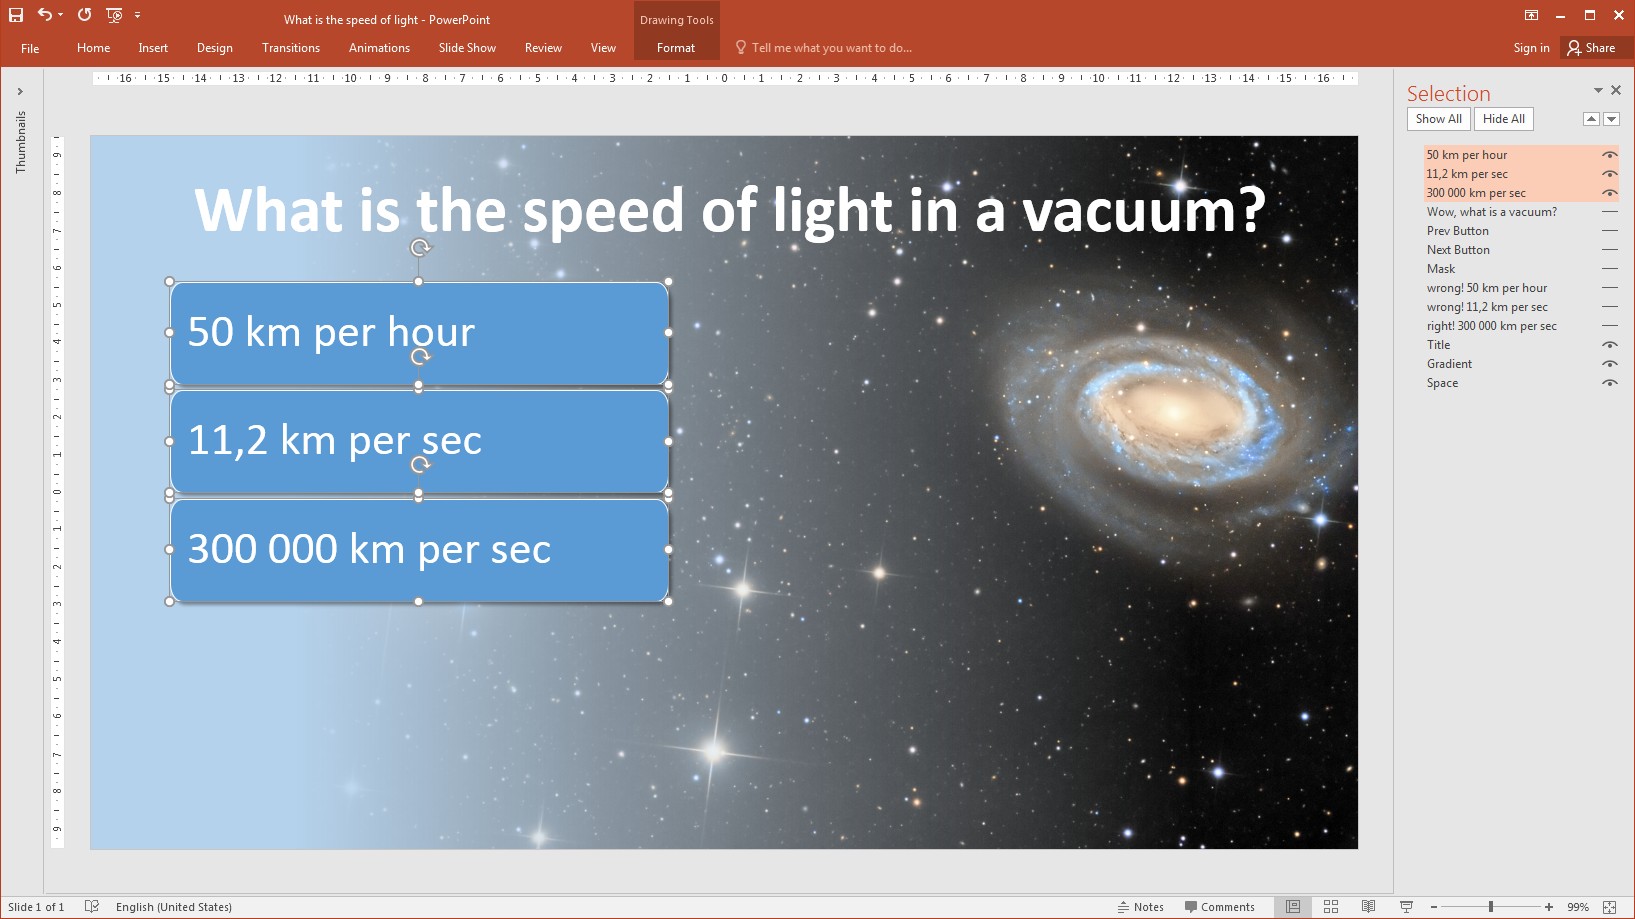
2) A click on the hyperlink jumps to another slide in the presentation.
Interactive Presentation: Animated Elements
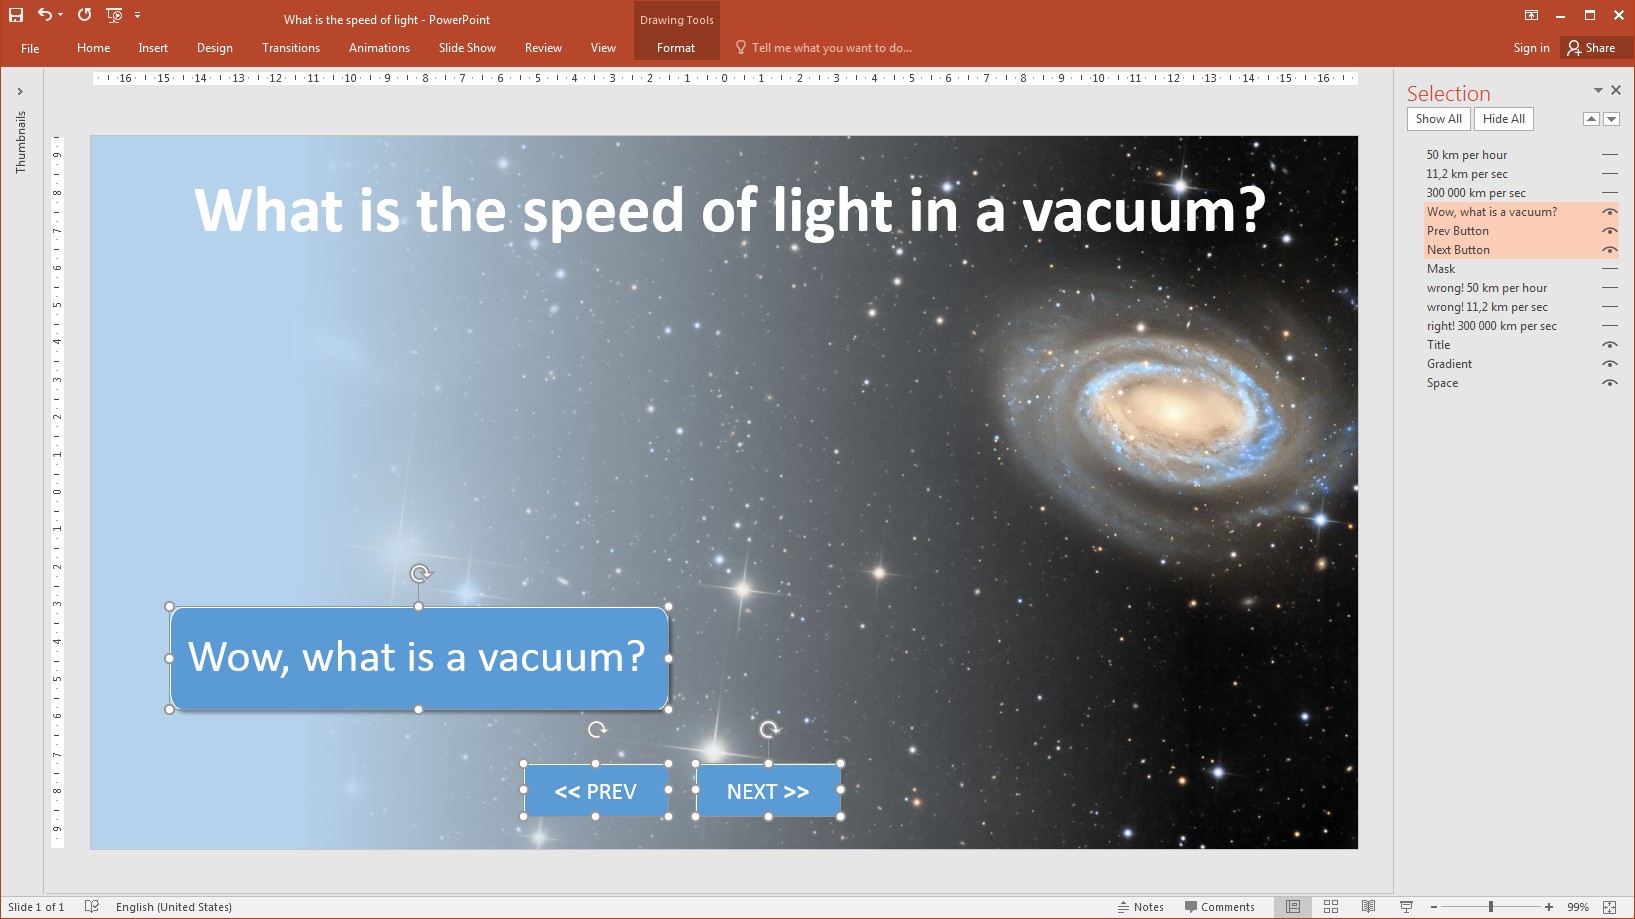
The “engine room” layer of our interactive slide is sandwiched between the background and trigger layers. This is where all the action happens in response to the viewer’s commands. Watch carefully — you don’t want to miss anything!
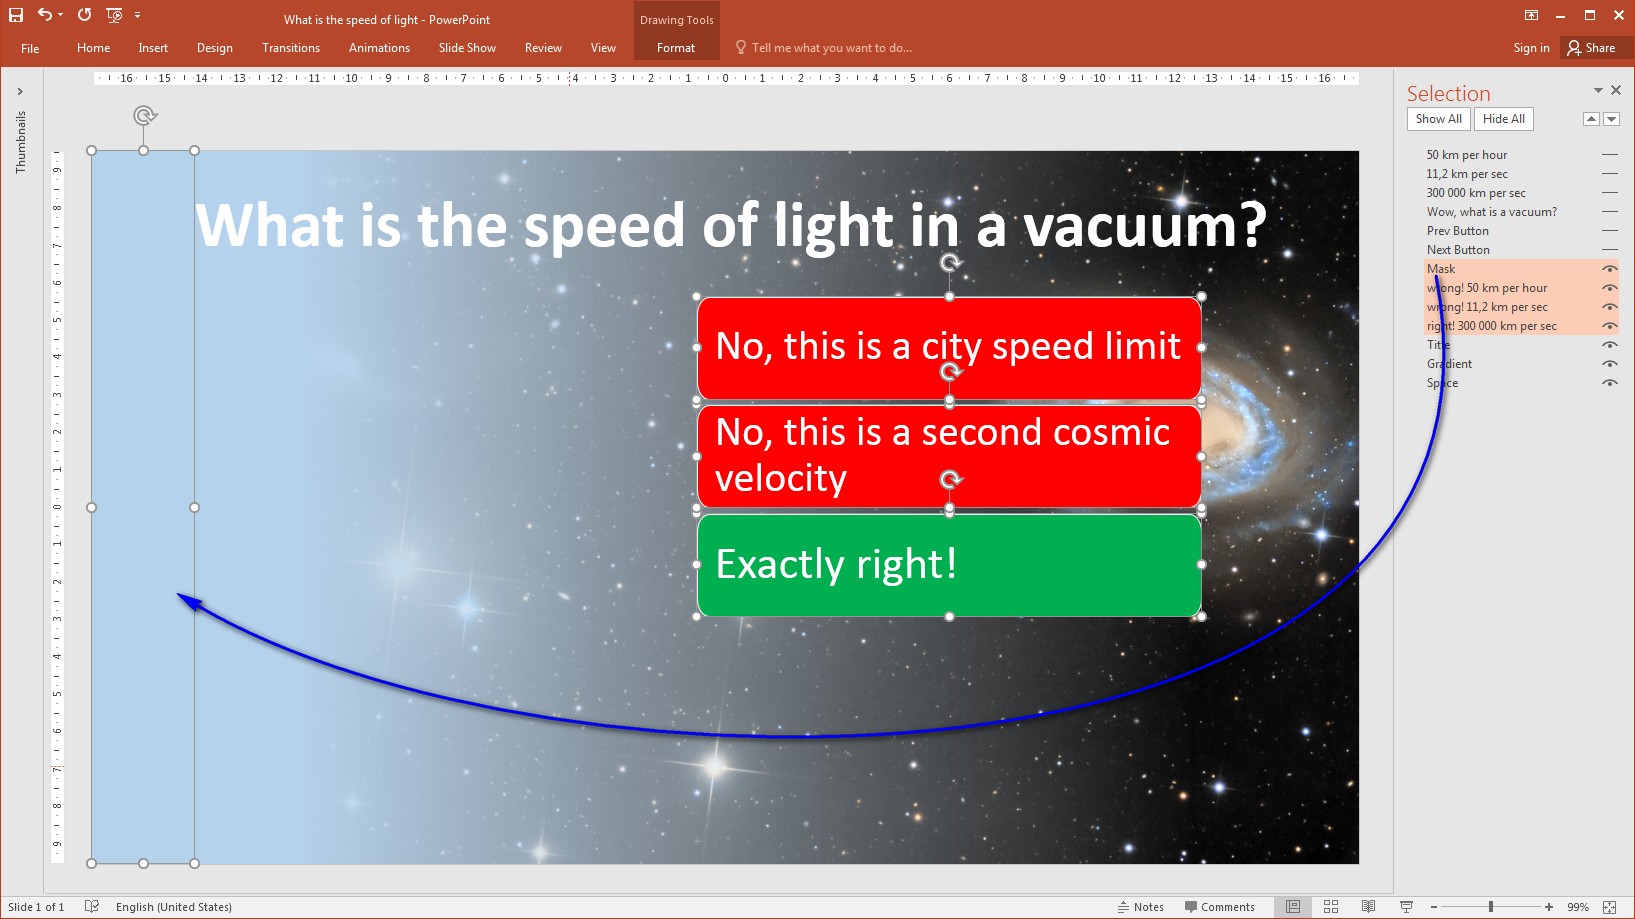
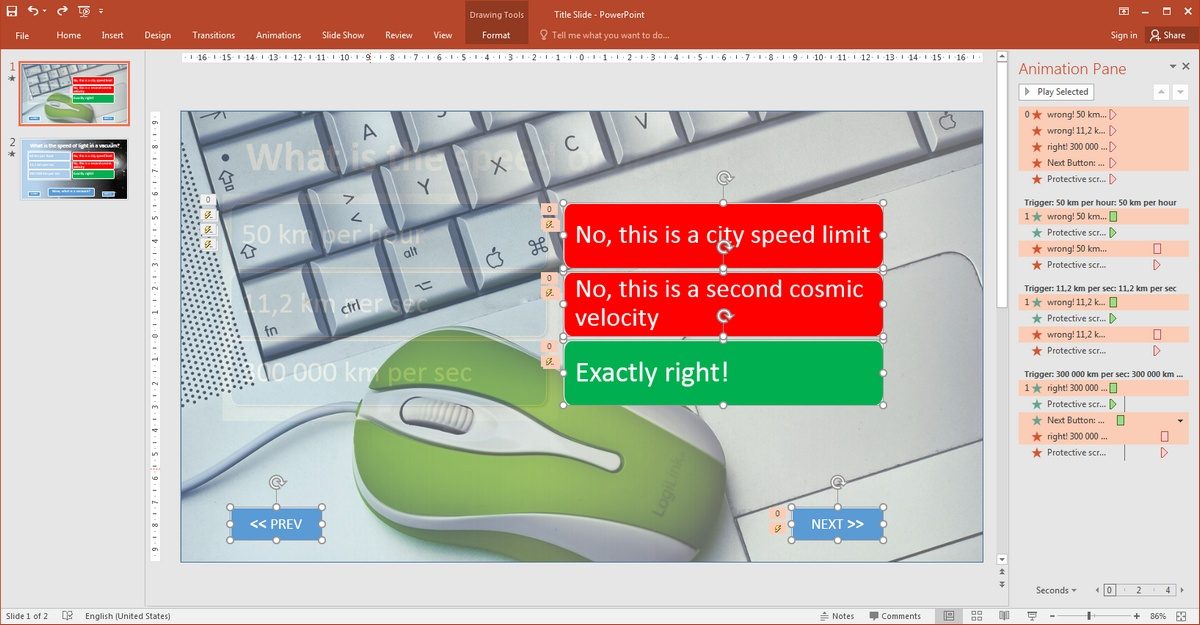
Here, we added three rectangular shapes, each tied to its own animation. When a user clicks one of the answer option buttons, these animations play. To make it work smoothly, we used:
- A mask to hide the shapes behind it (check out our blog post on using masks in PowerPoint animations).
- The “Fly In” effect with the appropriate trigger so the shape slides in from left to right.
- The “Fly Out” effect with the same trigger, so the shape slides out from right to left after a 2.5-second delay.
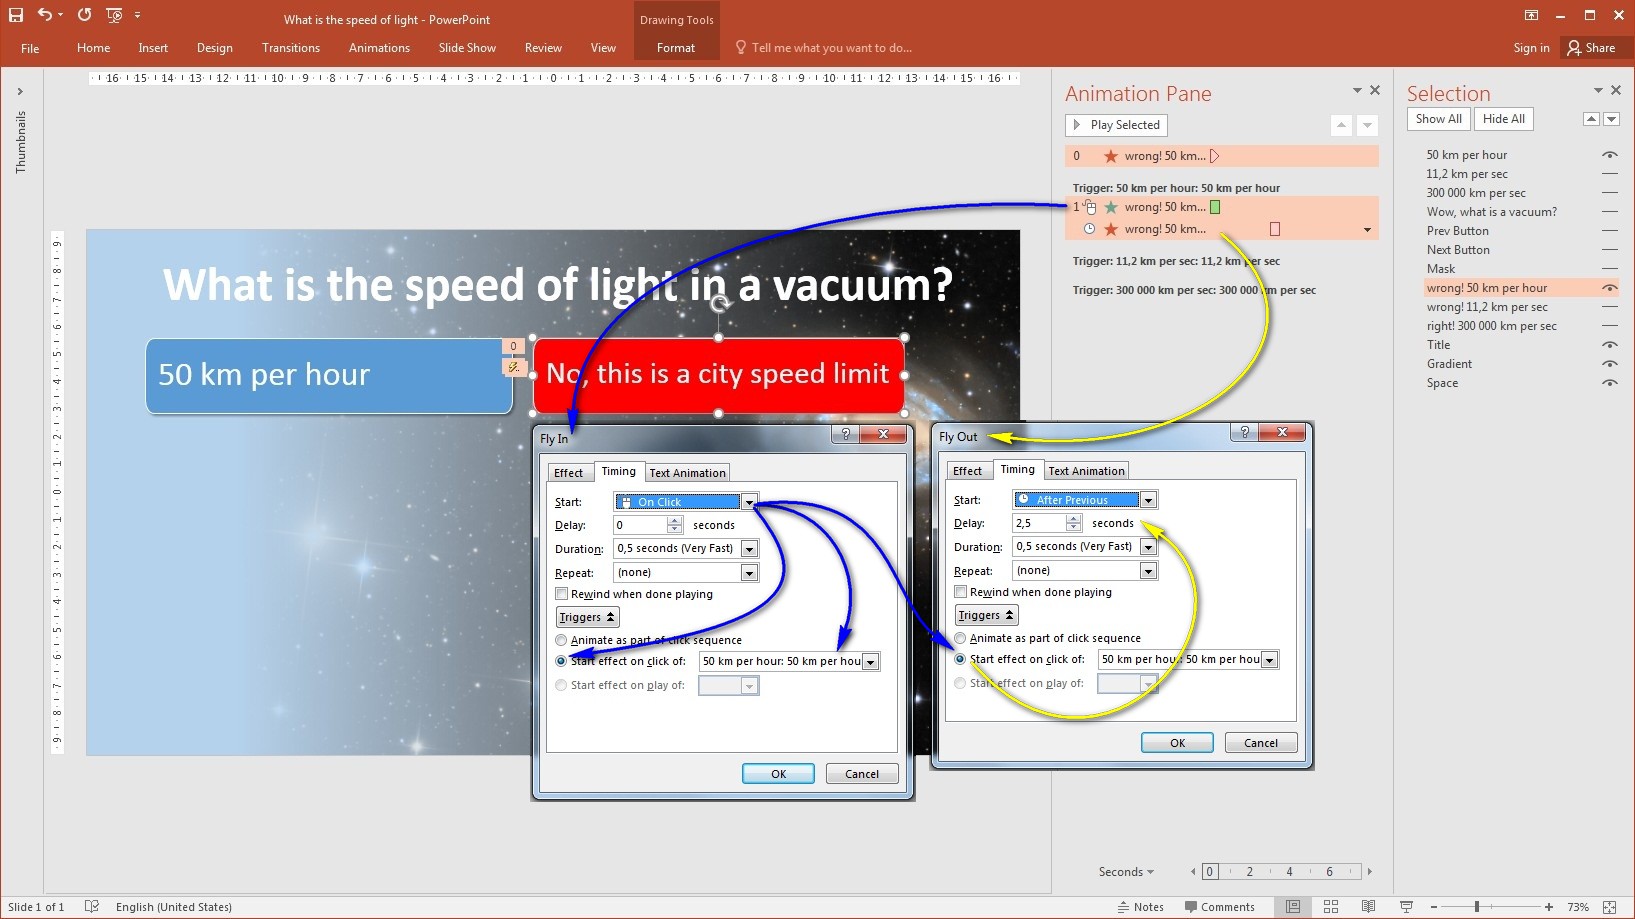
Sounds like it’s ready to go, right? Well, not quite!
How to Protect an Interactive Presentation
We need to make sure the slide always responds correctly to the viewer’s clicks.
First, by default, PowerPoint advances to the next slide when someone clicks anywhere on the slide. So if a viewer accidentally clicks outside the answer options, PowerPoint could jump to the next slide — not what we want! To fix this, go to the Transitions tab and uncheck “On Mouse Click” in the Timing group.

Second, let’s see what happens when a viewer rapidly clicks multiple answer buttons.
Chaos, right? We don’t want that either! To protect the slide from a curious or bored user, here’s what we did:
- We added a transparent protective screen the same size as the area with the answers.
- We changed the animation sequence by adding:
- An animation to display the protective screen when an answer is clicked.
- Another animation to hide the screen once the previous animation finishes.
We made the protective screen semi-transparent so you can see when it appears and disappears in the video demo.
Well, that’s it — everything’s ready to go!
Conclusion
PowerPoint triggers are a powerful tool for turning a static presentation into an engaging, interactive experience. Whether you’re building an online quiz, an educational module, or a self-running demo, triggers give you control over how your presentation behaves — no presenter required!
With a little planning and attention to user interaction, you can design slides that guide your audience smoothly through the experience, eliminating confusion and keeping them focused. And with AI Quiz Maker by PoweredTemplate now in the mix, the possibilities for interactive learning and assessment are even greater!
Ready to level up your presentations? Start experimenting with triggers today and see where they take you!
