

One way to do this is with a tabbed presentation. It looks somewhat like links at the top of a website.
We prefer to keep the tabs simple so that they don’t distract from the main content, but you can format them any way you want.
Here’s how you can to create
The tabs for presentation with lots of topics
Make tabs
- Click the Slide Master button from View menu.
- In the left-hand pane, scroll up to the top, larger thumbnail.
Whatever you place on this master will appear on every slide, no matter which layout it uses. - Click the Shapes button from the Insert menu and select the Round Same Side Corner Rectangle shape in the Rectangles option.
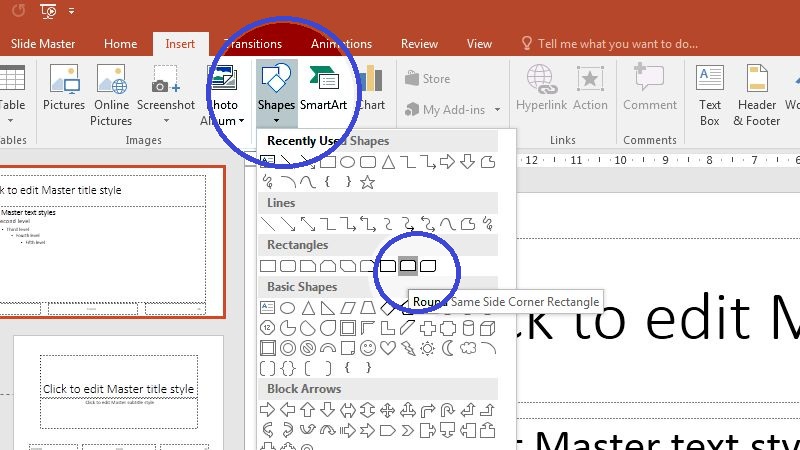
Select the Round Same Side Corner Rectangle shape - Draw the tabs.
Drag the yellow mark to adjust the size you need of the rounded corner.
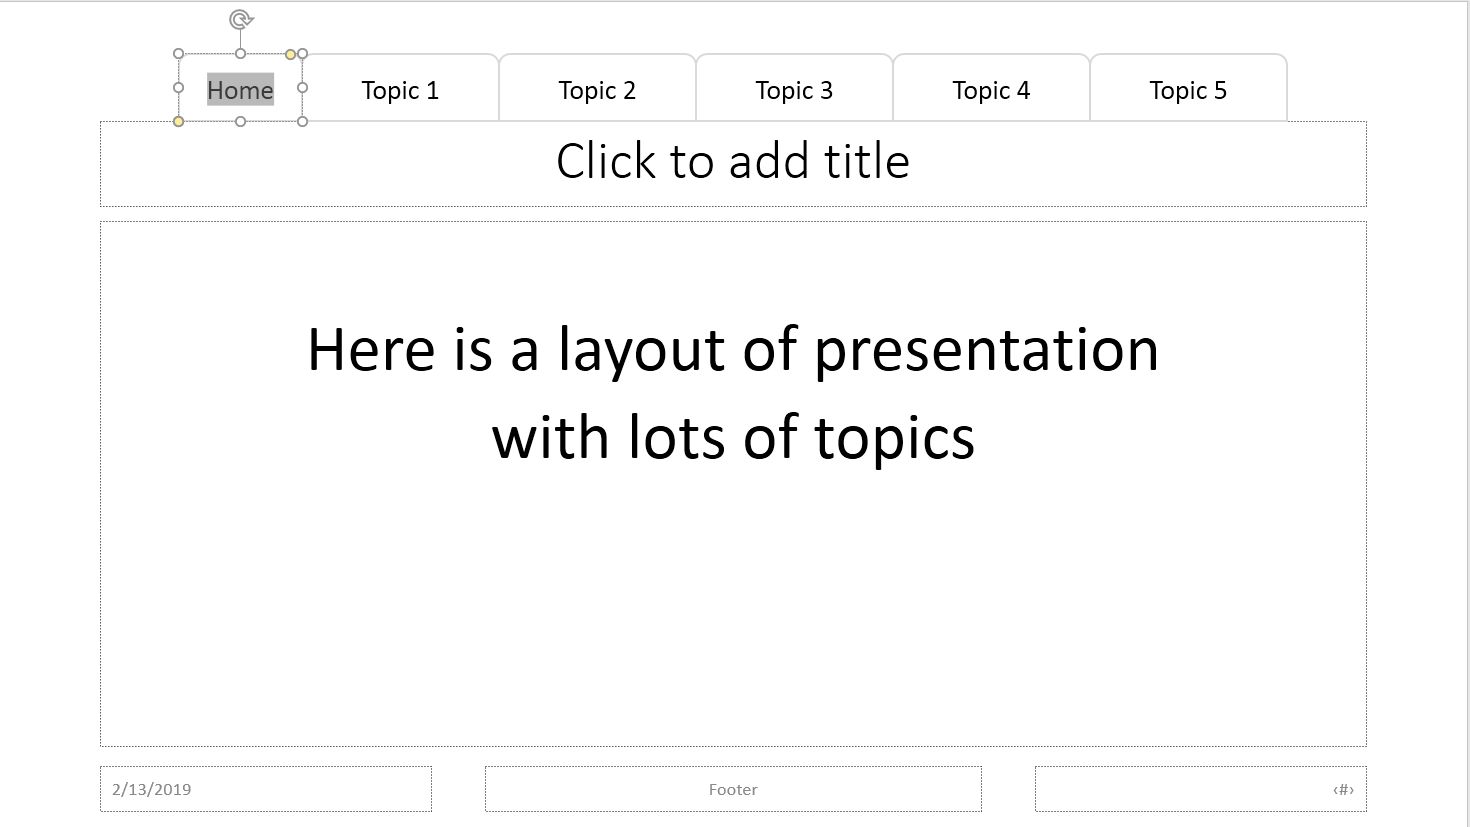
Layout of presentation with lots of topics
Create all of your slides
Click the Normal View icon at the bottom of the screen to return to Normal view and create all of your slides.
You can create a “topic” slide at the beginning of each topic, but it isn’t necessary. The Section layout is good for this, but you can also use the Title Slide layout or any other layout that works for you.
Link topics to tabs
- Click the Normal View icon at the bottom of the screen to return to Normal view and create all of your slides.
You can create a “topic” slide at the beginning of each topic, but it isn’t necessary. The Section layout is good for this, but you can also use the Title Slide layout or any other layout that works for you. - Return to the Slide Master.
You can now add hyperlinks to each of the sections and they will work on every slide:
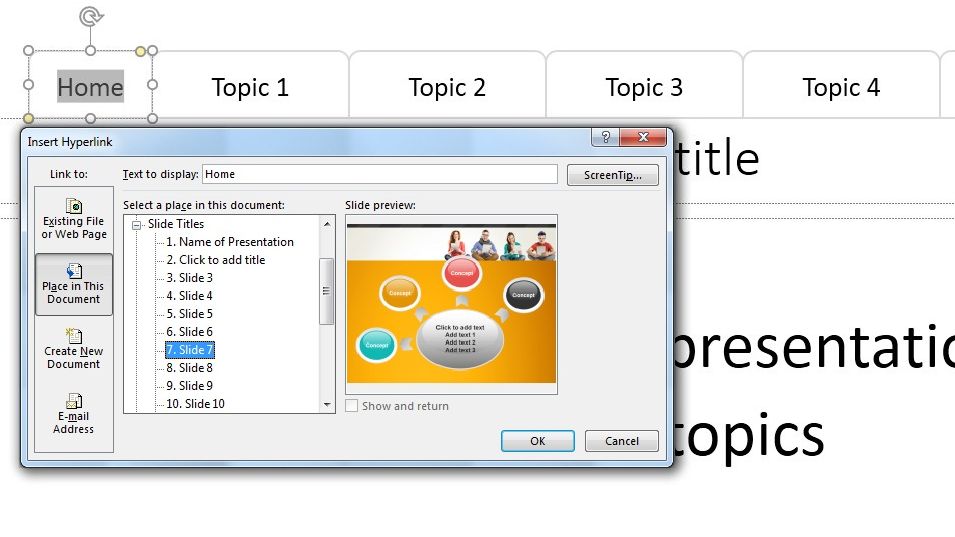
You can to add hyperlinks to each of the sections - select the first tab;
being sure to click the tab’s outline (border), not the text inside it. You want the hyperlink to work if you click anywhere on the tab and you probably don’t want the text to be underlined and change to the hyperlink theme color; - press Ctrl+K or go to the Insert menu and click Hyperlink button in the Links group;
- in the Link To pane of the Insert Hyperlink dialog box, choose Place in This Document;
- in the Select a place in this document pane, choose the desired slide.
For the Home tab, you would choose the first slide of the presentation. For subsequent tabs, you would choose the first slide of the corresponding topic. - Click OK to create the hyperlink and close the dialog box.
- Add hyperlinks to the rest of the tabs.
- select the first tab;
- Exit the Slide Master to return to Normal view.
- Test all of your hyperlinks!
Delivering a tabbed presentation with lots of topics
You can go through the presentation as usual, if you want.
You don’t even have to use the tabs!
But if someone asks a question about an earlier topic, you can easily go back to it by clicking the topic’s tab.
In some situations, you might also let your audience choose the topics they want to hear and in which order. We called this a menu-based presentation.