

This article is the ultimate guide on how to make an interactive online presentation using Google Slides. Here you will find detailed step-by-step instructions for creating interface elements to make the presentation truly interactive.
In a previous post we looked at the interface elements the BBC website uses to sketch workable interface outline for an interactive online presentation. Now we’ll give you step-by-step instructions on how to make an interactive online presentation in Google Slides we developed using this sketch.
- How to Disable Slide Advancing in an Interactive Presentation Using Google Slides
- Navigation tools properties
- Navigation tools layout
- How to Create an Interactive Presentation Tab Bar Using Google Slides
- How to Create an Interactive Presentation Navigation Bar
- Highlight the Active Topic of an Interactive Presentation
- How to Create an Interactive Presentation Pagination Bar
- Highlight the Active Slide on the Pagination Bar
- Do I Need an Interactive Presentation Homepage
- How to Create an Interactive Presentation Buttons in Google Slides
Below we will only talk about the technical aspects of implementing an interactive presentation interface using Google Slides. And we deliberately do not talk about design.
Everything about colors saturation and compatibility, images transparency, frames styles, rounded corners, etc. we left for you. You can handle it, we are sure!
How to Disable Slide Advancing in an Interactive Presentation Using Google Slides
In Google Slides defaults a left mouse click queues the next slide. In the case of the interactive presentation this means that if the viewer clicks not a button or a hyperlink, but somewhere else, then Google Slides will change the slide to the next.
Unfortunately, it is not yet possible to avoid this problem correctly. For some reason, Google is in no hurry to fix it, despite the fact that in MS PowerPoint it is simple.
Navigation Tools Properties
If you think about what properties an interactive presentation navigation tools should have, then you will quickly come to the following conclusions:
- They must not distract the viewer from the subject of the presentation.
- They must allow the viewer to
- switch between topics,
- move from the current slide to the next or previous,
- understand which topic is active and
- understand which slide of the current topic is active.
Understanding these properties will help us to develop the layout of the presentation slide.
Navigation Tools Layout
We will divide presentation slide into three parts: upper, lower and central, to use as follows:
- The tab bar will be located at the upper part. Using it the viewer will be able to switch from topic to topic.
- We’ll place buttons for navigate:
- from the active presentation slide to the next or previous presentation slide and
- from the active slide of current topic to the next or previous slide of current topic
- We’ll reserve the central part for the presentation content and will no longer mention it in this article.
Now we can start designing the interface elements: tab bar and navigation buttons 2-a. They should be located on each slide. This is absolutely obvious. This means our interactive presentation can not do without Google Slides Slide Master.
So, let’s go! Launch your Google Slides and start by creating a blank document. This blank sheet will turn into an outstanding interactive online presentation soon, don’t doubt!
Go to the View menu tab and select Master in drop down menu to access the Slide Master. Then click the thumbnail named Master.
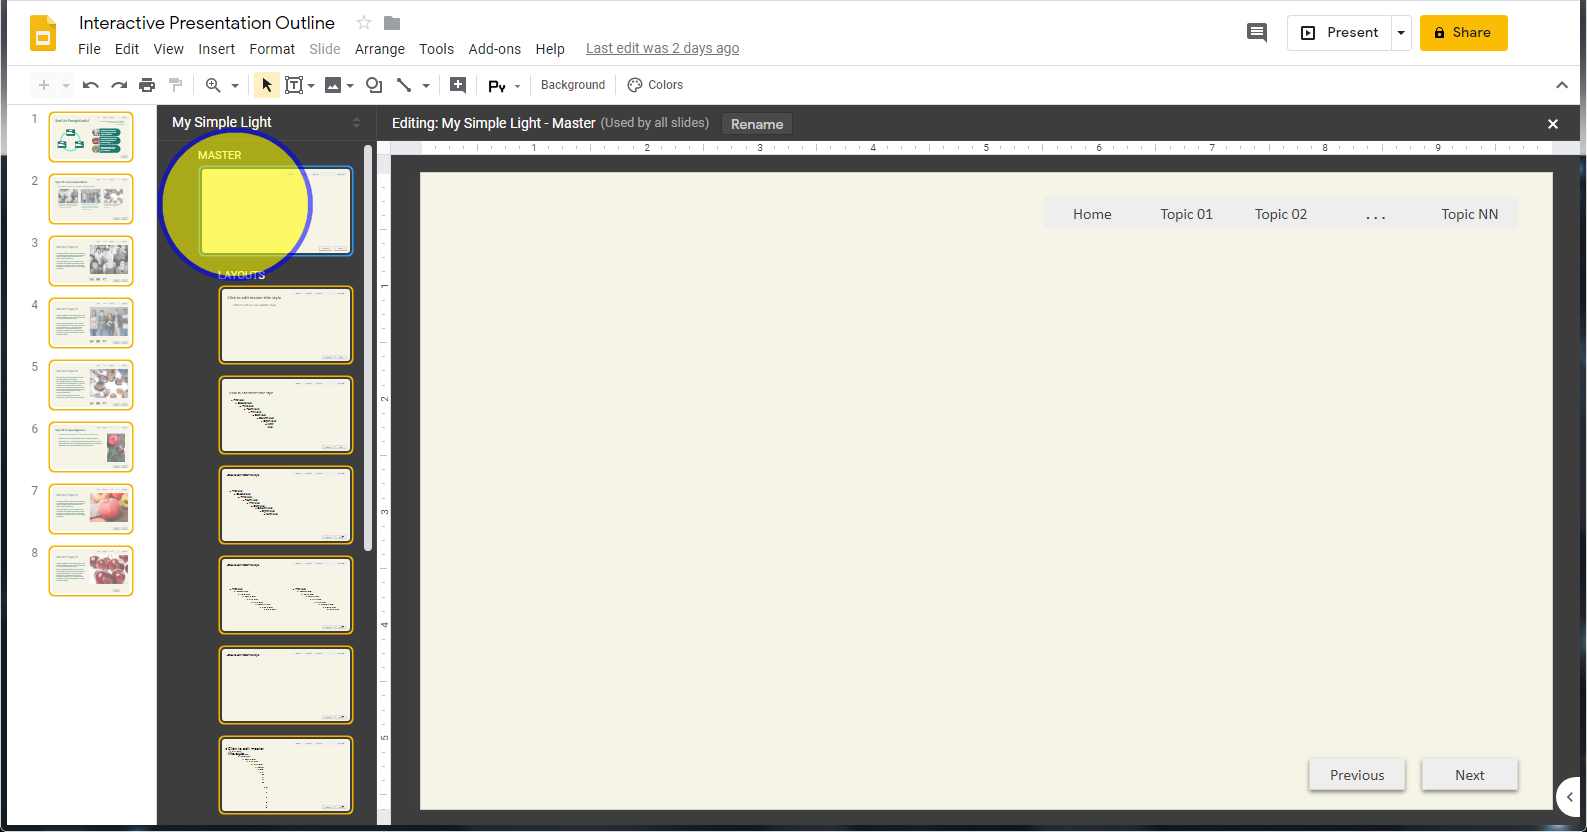
Whatever you place here will appear on every slide of your interactive presentation, no matter which layout it uses. This is exactly what we need, isn’t it?
Now is the time to choose a color scheme for your presentation. Subsequently, it can be easily changed if you deem necessary. We chose the Simple Light scheme and change background color to #f6f4e7.
How to Create Interactive Presentation Tab Bar in Google Slides

To create a tab bar, you need to thoroughly design the first tab.
- Locate the Shape button on the toolbar and select a Rectangle shape.
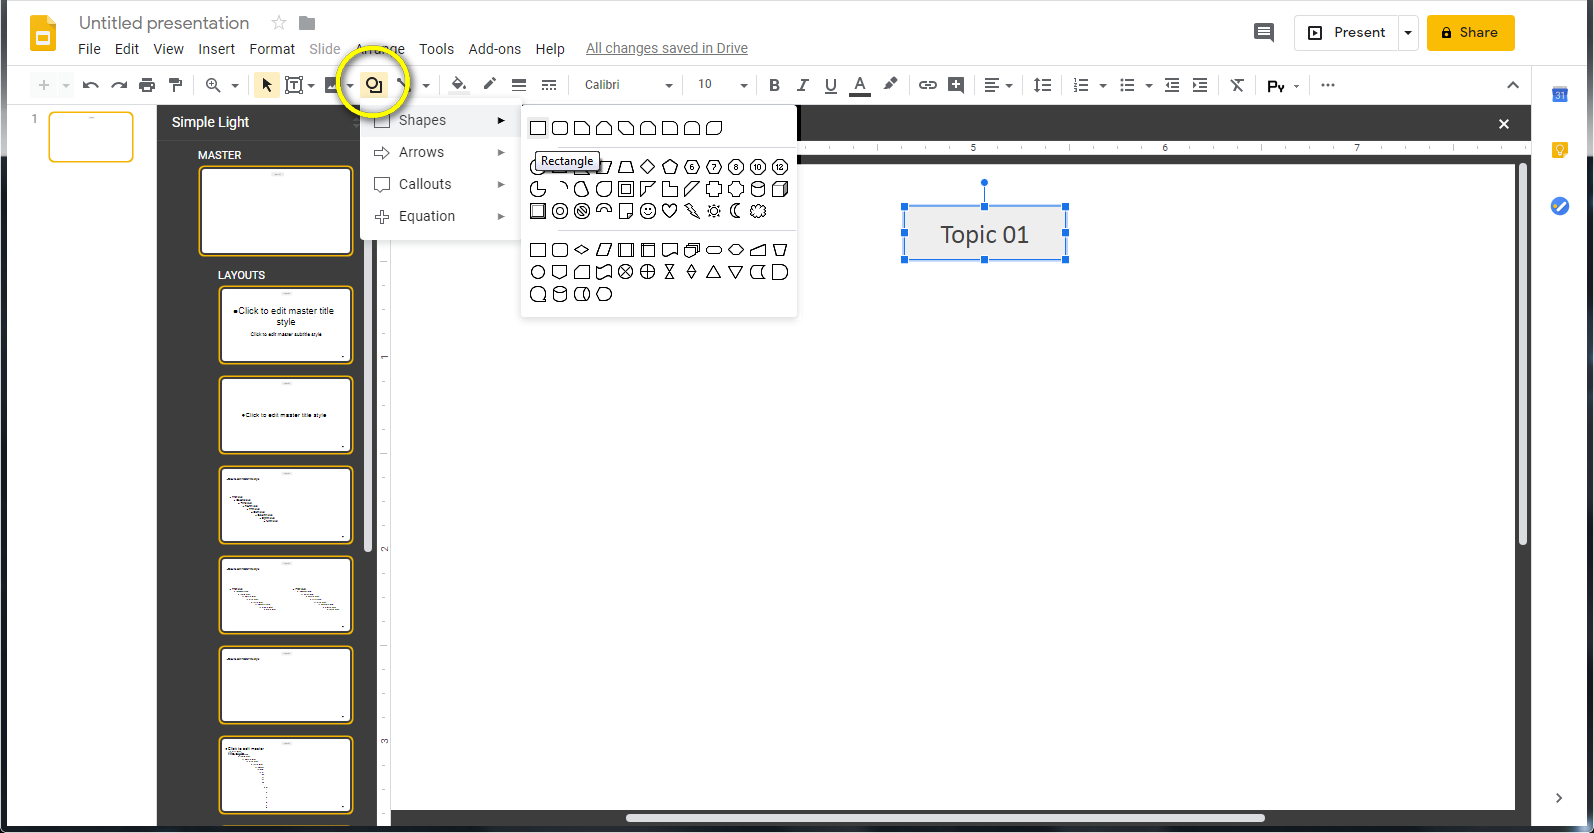
- Draw the tab.
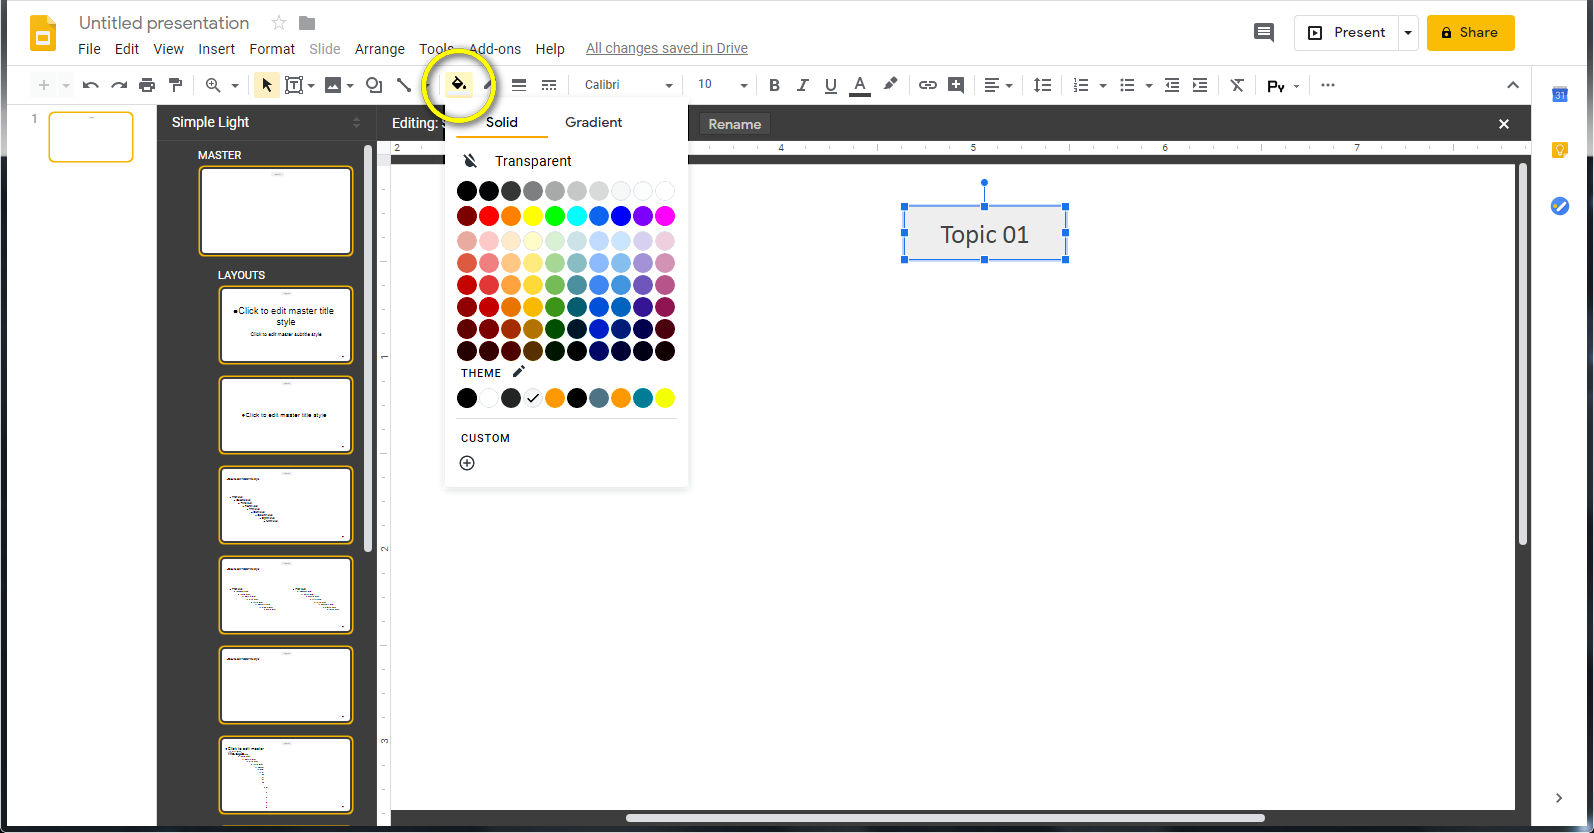
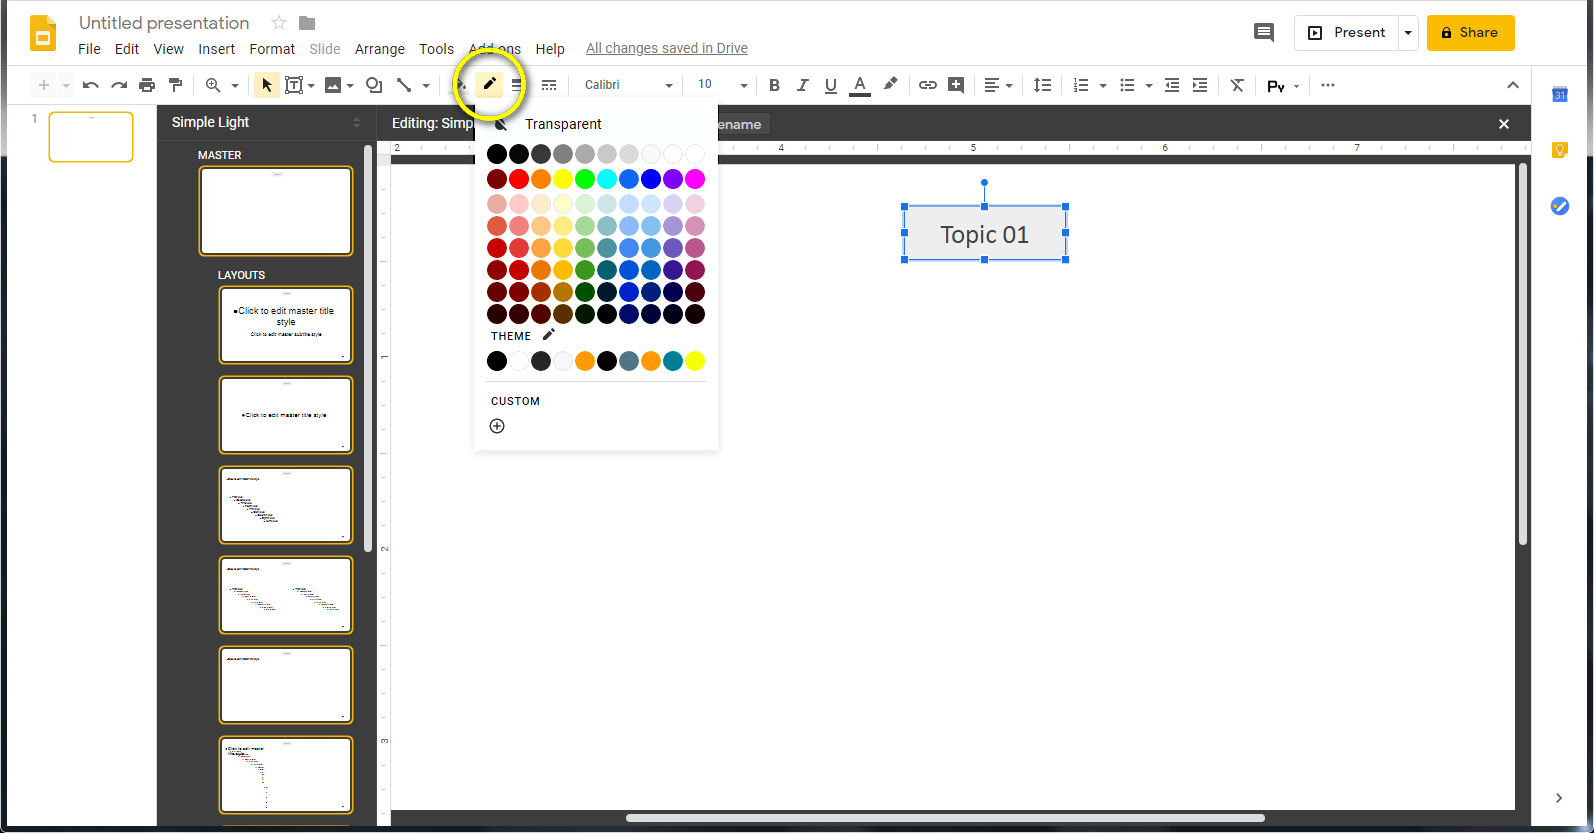
- Locate the Fill color button and make your tab a not contrasting color from the background to avoid viewer distracting.
- Locate the Border color button and make your tab border transparent.
- Select the tab and write any title, for example “Title 01”. You will change it later.
- Copy your tab and then paste it as many times as it is planned to be in the tab bar plus two additional ones.
- Move the two additional tabs to the bottom of the slide. We use them to make navigation buttons later.
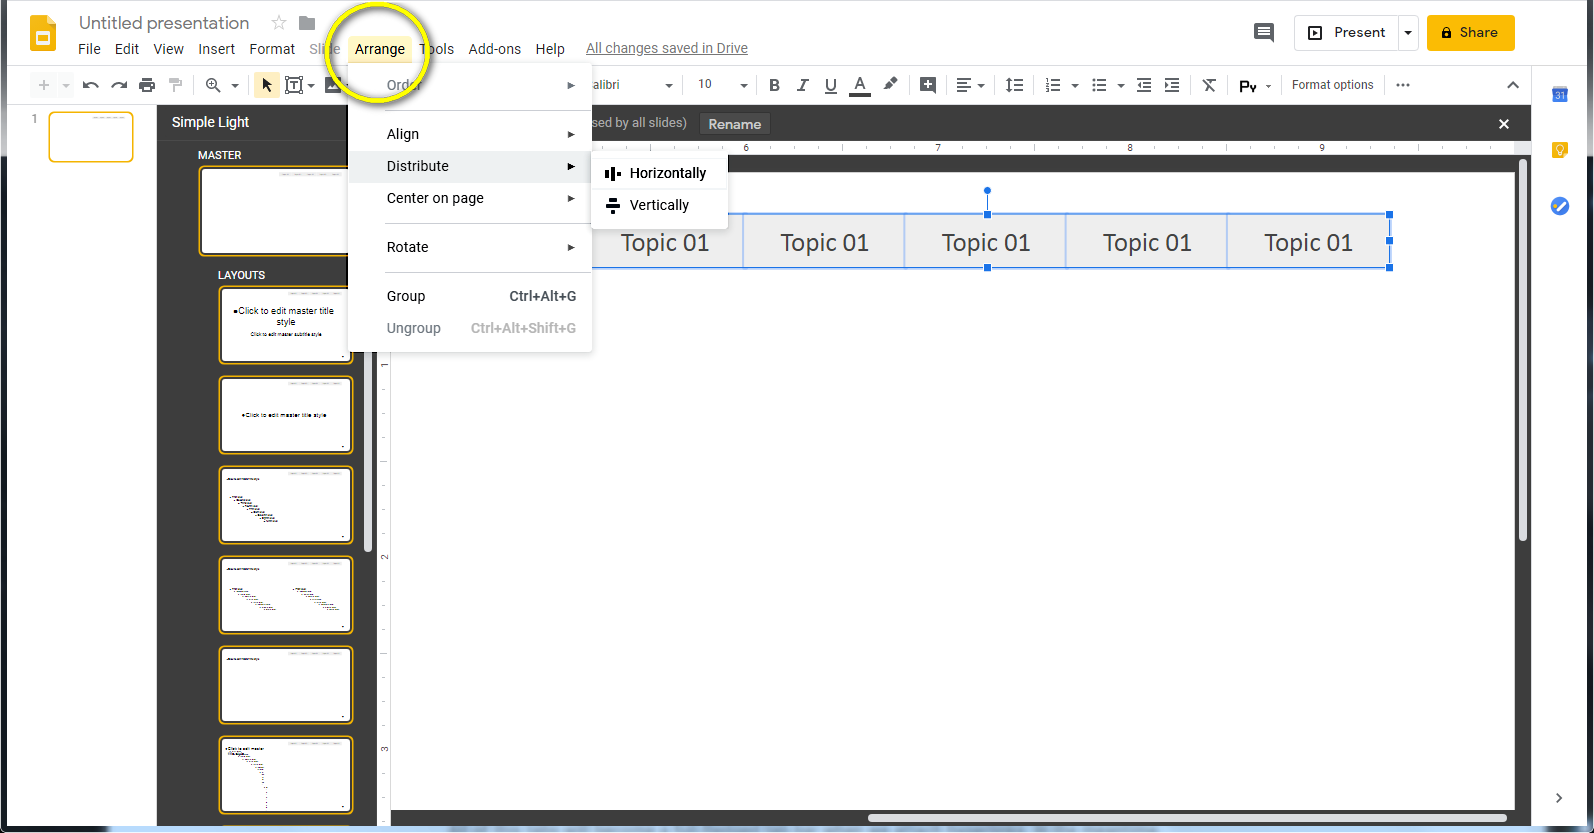
- Align the remaining tabs vertically and distribute them horizontally end-to-end with each other without gaps.
All of this tabs will become a full-fledged tab bar when we attach hyperlinks. In the meantime, just move them to the top of the slide.
How to Create an Interactive Presentation Navigation Bar
The navigation bar should contain buttons for moving from the active presentation slide to the next or previous slide as described in 2-a.

- Place the two additional shapes you just created in the bottom of the slide as shown at the picture below.
- Write “Previous” on the left shape and “Next” on the right.
- Add a shadow to make shapes look more like buttons:
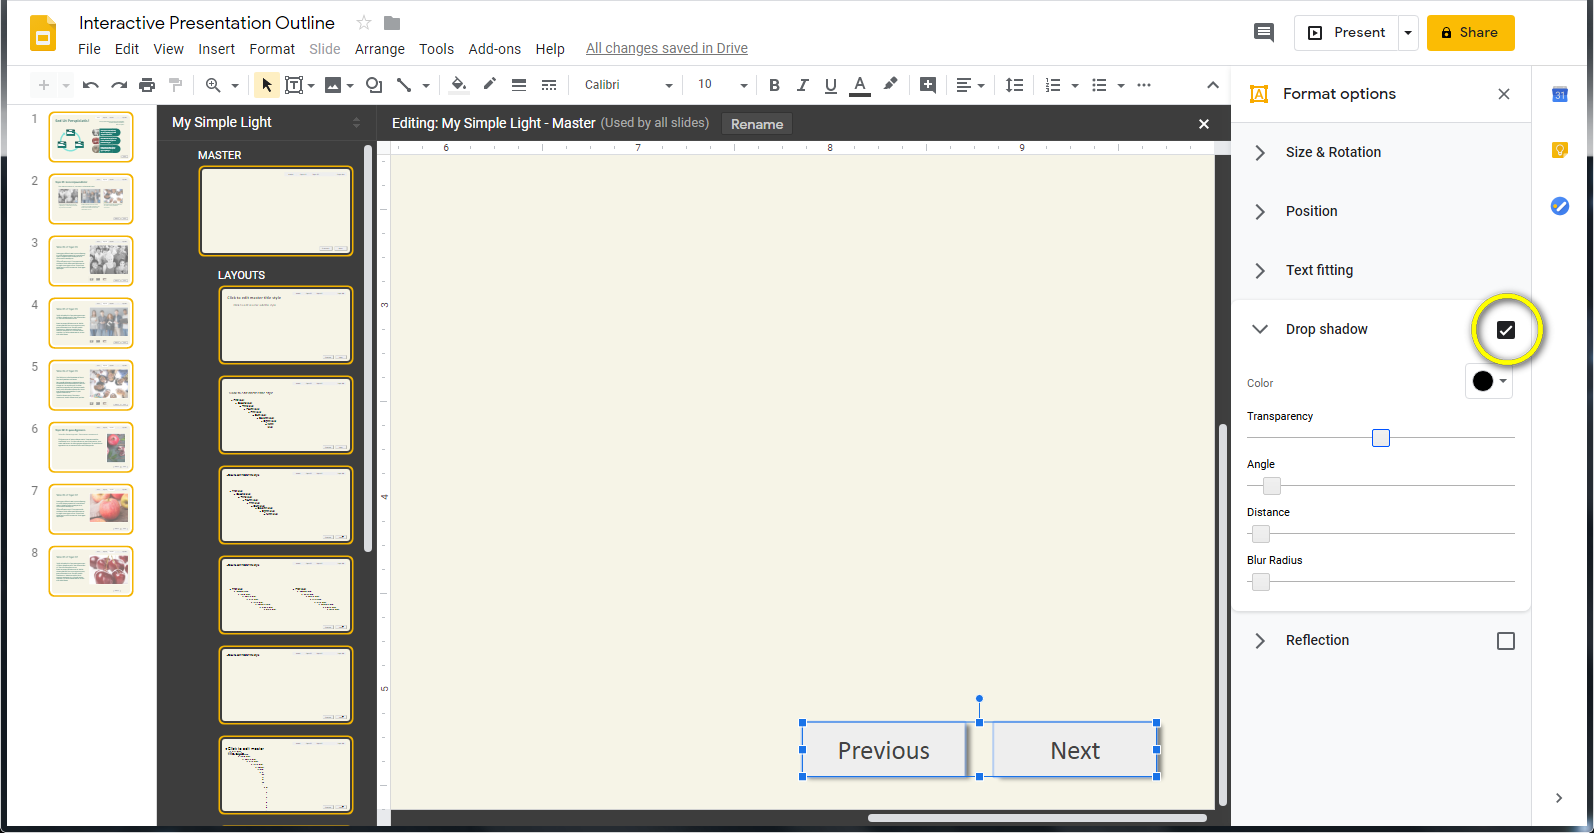
- select both shapes simultaneously and on the Format Options pane check the box for Drop shadow.
- Attach the hyperlinks:
- select the Previous button;
being sure to click the shape, not the text inside it. You want the hyperlink to work if you click anywhere on the tab and you probably don’t want the text to be underlined and change to the hyperlink theme color;
- press Ctrl+K or go to the Insert menu tab and select Link; the dialog pop-up will appear;
- type in the Link box of pop-up #slide=previous;
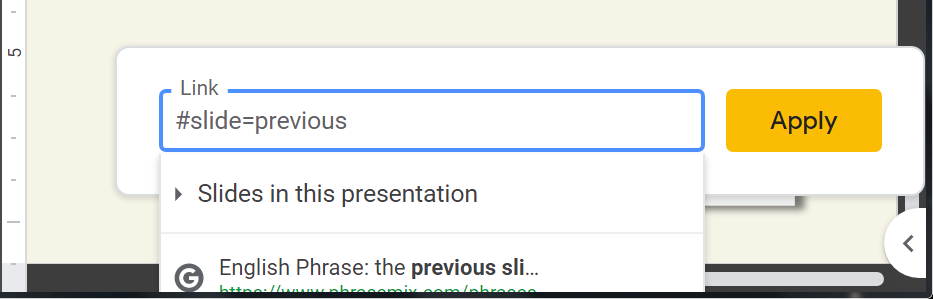
- click the Apply button
- and repeat the steps above for the Next button; type in the Link box of pop-up #slide=next.
- select the Previous button;
As a result the navigation bar will look like two buttons shifted to the right edge of the slide and there will be an empty space to the left of them in which we’ll place the pagination bar of the active topic later.
How to Highlight the Active Topic of an Interactive Presentation
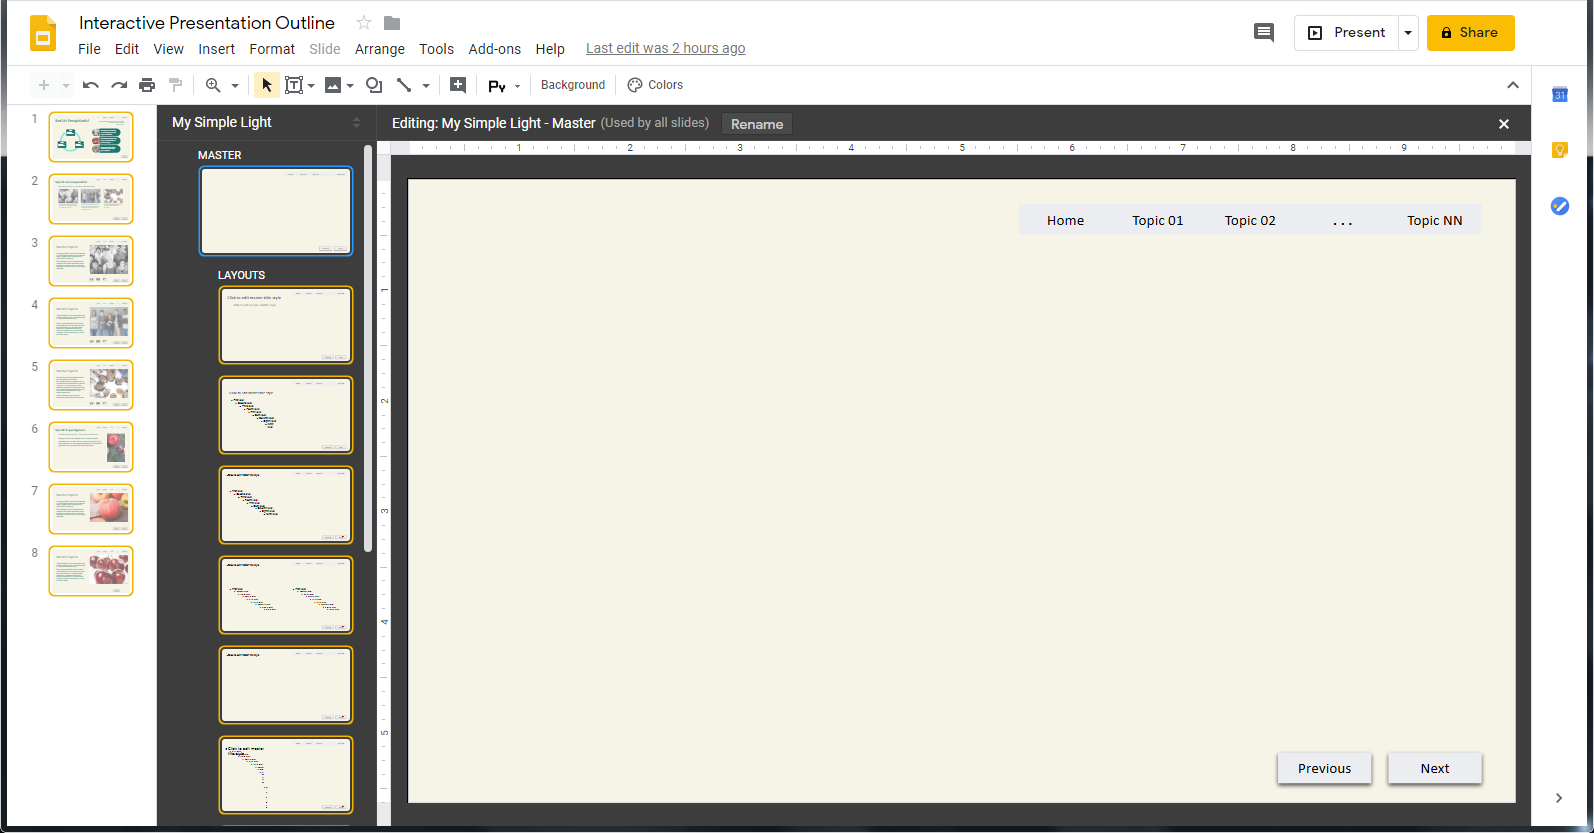
Go to the View menu tab and select the Master again to return to the normal view and create all your slides.
People like to know where they are in the presentation, so it’s a good idea to highlight the active topic to help them to relate it with the presentation wholeness. You just need to change the background color and add a border around the tab. Here is a step-by-step guide on how to do this:

- Go to Slide Master and select the current topic tab;
being sure to click the shape, not the text inside it. You want the hyperlink to work if you click anywhere on the tab and you probably don’t want the text to be underlined and change to the hyperlink theme color;
- Link the topic tab to the first slide of the current topic:
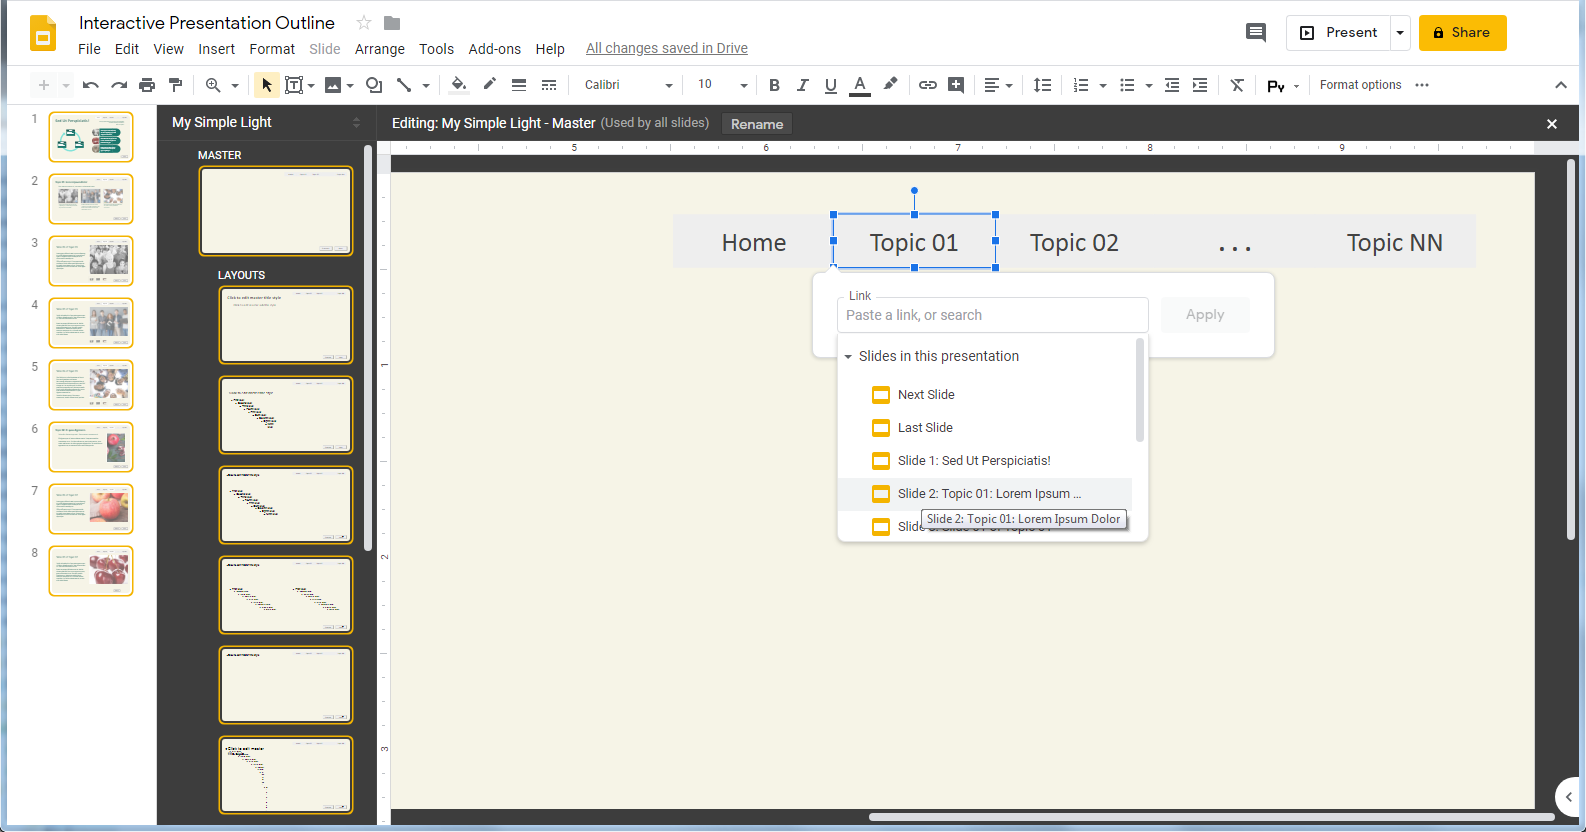
- press Ctrl+K or go to the Insert menu tab and select Link; the dialog pop-up will appear;
- in the Slides in this presentation list select the first slide of the current topic
- and press Apply button.
- Copy the current topic tab.
- Go to the View menu tab and select the Master again to return to the normal view.
- Paste the tab you copied above the current tab.
- Change the fill color and line of the current tab to the highlighted ones as you need.
- Copy the tab you made highlighted and paste it into each slide of the current topic.
How to Create an Interactive Presentation Pagination Bar in Google Slides
The pagination bar is a useful interactive presentation interface element for themes consisting a lot of slides. Use it! It will help viewers more understand where they are relative to the start or finish of the topic.
The pagination bar should contain buttons for moving from the active slide of current topic to the next or previous slide as described in 2-b. Below we will give step-by-step instructions on how to make a pagination bar with image thumbnails. We assume you have prepared thumbnail images of the same size in advance.
How to Create the Pagination Bar Step-by-Step
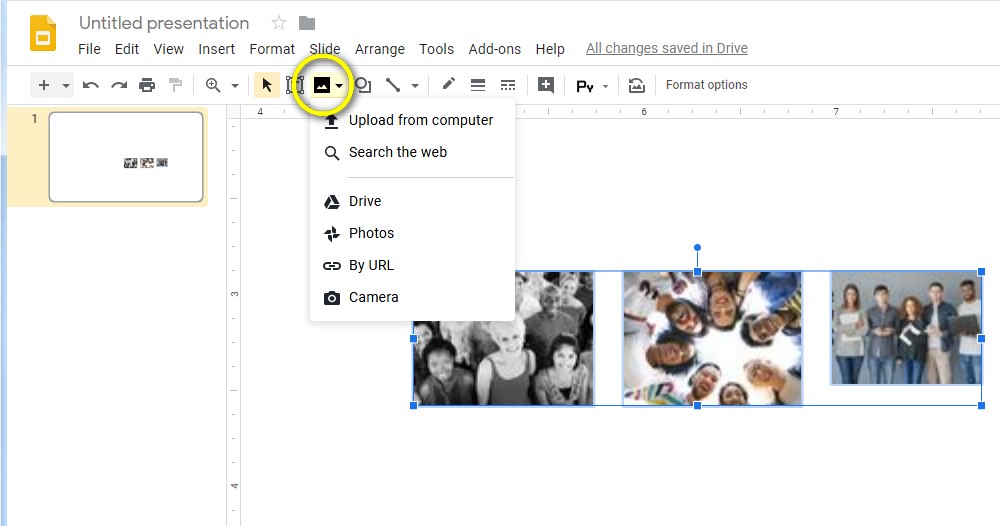
- Select the first slide of the current topic.
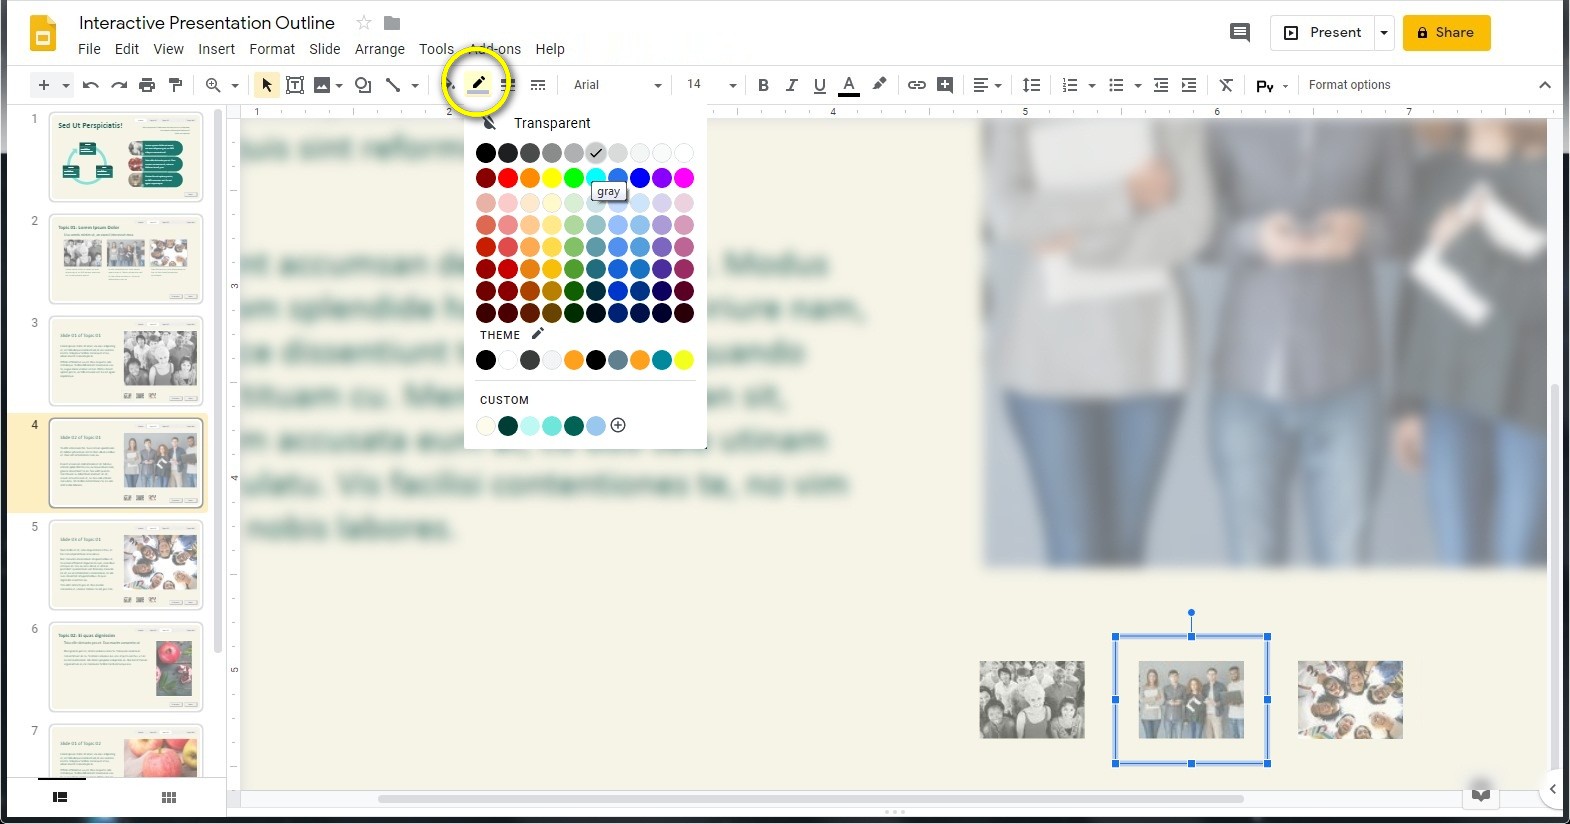
- Locate the Insert Image button on the toolbar and insert the images you want to use as the current topic thumbnails.
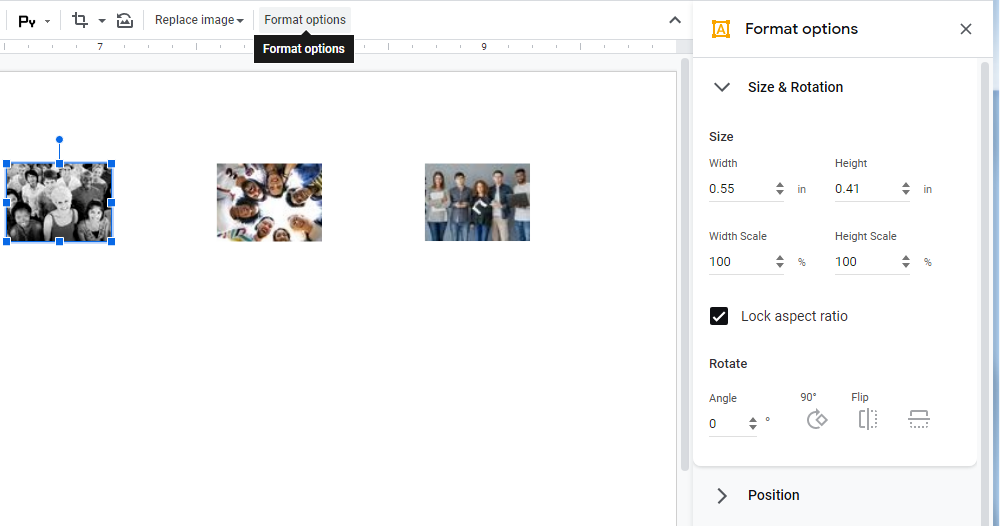
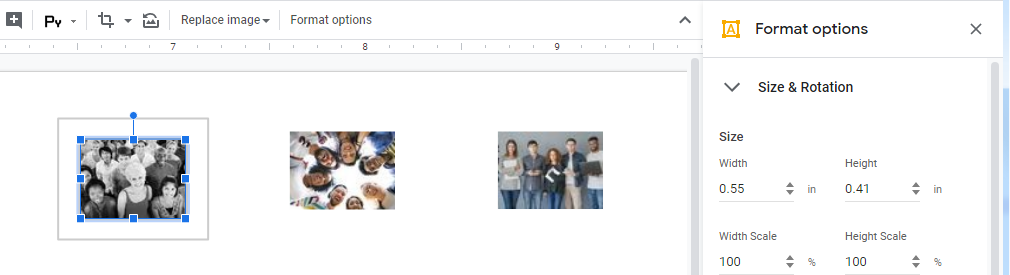
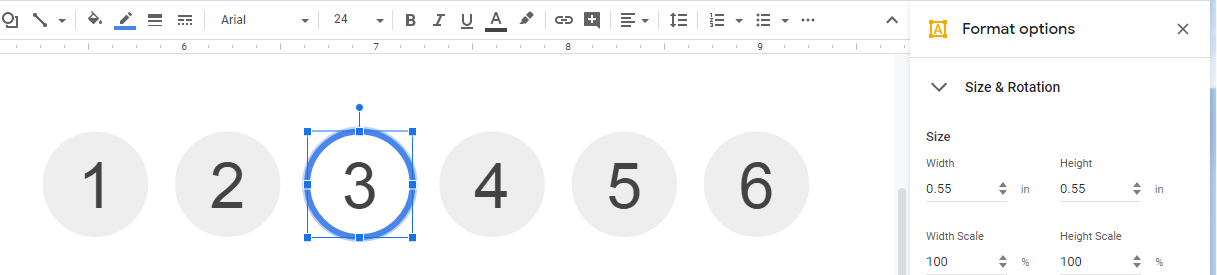
- Resize images to the same size using the Size & Rotation section of the Format Options pane;
- For each thumbnail you make, do the following:
- draw a rectangular shape with a transparent frame and a transparent background;
- resize the shape so it becomes slightly larger than the thumbnail;
- press Ctrl-K and link the desired topic slide to the transparent shape;
- select the thumbnail and place it above the transparent shape with the hyperlink;
- press Crtl-Shift-Down to place the thumbnail behind the hyperlink;
- hold the Ctrl key and click the hyperlink;
- press Ctrl-Alt-G to merge the thumbnail and the hyperlink as the button of pagination bar.
- Distribute horizontally the buttons of pagination bar you made and align them vertically as the Previous and Next buttons.
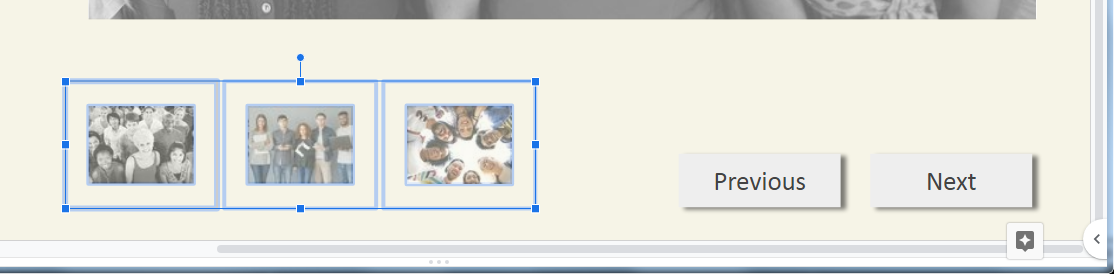
- Copy the pagination bar you made and paste it on each slide of the current topic.
That’s all! If you study the pagination bar layout with thumbnails then you can easily do something else, for example the simple slides numbering, as shown in the picture below.
How to Highlight an Active Slide on the Pagination Bar
It is simple! To highlight the active slide button on the Pagination Bar you need:
- Select the slide on which you want to highlight the active slide button.
- Select the button of the active slide on the Pagination Bar.
- Locate the Border Color button on the toolbar and change the border color from transparent to the one you need.
As a result, the frame will appear around the active button. This is enough to highlight it among the other buttons, is not it?
Do I Need an Interactive Presentation Homepage
A homepage is a useful but optional element of an interactive presentation. If you are going to talk about how you feed a puppy, then most likely you can do without a homepage.
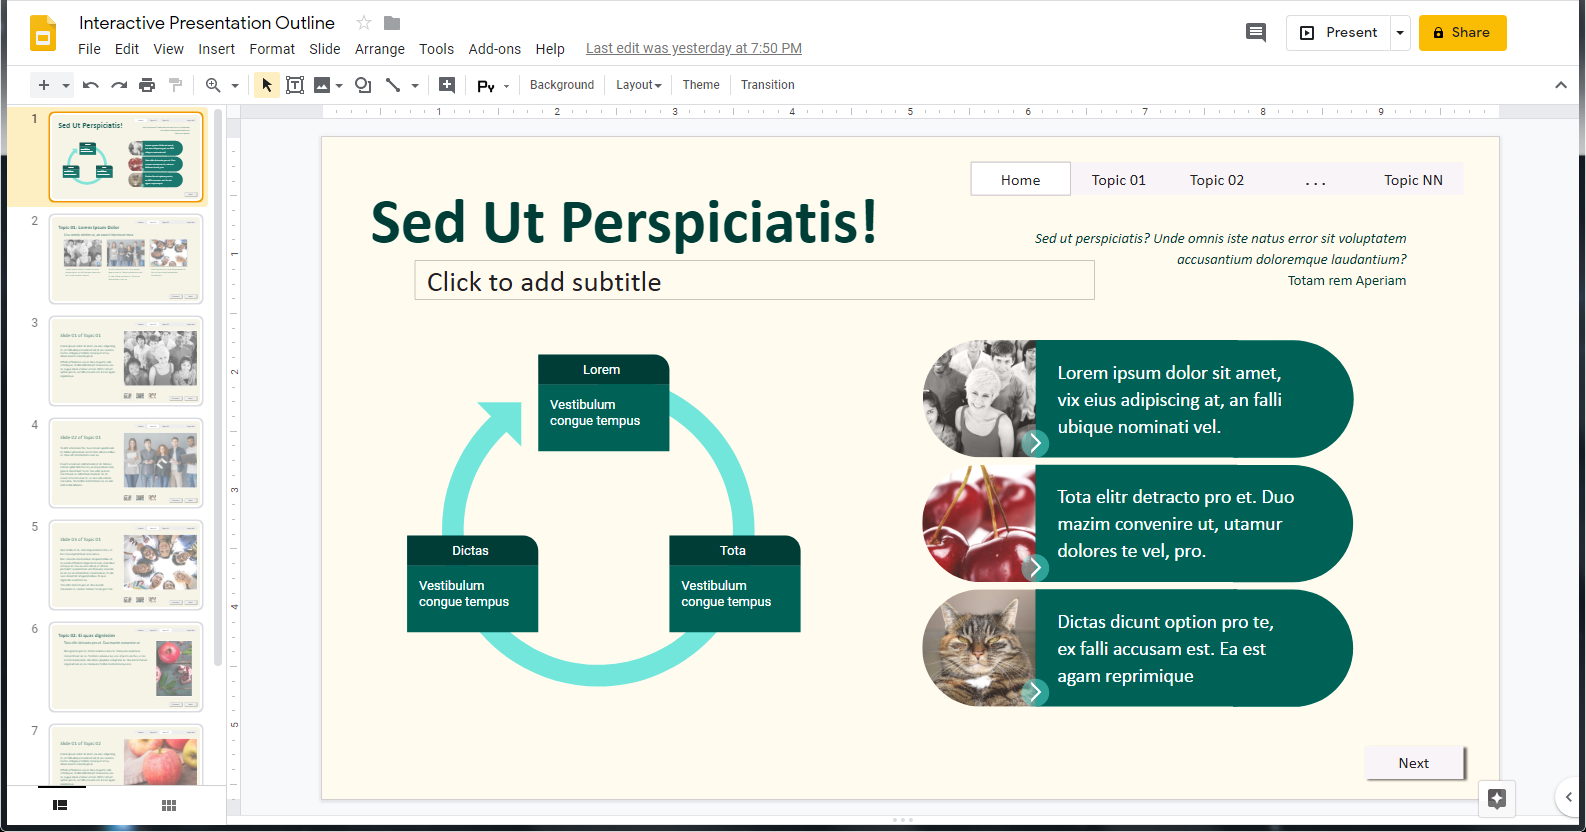
In other cases, using the homepage will allow you to show the general structure of the interactive presentation and provide short explanations for its topics. Thus, you will help the viewer to get a general idea of presentation essence and understand what path it will have to go through its contents even before the start of the presentation.
How to Create an Interactive Presentation Buttons in Google Slides
This post on how to make an interactive presentation using Google Slides will be incomplete if do not say anything about buttons.
A button is such a magical contraption which we’re click and suddenly find ourselves in some other place. (Wow, what an excellent definition, right?) This “teleportation” is caused by the hyperlink hidden inside the button.
Simple buttons, like these, look familiar, right?
We call them simple because they consist of a single shape. Of course, your buttons may not be made out of shapes alone.
Below we gave an example of a more complex button, consisting of an image, a text field and several figures arranged in a certain order (from bottom to top):
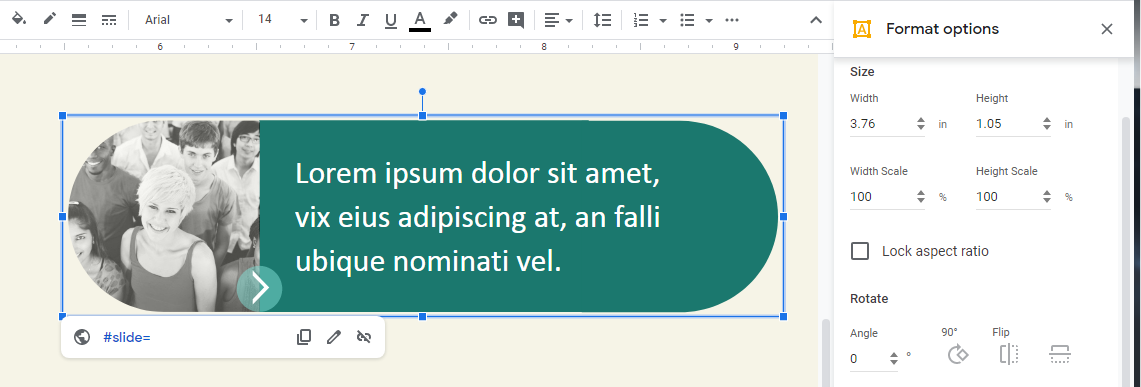
- The image masked using a Delay shape is on the right and on the left is a Delay shape with a background.
- The text box with text.
- The rounded arrow shape to help show that the button is clickable.
- The transparent shape with attached hyperlink.
Not a rocket science, isn’t it?