
This tutorial will show you how to use PowerPoint’s Slide Master to create your own custom design templates.
- Introduction to the Slide Master;
- Accessing the Slide Master;
- Making Global Changes;
- Making Changes to Layouts;
- Saving Your Theme
- Using Your Layouts
Introduction to the Slide Master
PowerPoint 2016 comes with some great design templates which you can access by clicking on the Design tab. But sometimes these templates aren’t exactly what we need. Maybe we want to brand our layout with a logo and a more relevant look and feel.
We could simply customize each slide we create, but it would be more efficient to create slide templates that can be easily reused. This isn’t harder or more time consuming, and will save us a lot of time and effort.
The Slide Master is the part of PowerPoint that lets us create these design templates. We can create a master look and feel for our slides, and then customize individual layout templates for specific purposes such as a title page, a side-by-side comparison, or a large image display.
Accessing the Slide Master
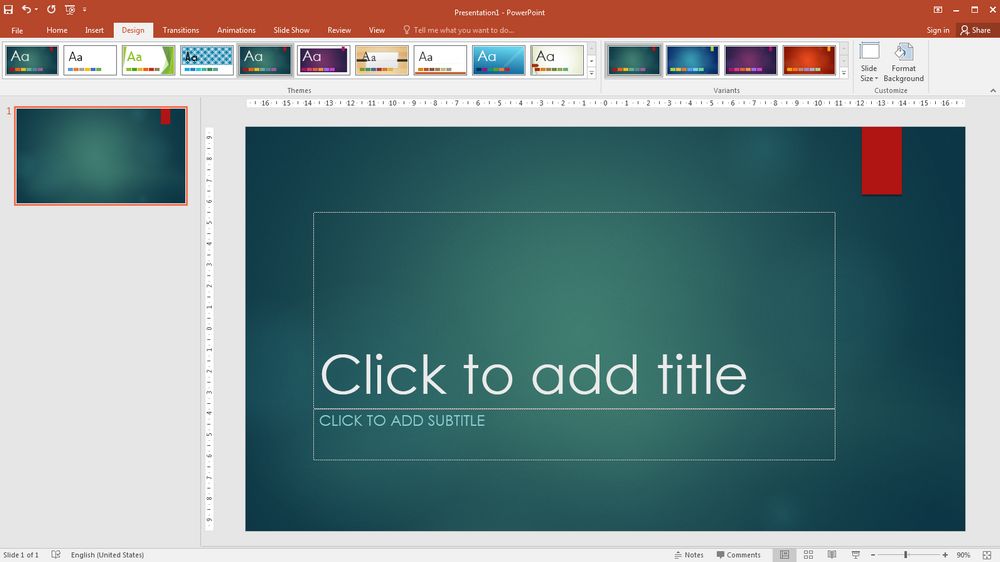
Let’s start by creating a new document. Then, to access the Slide Master, click the View tab and click the Slide Master icon in Master View group.
You will see a set of slides with very minimal formatting. This is PowerPoint’s simple Office Theme. The easiest way to create your layout is by starting with these slides and making design changes to customize them.
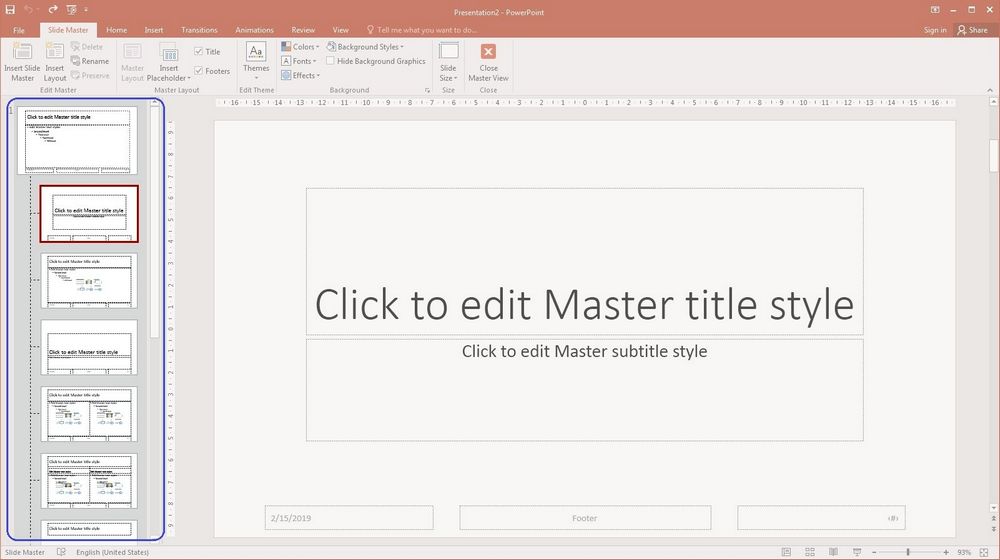
Master Slide – this is the first, larger slide. Make changes here if you want them to apply to every type of slide (title, image, text). See Making Global Changes below for instructions.
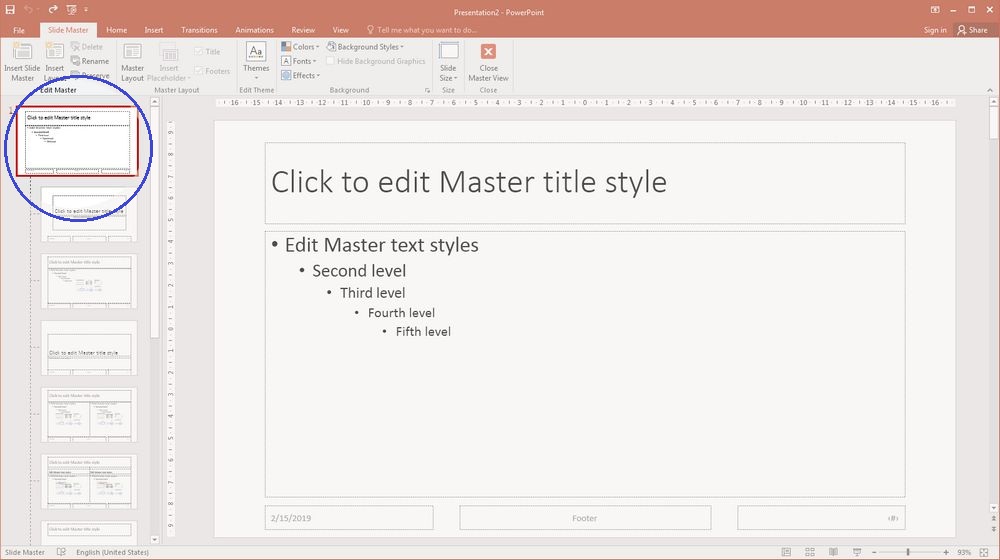
Layout Slides – these are the smaller slides below the master slide. Each has its own layout and purpose, like displaying a title or a large image. Changes make to a layout slide will not affect other slides. See Making Changes to Layouts below for instructions.
Making Global Changes
Start by clicking on the Master Slide. Here, you will make any changes you want to apply to every slide in your presentation.
Changing the background style
In the Slide Master tab, click on Background Styles button.
You can choose from:
- one of the provided styles
- or click Format Background... to activate Format Background pane.
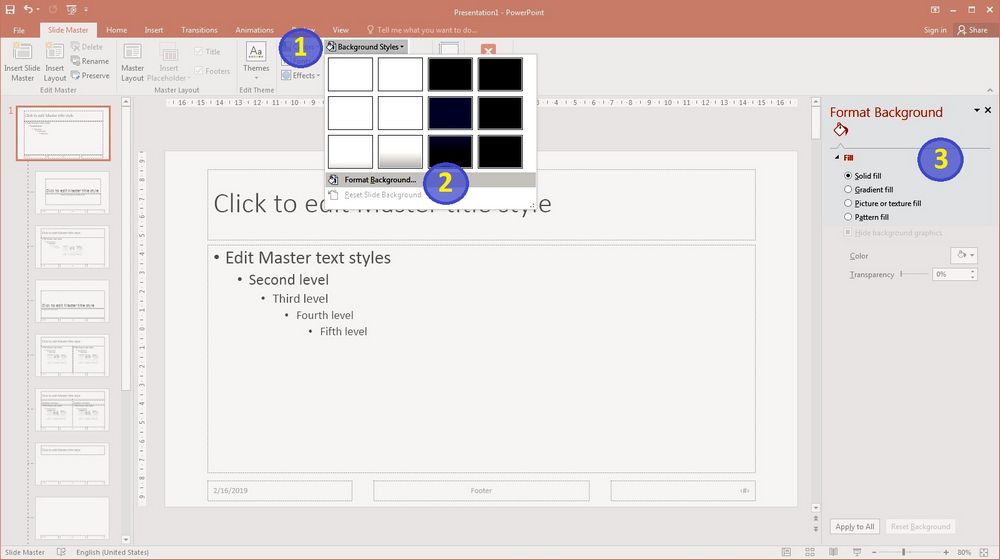
In the Format Background pane, you can choose to display a:
- Solid fill,
- Gradient fill,
- Picture or texture fill,
- or Pattern fill
by radio button. Each option of this button has its own set of interface elements: buttons, options, etc. They will help you create your own or customize your chosen pre-made background style.
For example, if you want to use an image from your computer as a background, then select the radio button option Picture or texture fill and use the File… button.
Changing the Fonts
You can change fonts in two ways.
One is to use a font theme provided by PowerPoint. To do this, click on the Slide Master tab and in the Background area, click the Fonts drop down. Here you can choose from
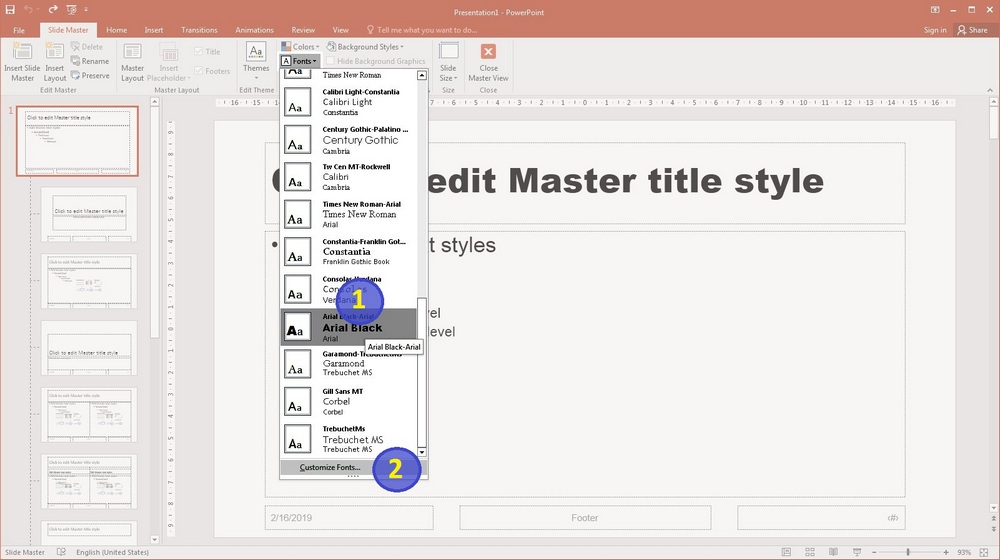
Here you can choose from font sets recommended by PowerPoint, or customize your own
- Font sets recommended by PowerPoint,
- Or customize your own.
Another way to customize fonts is to select the master slide, choose either the title or the main text box, and use the text tools in the Home tab to format text. Changes made to the title box and the main text box will affect every slide in your design template.
Note that you can select varied styling for each level of the outline.
Adding an Image
Even if you customized the background, you might also want to add an image – like a logo – that appears on every slide. To do this, click on the Insert tab and click Pictures button in Images area to select a picture from your computer.
Choosing a Color Theme
You can choose a color theme under the Colors drop down menu.
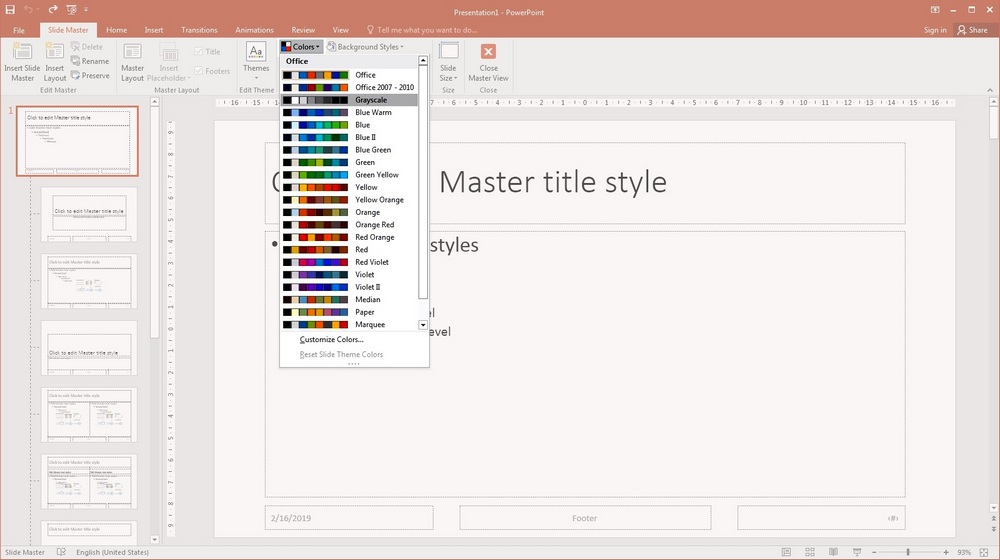
Even if you don’t yet have any colored elements on your master slides, this theme will ensure that Smart Art, Charts, and Shapes added to the final presentation better match your layout.
Making Changes to Layouts
We’ve already made global changes by editing the Master Slide – now, let’s make changes to each layout slide below.
Layout slides give us the opportunity to customize slide design and layout based on the type of information and content we will be presenting.
For example, title slides might have larger, centered text. You might want custom slide layouts, like a large image with a small caption.
Again, it’s easiest to start by using the layouts already provided. To understand their purpose, hold your mouse over a layout slide to read its description. You can erase any layout slides you don’t need. (Just click to select, then hit the delete key).
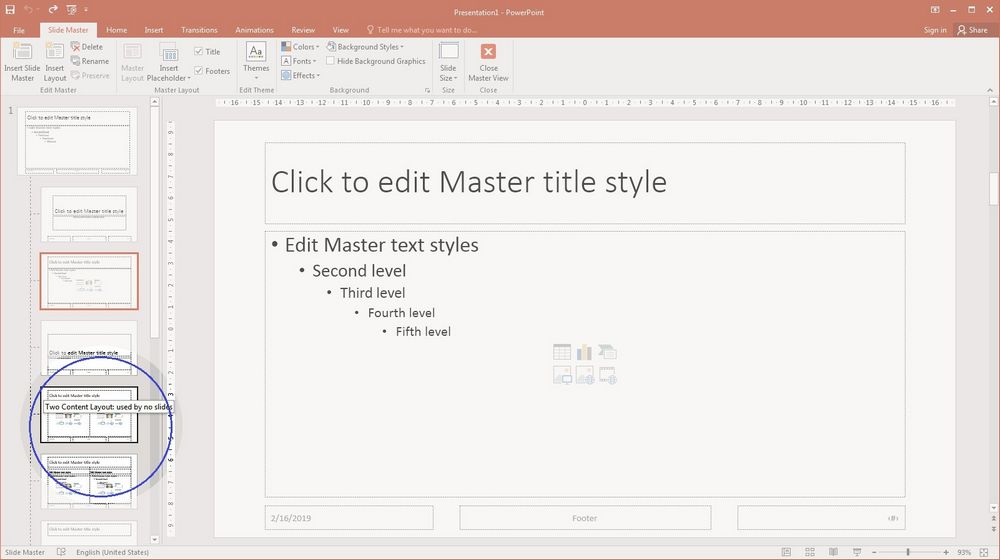
Some of the most useful layouts are Title Slide, Title and Content, Section Header, Two Content, Blank, Picture with Caption etc.
Simply customize each slide by editing it as you would a normal PowerPoint slide. Changes made on each layout slide will apply only to that layout. You can override the Master Slide styles – for example, if you would like the Title Slide layout to stand out with a red background, click on that layout and change the background color. The rest of the layouts will not change; they will still retain the Master Slide’s background.
Layout Slide Text
The text in each box may be customized, but it is still simply a prompt for the person creating slides to type content, it will not actually be displayed on every slide.
If you would like text to be displayed on every slide, click on the Insert Tab and click Text Box button in Text area to insert text that will NOT be editable in the final presentation.
Adding Placeholders
Placeholders are areas in a slide that can hold text or objects such as images, SmartArt, or charts. To add a placeholder, use the Insert Placeholder drop down on the Slide Master tab.
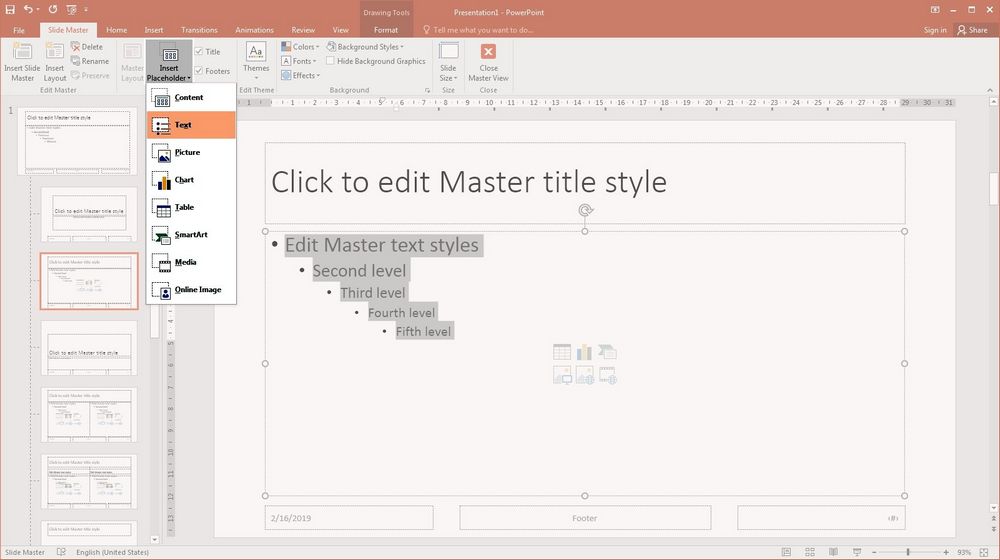
You can choose Content to allow any type of content, or specify what type of content can be added.
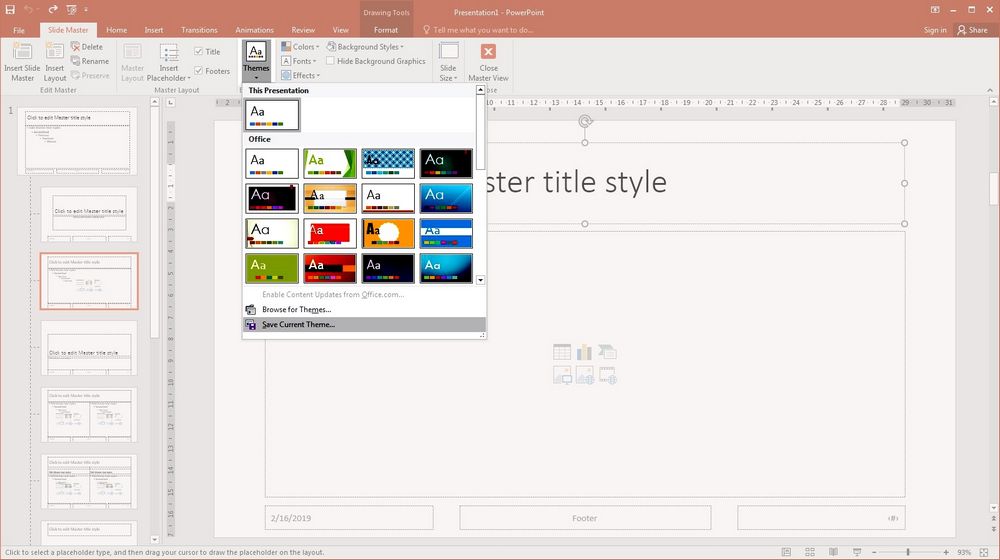
Saving Your Theme
To save your theme, go to the Slide Master tab, click Themes, and choose the Save Current Theme option. It will be saved in the Document Themes folder on your computer. From now on, it will show up as an available theme when creating or editing presentations.
You can email the .thmx file you have saved to others if you would like them to be able to create presentations using your theme.
Using Your Layouts
Now, let’s use our new theme to create a presentation.
Exiting the Slide Master
To exit the Slide Master click Close Master View button on the Slide Master tab.
Adding Slides to Your Presentation
Your presentation should already be set to use your new custom theme. If not, you can select it in the Design tab.
To add a slide, locate the New Slide button on Slides area on the Home tab.
Notice that the New Slide button has two parts:
- the top, an icon of a slide,
- and the bottom, the New Slide text with an arrow.
Clicking on the top (icon) is a shortcut to adding a slide with the title and text layout. Clicking on the bottom (New Slide text with the arrow) lets you choose exactly which layout you would like to use.
For best results use PowerPoint Templates from PoweredTemplate.com