To help you make the most of this design tool that’s sitting unused on your computer, here are five little PowerPoint tricks, complete with animated GIF instructions.
- Trick 1: Create a Custom Background Size
- Trick 2: Edit Your Slide Template
- Trick 3: Save Slide Components as an Image
- Trick 4: Align All of Your Objects
- Trick 5: Turn Square Images Into Custom Shapes
Try them out for yourself!
Trick 1: Create a Custom Background Size
If you’ve ever tried to create an infographic or virtually anything else that won’t fit in the default slide size in PowerPoint, you’ve probably felt this pain before.
So go ahead, free yourself from the binds of PowerPoint slides, and embrace your custom image with this tip.
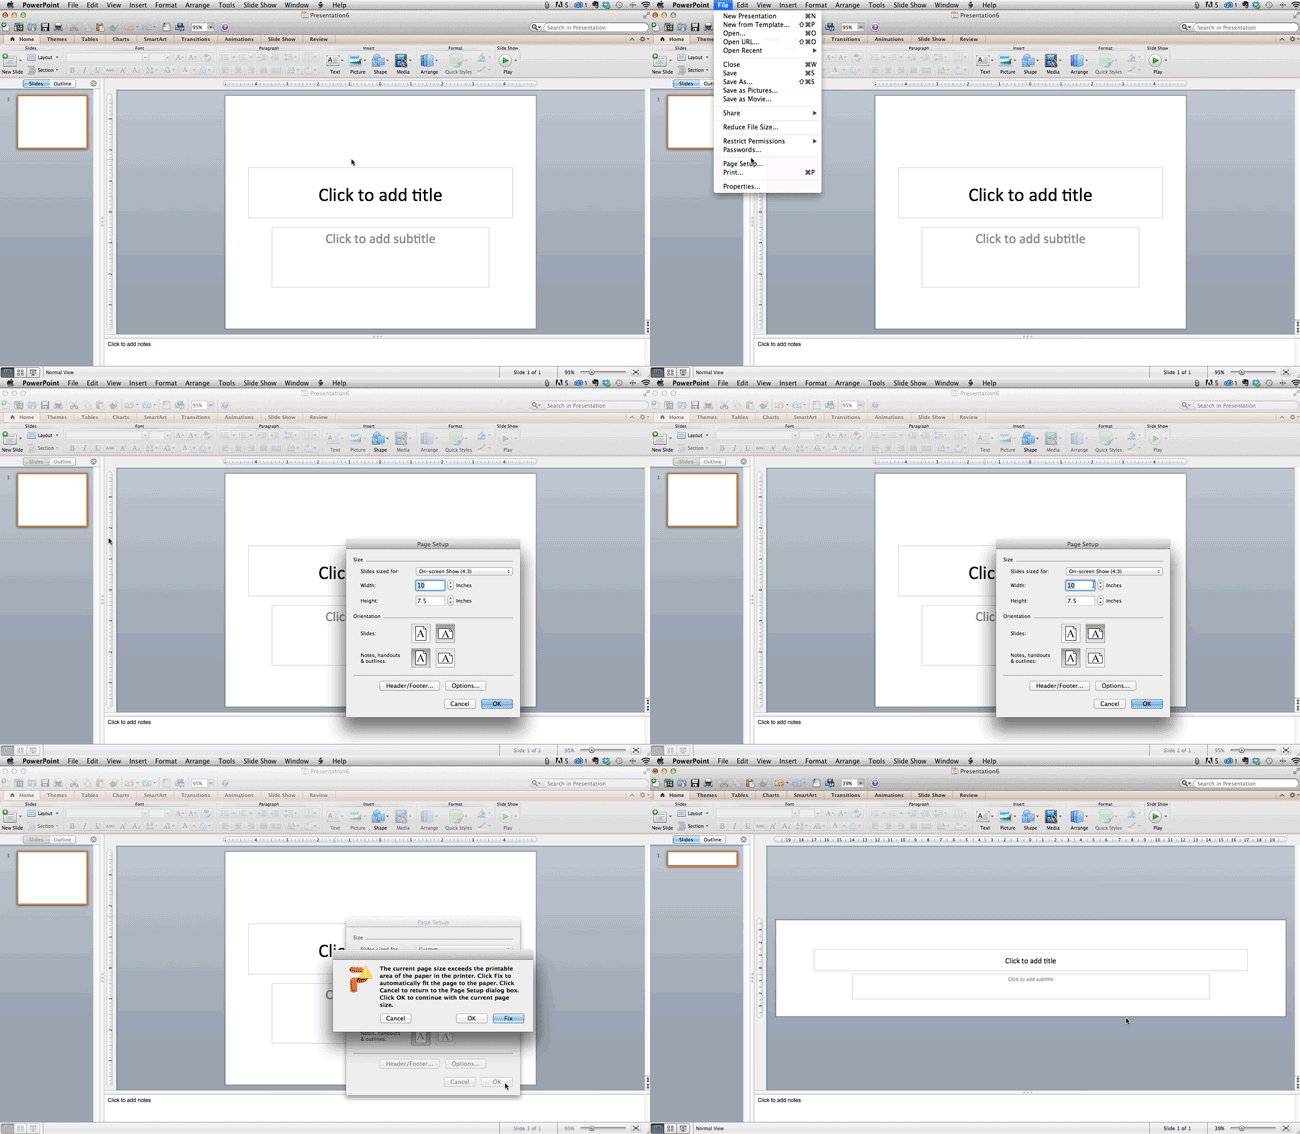
- In the top-left corner, choose ‘File’;
- Select ‘Page Setup’;
- Type the height and width of the background you’d like, and click ‘OK’;
- A dialogue box will appear. Click ‘OK’ again;
- Your background is resized!
Tip: Resize your slides before you add any objects to them or the dimensions of your objects will become skewed.
Trick 2: Edit Your Slide Template
If you’ve ever tried to get your marketing department to stay on-brand when developing SlideShares or giving presentations, you know how annoying it is to try to get everyone on the same page.
Now, all you need to do is edit your Master Slides, and then let the branding commence!
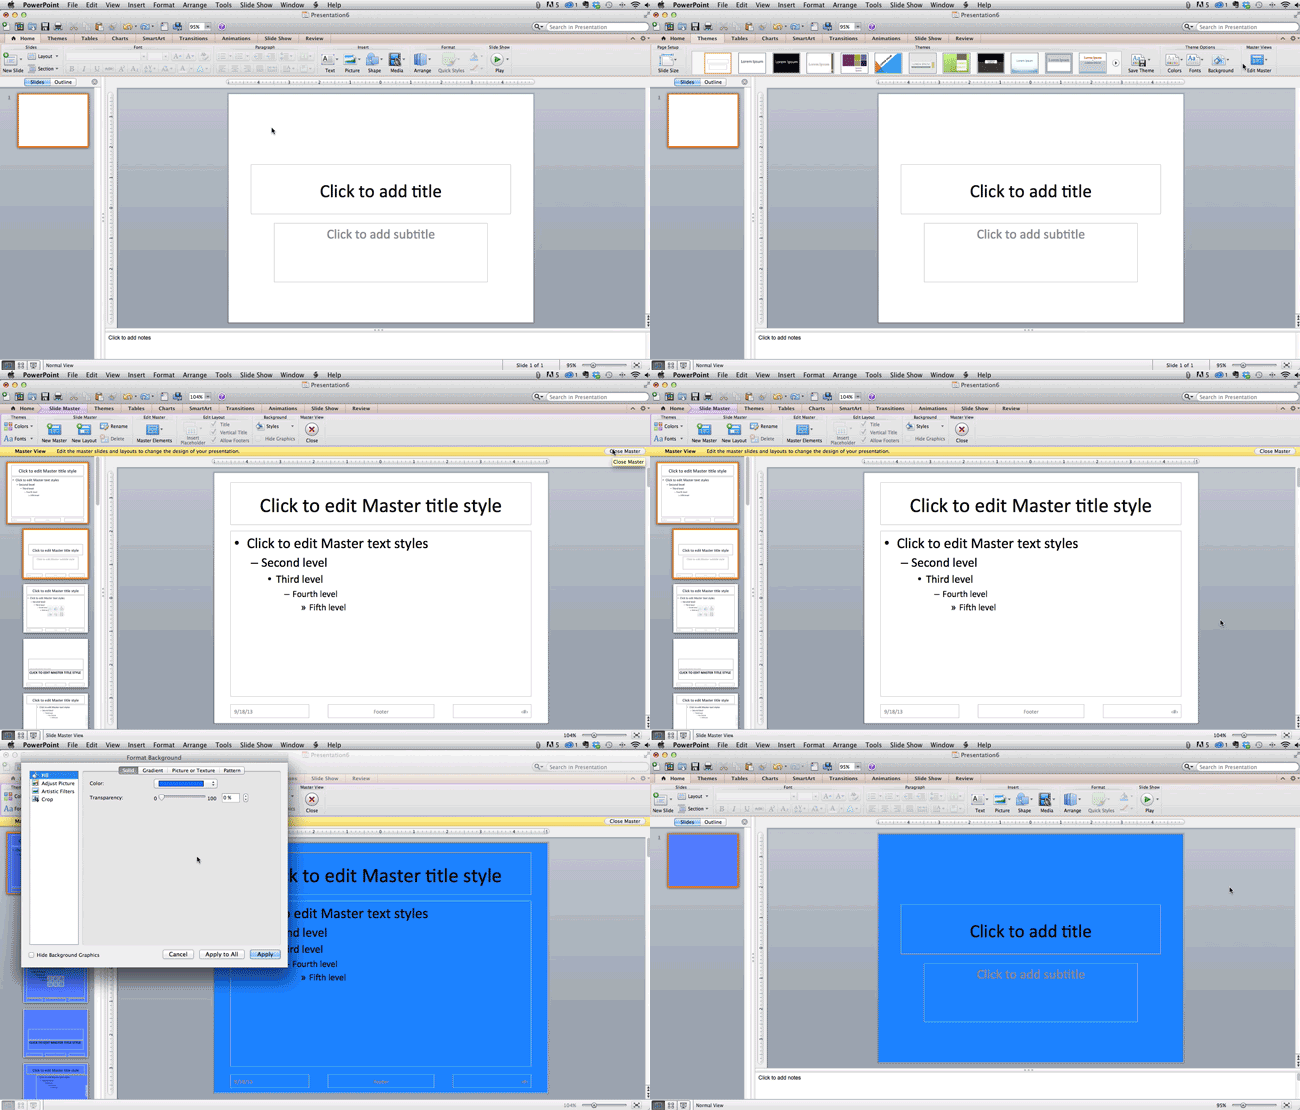
- Select ‘Themes’ in the top navigation;
- In the far right, click ‘Edit Master’, then ‘Slide Master’;
- Make any changes you like, then click ‘Close Master’
All current and future slides in that presentation will use that template.
Trick 3: Save Slide Components as an Image
The problem with saving each slide as an image is that you often get unwanted background colors in them, meaning it becomes difficult to make versatle images in PowerPoint.
Here’s how you avoid that pesky background problem and just save objects as your image.

- Select all objects by holding down ‘Shift’ while clicking on them;
- Right click, then select ‘Grouping’ and then ‘Group’;
- Right click on the whole group, then select ‘Save as Picture’.
Boom, no white space in the back!
Trick 4: Align All of Your Objects
You can manually try to line up your images, but we all know how that works out.
You’re trying to make sure all of your objects hang out in the middle of your slide, but when you drag them there, it still doesn’t look quite right.
Get rid of your guessing game and let PowerPoint work its magic with this trick.
How to align objects to each other
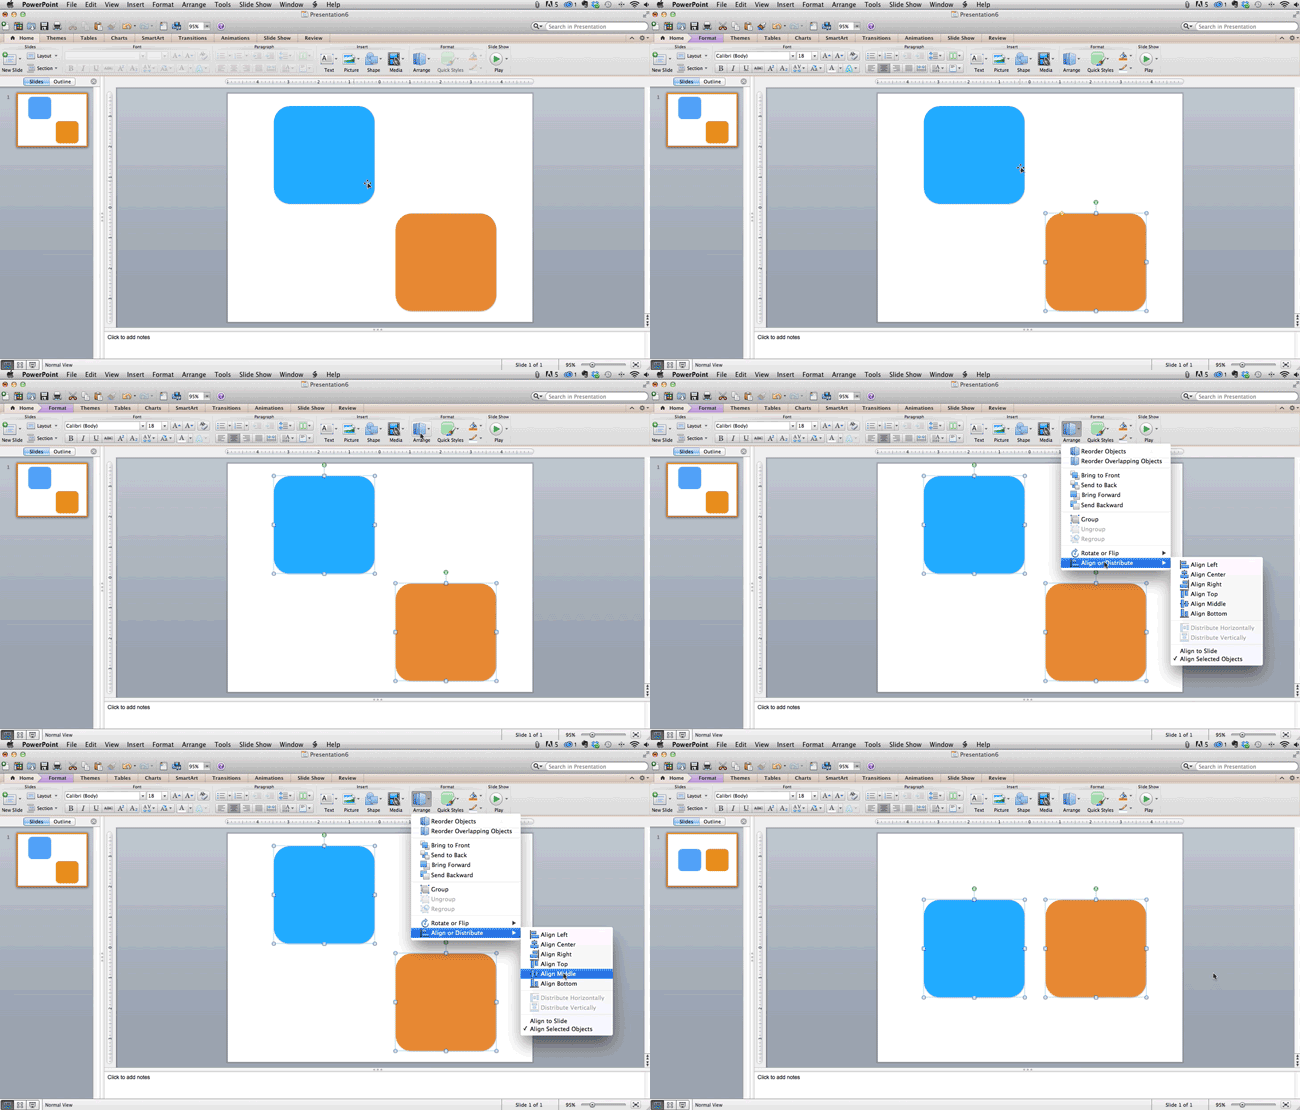
- Select all objects by holding down ‘Shift’ while clicking on them;
- Select ‘Arrange’ in the top options bar, then choose ‘Align or Distribute’;
- Choose the type of alignment you’d like.
How to align objects to the slide
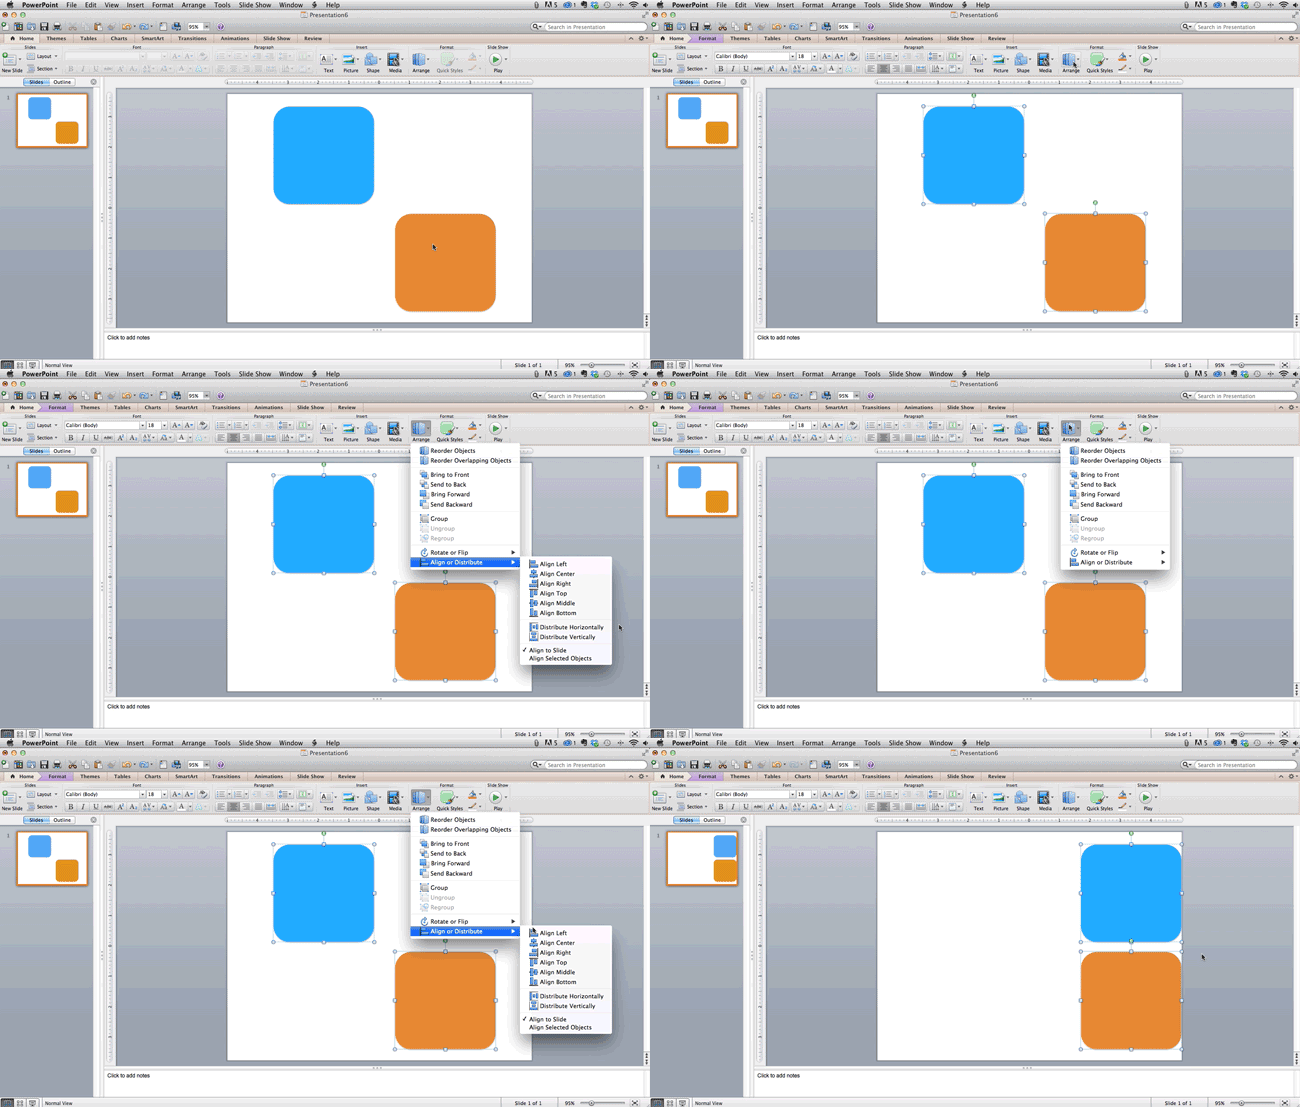
- Select all objects by holding down ‘Shift’ while clicking on them;
- Select ‘Arrange’ in the top options bar, then choose ‘Align or Distribute’;
- Select ‘Align to Slide’;
- Select ‘Arrange’ in the top options bar again, then choose ‘Align or Distribute’;
- Choose the type of alignment you’d like.
Trick 5: Turn Square Images Into Custom Shapes
We all know how important it is to use photos in your marketing, but do you know how to customize them?
Make them fit into your favorite shapes in PowerPoint – all with just one click.
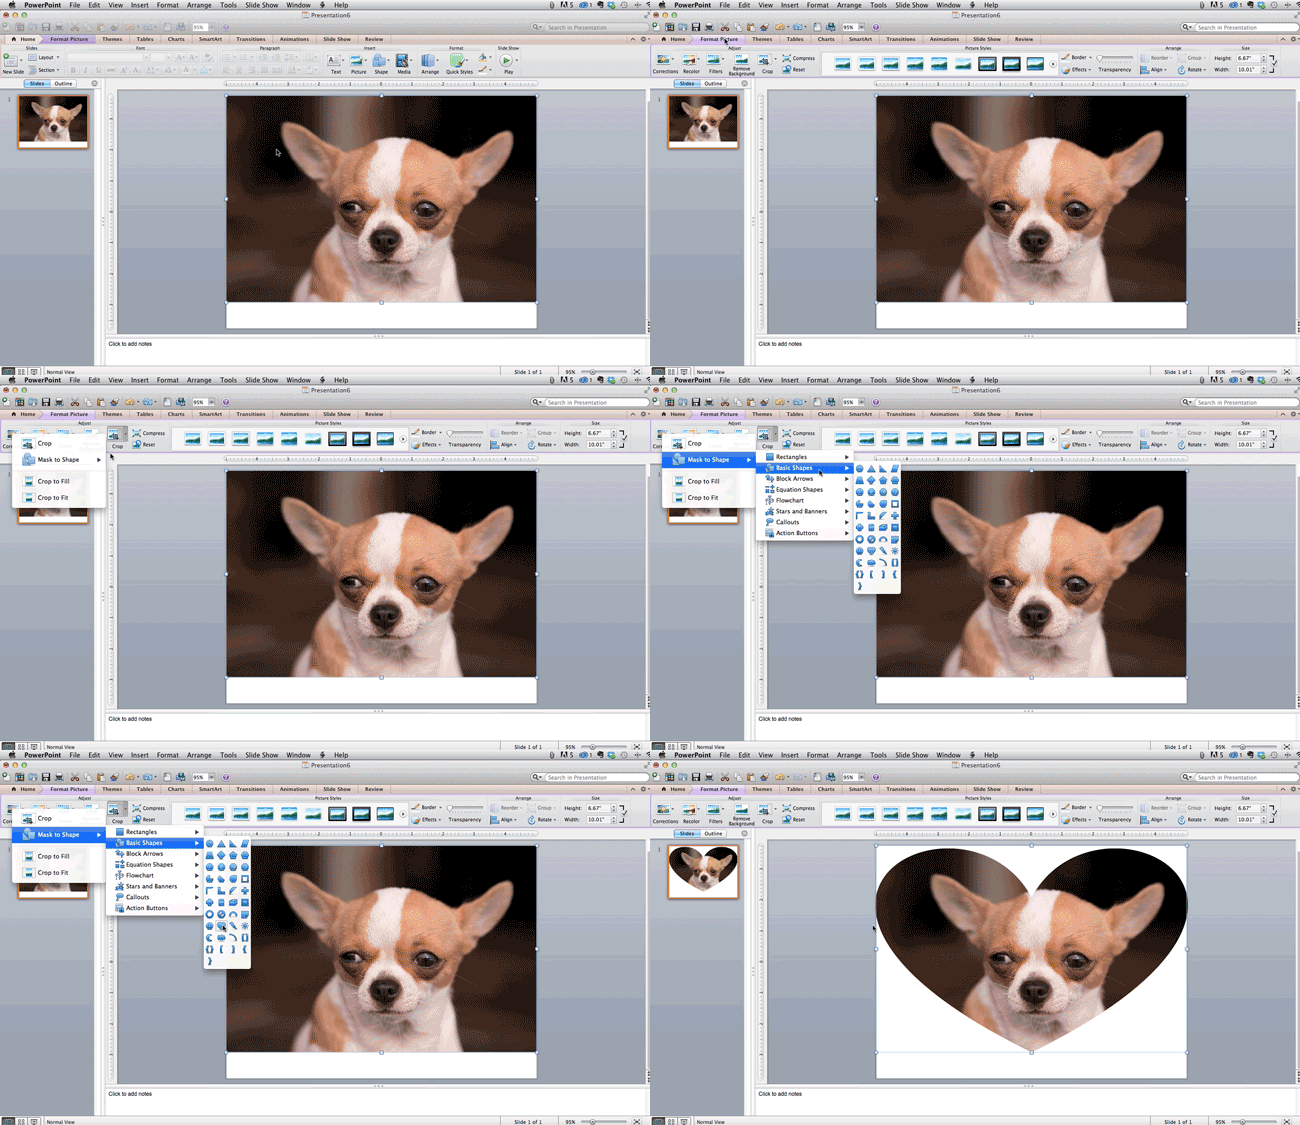
- Click on the image and select ‘Format’ in the options bar;
- Choose ‘Crop,’ then ‘Mask to Shape,’ and then choose your desired shape.
Ta-da! Custom-shaped photos!
